

Welcome to the most comprehensive Swarm weapons tier list you’ll find anywhere! As someone who has spent countless hours testing every weapon combination across all nine champions, I’m excited to share my insights on which weapons will carry you through the toughest waves and which ones might leave you struggling.
Swarm has taken the League of Legends community by storm, becoming one of the most successful PvE modes in the game’s history. According to Riot’s official dev blog, Swarm outperformed previous PvE modes like Odyssey and Star Guardian in both initial engagement and long-term player retention. With its unique blend of bullet heaven mechanics and League’s champion system, understanding weapon tiers isn’t just helpful—it’s essential for survival.
In this guide, I’ll break down every weapon from S-tier game-changers to D-tier disappointments, explain their scaling mechanics, evolution requirements, and provide champion-specific recommendations that will help you dominate the Primordian invasion.
| Tier | Weapons | Key Characteristics |
|---|---|---|
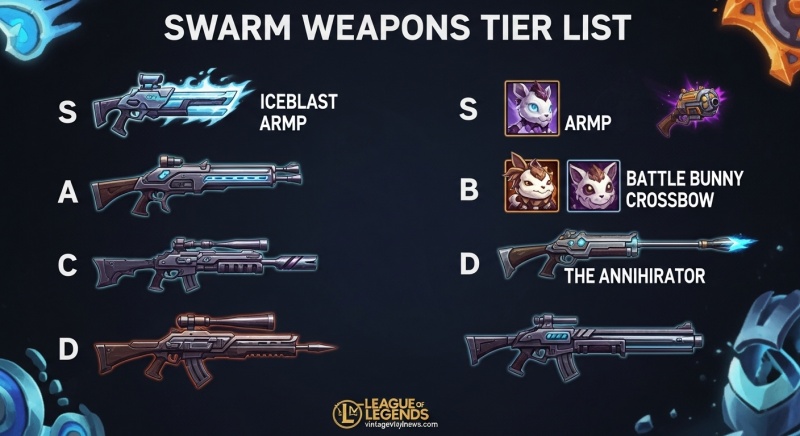
| S-Tier | Iceblast Armor, Battle Bunny Crossbow, The Annihilator, Bunny Mega-Blast, Statikk Sword, Radiant Field, Gatling Bunny-Guns, UwU Blaster | Game-changing power, excellent scaling, viable on multiple champions |
| A-Tier | Vortex Glove, YuumiBot, Echoing Batblades, Anti-Shark Sea Mine, Cyclonic Slicers, T.I.B.B.E.R.S, Searing Shortbow, Blade-o-rang, Lioness’s Lament | Strong performance with proper investment, situationally excellent |
| B-Tier | Ani-Mines, Paw Print Poisoner, Final City Transit | Viable with specific builds or champions, requires more investment |
| C-Tier | (Limited options) | Niche use cases, generally outperformed |
| D-Tier | YuumiBot (some builds), Lioness’s Lament (some builds), Final City Transit | Generally underwhelming, avoid unless specific requirements |
Why it’s S-Tier: Iceblast Armor isn’t just a weapon—it’s your survival package. This defensive powerhouse freezes attacking enemies while providing substantial damage reduction, making it the go-to choice for tank builds and beginners alike.
Scaling Stats: Damage, Ability Haste, Area Size, Duration, Armor Evolution Requirement: Armor Best Champions: Leona, Briar, Riven
What makes Iceblast Armor exceptional is its dual functionality. Not only does it keep you alive during overwhelming waves, but the freezing effect creates breathing room for your other weapons to work their magic. When evolved, it becomes an absolute cornerstone of any serious Swarm run.
Why it’s S-Tier: If you want to delete normal mobs and put serious hurt on elites, Battle Bunny Crossbow delivers in spades. Its random cone pattern with built-in critical chance creates devastating burst potential that scales incredibly well into late game.
Scaling Stats: Damage, Ability Haste, Critical Chance, Projectile Count Evolution Requirement: Critical Chance Best Champions: Yasuo, Riven, Jinx
The beauty of Battle Bunny Crossbow lies in its chaos. While other weapons offer predictable patterns, this crossbow’s random firing direction means you’re constantly covering different angles, making it nearly impossible for enemies to approach safely. When evolved, its crit potential becomes absolutely terrifying.
Why it’s S-Tier: The name says it all. The Annihilator lives up to its reputation by instantly wiping normal mobs and dealing massive damage to elites. What pushes it into S-tier territory is its evolved form, which boosts both gold and EXP drops—making it the ultimate farming tool.
Scaling Stats: Damage, Ability Haste, Area Size Evolution Requirement: EXP Best Champions: Aurora, Jinx, Xayah
The Annihilator represents the perfect balance between offensive power and economic advantage. While other weapons might deal more raw damage, none contribute to your overall progression quite like this explosive powerhouse. It’s particularly devastating in the hands of champions who can stack EXP quickly.
Why it’s S-Tier: Orbital strikes never felt so good. Bunny Mega-Blast delivers consistent, high-impact damage that excels at both crowd control and single-target damage. Its evolved form significantly boosts the final blast damage, making it a boss-melting machine.
Scaling Stats: Damage, Ability Haste, Area Size, Critical Chance Evolution Requirement: Critical Chance Best Champions: Riven, Yasuo, Leona
What sets Bunny Mega-Blast apart is its reliability. Unlike weapons that require specific positioning or timing, this orbital cannon consistently delivers damage where it’s needed most. Its area coverage makes it particularly effective against the dense enemy waves that characterize higher difficulties.
Why it’s S-Tier: Chain lightning is always a good time, and Statikk Sword takes this concept to the next level. Its ability to jump between targets based on health pools makes it incredibly efficient at clearing entire waves while simultaneously focusing down high-priority threats.
Scaling Stats: Damage, Ability Haste, Area Size, Critical Chance, Duration Evolution Requirement: Max Health Best Champions: Briar, Leona, Illaoi
Statikk Sword’s evolution transforms it from a good weapon into an absolute powerhouse. The constant electric damage creates a deadly field that melts enemy groups, making it particularly effective in the confined spaces of many Swarm maps. Its health-based scaling also makes it naturally tankier as you progress.
Why it’s A-Tier: Vortex Glove fires spiraling projectiles in an outward pattern, providing excellent area coverage. Upon evolution, it adds a second spiraling barrage, dramatically increasing both damage output and area coverage.
Scaling Stats: Damage, Critical Chance, Projectile Count Evolution Requirement: Health Regeneration Best Champions: Riven, Yasuo, Aurora
While Vortex Glove requires more positioning than S-tier options, its evolved form offers some of the best area coverage in the game. It’s particularly effective for players who prefer controlling the battlefield rather than just overwhelming it with raw damage.
Why it’s A-Tier: These bouncing blades that ricochet off walls and enemies offer incredible versatility, especially in enclosed spaces. Their evolved form significantly increases both bounce frequency and total damage.
Scaling Stats: Damage, Ability Haste, Critical Chance, Projectile Count Evolution Requirement: Projectile Count Best Champions: Yasuo, Riven, Jinx
Echoing Batblades excel where other weapons struggle—tight corridors and enclosed spaces. Their ability to bounce multiple times means they can hit enemies that would normally be safe from direct-fire weapons. This makes them particularly valuable in the later stages where positioning becomes crucial.
Why it’s A-Tier: This weapon launches bouncing bombs that cover large areas, making it excellent for zone control. Its evolved state releases them non-stop, allowing players to lock down areas and clear waves efficiently.
Scaling Stats: Damage, Ability Haste, Area Size Evolution Requirement: Damage Best Champions: Aurora, Illaoi, Leona
Anti-Shark Sea Mine shines in its ability to control space. While other weapons focus on direct damage, this mine layer creates no-go zones for enemies, making it invaluable for survival-focused builds. Its area denial capabilities become increasingly important as enemy density increases in later waves.
Why it’s B-Tier: These time-delayed explosives that explode in a ring require strategic placement and timing. When evolved into Tri-Namite, their destructive range and frequency increase, making them strong for zone control.
Scaling Stats: Damage, Ability Haste, Area Size, Projectile Count Evolution Requirement: Area Size Best Champions: Illaoi, Leona, Briar
Ani-Mines demand more skill and planning than higher-tier weapons, but in the right hands, they can be devastating. Their ring explosion pattern makes them particularly effective against enemies that attempt to surround you, turning a dangerous situation into an opportunity.
Why it’s B-Tier: This weapon trails a toxic cloud behind your character, dealing damage over time. After evolution, it grants bonus movement speed and a protective shield, improving both survivability and offensive pressure.
Scaling Stats: Damage, Area Size, Duration, Movement Speed Evolution Requirement: Movement Speed Best Champions: Riven, Yasuo, Jinx
Paw Print Poisoner offers a unique playstyle focused on movement and positioning. While it requires more active play than passive weapons, its evolved form provides a nice balance of offense and defense that can be quite effective in the right build.
Understanding how weapons evolve and scale is crucial for maximizing their effectiveness. Based on my research and countless hours of testing, here’s what you need to know:
Damage-Based Evolutions:
Movement Speed Evolutions:
Ability Haste Evolutions:
Critical Chance Evolutions:
Different champions synergize better with certain weapons based on their abilities and scaling. Here are my top recommendations:
Best Weapons: Battle Bunny Crossbow, Blade-o-rang, Bunny Mega-Blast Key Stats: Movement Speed, Critical Chance, Damage Playstyle: Riven excels with weapons that complement her high mobility and shield mechanics. The Battle Bunny Crossbow’s crit potential pairs perfectly with her natural flow state.
Best Weapons: Battle Bunny Crossbow, Cyclonic Slicers, Statikk Sword Key Stats: Critical Chance, Projectile Count, Damage Playstyle: Yasuo’s natural critical strike synergy makes him perfect for crit-focused weapons. His tornado ability combined with area-effect weapons creates devastating combos.
Best Weapons: Iceblast Armor, Radiant Field, UwU Blaster Key Stats: Armor, Max Health, Ability Haste Playstyle: Leona’s tanky nature makes her ideal for defensive weapons that scale with armor and health. Iceblast Armor is practically mandatory on her for maximum effectiveness.
Best Weapons: YuumiBot, Bunny Mega-Blast, Statikk Sword Key Stats: Ability Haste, Damage, Critical Chance Playstyle: Jinx benefits from weapons that allow her to maintain her movement speed passive while dealing consistent damage. The combination of YuumiBot and offensive weapons creates a well-rounded arsenal.
After analyzing hundreds of Swarm runs, I’ve identified several common mistakes that hold players back:
Many players try to level up multiple weapons simultaneously, resulting in several mediocre weapons instead of one or two powerhouse evolved weapons. Focus on your primary weapons first.
Not checking evolution requirements before choosing augments leads to wasted stat points. Always press Tab to review what stats your weapons need.
While offensive weapons are exciting, completely ignoring defensive options like Iceblast Armor often leads to unnecessary deaths. A balanced approach works best.
Different weapons excel in different situations. Learn which weapons work best in open areas versus confined spaces and position yourself accordingly.
For those looking to conquer Extreme difficulty, here are some advanced strategies:
The Death and Taxes augment, found by completing Yuumi events, is game-changing for gold farming. Every enemy you kill gains a chance to drop gold, dramatically increasing your economic power throughout the run.
For rapid gold and EXP farming, focus on:
For taking down elite enemies and bosses:
Based on extensive testing, Iceblast Armor and Battle Bunny Crossbow are generally considered the best weapons due to their versatility, scaling potential, and effectiveness across multiple champions. However, the “best” weapon ultimately depends on your champion and playstyle.
To evolve a weapon, you need:
Each weapon scales with different stats. For example:
Leona is generally considered the best beginner champion due to her tanky nature, simple mechanics, and excellent synergy with top-tier weapons like Iceblast Armor and Radiant Field.
For most runs, focusing on 2-3 weapons is optimal. This allows you to evolve them properly while maintaining good coverage for different situations. Having 4-5 evolved weapons is possible but requires careful planning and luck.
Death and Taxes is a powerful augment that gives every enemy you kill a chance to drop gold. It’s obtained by completing Yuumi events and is essential for gold farming builds.
For boss fights, prioritize:
Evolution cards are dropped by:
Swarm represents one of League of Legends’ most successful game modes, combining the addictive progression of bullet heaven games with the familiar champions and mechanics we love. Understanding weapon tiers and evolution mechanics isn’t just about knowing which items are “best”—it’s about creating synergistic combinations that complement your chosen champion and playstyle.
Remember that while this tier list provides a strong foundation, the beauty of Swarm lies in experimentation. Some of the most effective builds come from unexpected combinations that defy conventional wisdom. Don’t be afraid to try new weapons and adapt your strategy based on the augments and evolution cards you receive.
As Riot continues to support and potentially expand on Swarm’s success (as mentioned in their dev blog), staying updated on the latest weapon balance changes and meta shifts will be crucial for maintaining your edge. Bookmark this guide and check back regularly for updates as the mode evolves.
Whether you’re a beginner looking to survive your first few waves or a veteran pushing the limits of Extreme difficulty, mastering these weapon tiers and strategies will significantly improve your Swarm experience. Now get out there and show those Primordians what League of Legends champions are really made of!
Looking for more tier lists and game guides? Check out our comprehensive League of Legends Tier List and LoL Arena Tier List for more competitive insights. For weapon enthusiasts, our Best Weapons Tier List: Monster Hunter Wilds offers another deep dive into weapon optimization across different games.


