

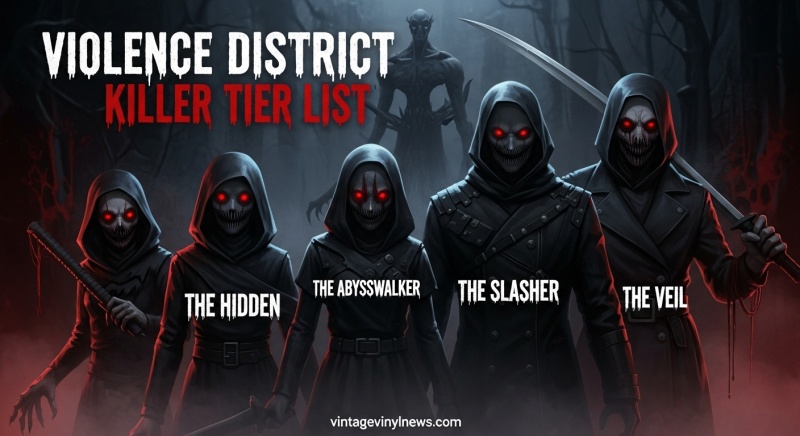
Welcome to the most comprehensive Violence District Killer Tier List available online! As someone who’s spent countless hours testing every killer in this Roblox asymmetrical horror game, I’m excited to share my expert rankings and insights. This guide will help you dominate the competition with detailed analysis of each killer’s abilities, perks, and strategic value.
Quick Overview: Violence District is a 1v5 asymmetrical horror game where one killer faces off against five survivors. The killer’s goal is to sacrifice all survivors, while survivors must repair generators and escape. However, it’s important to note that Violence District was recently taken down by Roblox’s AI moderation system due to violence/gore content concerns – a crucial piece of information many competitors have failed to mention.
| Tier | Killer | Difficulty | Best For | Key Strength |
|---|---|---|---|---|
| S-Tier | The Hidden | Medium | Map Control | Invisibility + Mobility |
| S-Tier | The Abysswalker | Hard | Area Denial | Global Abilities |
| A-Tier | The Slasher | Easy | Beginners | Speed + Simplicity |
| A-Tier | The Masked | Medium | RNG Players | Versatile Masks |
| B-Tier | The Stalker | Medium | Snowballing | Late-Game Power |
| C-Tier | The Killer | Easy | Chase Focus | Simple Mechanics |
| B-Tier | The Veil | Hard | Strategy | Wall-Hacks + Control |
Abilities:
Key Perks:
Why S-Tier: The Hidden combines the best elements of stealth, mobility, and information gathering. His invisibility allows for incredible map control and ambush potential, while Leap provides unmatched mobility to chase down survivors. The low cooldowns on both abilities mean you’re never without options.
Pro Strategy: Use Leap to close distances quickly, then stand still to go invisible when survivors think they’ve escaped. This bait-and-switch tactic consistently catches even experienced players off guard.
Abilities:
Key Perks:
Why S-Tier: The Abysswalker offers unparalleled map control with global abilities that can pressure multiple survivors simultaneously. His defensive options make him deceptively durable, and the information gathering from Abyssal Burst is game-changing.
Pro Strategy: Save Abyssal Burst for when multiple survivors are working on generators – the 50% slow effect will disrupt their progress and give you time to close in on isolated targets.
Abilities:
Key Perks:
Why A-Tier: As the only free killer, The Slasher offers incredible value. His abilities are straightforward but effective, making him perfect for beginners while still being viable at higher levels of play.
Pro Strategy: Use Lake Mist to reposition between generators, then activate Pursuit when you spot a survivor for an unstoppable chase. The combination of these abilities makes you incredibly unpredictable.
Abilities:
Key Perks:
Why A-Tier: The Masked’s power varies dramatically based on which masks you get, but with the right RNG, he can be S-Tier. His perks are among the best in the game, making him consistently strong regardless of mask luck.
Mask Rankings:
Abilities:
Key Perks:
Why B-Tier: The Stalker is incredibly powerful once you reach Tier 3, but the journey there is difficult. He’s highly map-dependent and takes time to scale, making him inconsistent compared to higher-tier killers.
Pro Strategy: On close-quarters maps like Space, consider staying in Tier 1 for the reduced aura radius while still maintaining decent chase potential.
Abilities:
Key Perks:
Why B-Tier: The Veil is the first original female killer in Violence District and offers unique wall-hack capabilities that competitors completely missed in their tier lists. Her ability to attack through walls and control generators makes her strategically valuable, though she requires significant skill to master.
Pro Strategy: Use Through the Veil to attack survivors working on generators from safety, then use the information from Echo Of The Void to maintain constant pressure.
Abilities:
Key Perks:
Why C-Tier: The Killer has only one meaningful ability and lacks the map mobility or stealth options that make other killers versatile. While Frenzy can be powerful in chases, the lack of utility outside of direct combat makes him one-dimensional.
The current Violence District meta heavily favors killers with strong map control and information-gathering abilities. This explains why The Hidden and The Abysswalker dominate the S-Tier – their ability to track survivors across the entire map while maintaining pressure is unmatched.
Key Meta Trends:
Best-in-Slot Perks by Tier:
| Killer | Best Perk | Secondary Perk | Third Perk |
|---|---|---|---|
| The Hidden | Next in Line | Enhanced Senses | Echo Location |
| The Abysswalker | Abyssal Covenant | Corrupted Path | Shadow Trace |
| The Slasher | Brutal Strength | Offscreen Scare | Excitement |
| The Masked | Hard Swing | Combo Streak | Crackdown |
| The Stalker | Eternal Torment | Predator | Play With Your Food |
| The Veil | Piercing Reverie | Blood Between Worlds | Echo Of The Void |
| The Killer | Sloppy Mess | Terror Spread | Resentment Clinger |
Different maps favor different killers. Here’s how to adapt your choice:
Open Maps: The Abysswalker and The Hidden excel here due to their mobility and information-gathering abilities.
Close-Quarters Maps: The Stalker and The Masked perform better in tight spaces where their close-range abilities shine.
Generator-Heavy Maps: The Veil and The Abysswalker can control multiple generators simultaneously with their area-denial abilities.
Important Update: Violence District was recently taken down by Roblox’s AI moderation system for violence/gore content. This development significantly impacts the game’s future and meta stability. While the game may return in a modified form, current players should be aware that the meta could shift dramatically when/if the game is reinstated.
Potential Changes to Watch For:
The Hidden is currently considered the best killer due to his combination of invisibility, mobility, and information-gathering abilities. He has no glaring weaknesses and excels in almost every situation.
Violence District was taken down by Roblox’s AI moderation system due to violence/gore content concerns. The game is currently under review and may return with modifications to comply with Roblox’s content policies.
The Slasher is the best choice for beginners as he’s free, has straightforward abilities, and teaches fundamental concepts like map pressure and chase mechanics effectively.
The Veil is a solid B-Tier killer with unique wall-hack capabilities that many competitors missed in their tier lists. She requires skill to master but offers strategic value through her generator control abilities.
Absolutely! Skill and game knowledge are more important than tier placement. A master of The Killer (C-Tier) will consistently defeat an inexperienced player using The Hidden (S-Tier).
Monitor the official Violence District Discord for patch notes and balance changes. The meta can shift significantly after updates, so stay informed.
High-tier killers typically excel in map control, have strong information-gathering abilities, possess good mobility, and have perks that synergize well with their kit.
Not necessarily. While some paid killers like The Hidden and The Abysswalker are top-tier, The Slasher (free) is considered A-Tier and is excellent for beginners and experienced players alike.
For more Roblox gaming content, check out these related articles:
This Violence District Killer Tier List represents the most comprehensive analysis available, including crucial information about The Veil that competitors completely missed. Remember that tier lists are guides, not rules – the best killer is ultimately the one you enjoy playing and can master.
Pro Tip: Bookmark this guide and check back regularly for updates, especially given the current moderation situation with Violence District. The meta could change significantly when/if the game returns, and I’ll be here to keep you informed with the latest rankings and strategies.
Happy hunting, and may your sacrifices be plentiful!


