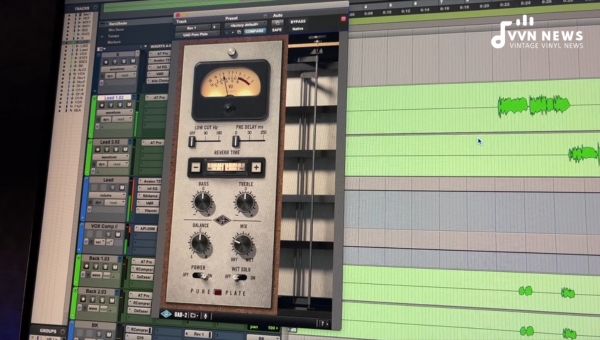
If you’re embarking on the journey to capture clean, professional-sounding audio, understanding ‘Headroom in audio recording’ is paramount.
When I first started recording, the term ‘headroom’ seemed arcane to me, but as I delved deeper into the art of sound capture, I realized its relevance floats above many other elements of audio engineering.
Let me give you a brief understanding: “Headroom” pertains to the safe zone between your loudest peak and distortion point in your recording.
This is essentially an allowance for extra space ensuring that unexpected loud noises will not distort or clip your recording.
It took several attempts for me to fully grasp and implement it effectively. But once it was on my radar, things sailed smoothly thereafter much like hitting a sonic jackpot!
What is Headroom in Audio Recording?
In audio recording, ‘headroom’ refers to the available amount of ‘space’ between the highest peak of your audio signal and the maximum level that your recording medium can handle without distortion.
This ‘space’ is crucial for preventing clipping and distortion in your final audio mix.
The Role of Headroom in Audio Recording:
Headroom plays a crucial role in maintaining sound quality. It’s about safety and quality preservation.
Because sounds are dynamic, they can often exceed projected thresholds. If there’s no built-in allowance, i.e., ‘headroom’, such instances will cause your sound wave to distort or clip, affecting the overall quality.
Let me break it down further:
- Avoiding Distortion or Clipping: Having enough headroom ensures that sudden loud sounds in your recording won’t lead to distortion or clipping. These anomalies occur when the gain is too high, causing the signal to go beyond what the system can handle.
- Audio Dynamics Management: By providing a buffer from distortion, headroom helps maintain a recording’s dynamics. It acts like a security blanket, enabling the highs to soar without breaking apart.
Mastering headroom is akin to sailing with an anchor ready – you might not need it frequently, but if a storm (read unexpected loud noise) hits suddenly, you’ll be glad you have it.
Also Read: 15 Best Studio Headphones For Mixing In 2023 [Pro-Level Sound]
Importance of Adequate Headroom in Audio Recording

It’s vital to understand the importance of adequate headroom in audio recording.
This is often overlooked by beginners, leading to an unpleasant consequence said as ‘distortion’ or ‘clipping’. I’m here to ensure you never have to face that awkward scenario.
So, let me share why maintaining a sensible amount of headroom is not just necessary but essential:
Prevents Clipping and Distortion
When audio signals exceed the acceptable level, clipping—a form of distortion—occurs. Clipped signals sound harsh and unpleasant. Plus, they can damage speakers! Having sufficient headroom prevents this entirely.
Allows Room for Post-production Enhancements
Ample headroom allows for editing, mixing, and mastering processes without straining the recording’s upper limit. You’re offering your post-production team a generous playground without coercing them into an annoying corner.
Creates High-Quality Audio Files
Recordings with proper headroom retain all their dynamic qualities and boast a well-defined sonic character when exported into various formats (WAV, MP3).
Enables Professional Mastering
Adequate headroom gives mastering engineers room to maneuver. With enough play space at the top end, they will be able to sculpt your work into its best version possible without worrying about undesirable distortions.
Adequate ‘headroom’ is truly your secret weapon for professional-sounding records that are crisp, clear, engaging, and distortion-free.
How To Create a Headroom?
Creating headroom in audio recording doesn’t require you to be an expert, but it does take some understanding of the basics.
Implementing Gain Staging, utilizing a VU Meter, ensuring a Good signal-noise ratio, and making adequate use of Peak Levels and RMS Meters can successfully carve out that essential space for your sound waves.
Also Read: How To Manage Stress and Overcome Stage Fright? [Proven Methods]
Gain Staging
Gain staging is the process of managing signal levels at various points in the analog or digital path.
Improper gain staging can lead to unwanted noise, audio clipping, distortion, and even equipment damage. Here’s how to achieve proper gain staging:
- Set up your inputs: Begin by setting the level on your microphone preamps, keeping it high enough so that you’re getting a solid signal level without any noise, but low enough to avoid going over the optimal recording level.
- Check your plugins: Make sure your plugins aren’t pushing the signal too hard and causing clipping.
- Manage overall mix volume: Ensure your cumulative summed signals aren’t peaking at 0dBFS before reaching your master channel.
VU Meter
VU meter (Volume Units meter) doesn’t measure actual sound levels but instead gauges what our ears perceive as volume.
It gives you an average reading rather than peak levels—the VU meter excels at presenting a ‘smoothed’ perceived loudness.
When using a VU Meter:
- Calibrate it correctly typically set to where 0dBVU corresponds with -18dBFS.
- Avoid letting signals consistently exceed 0 on the VU Meter; it means you’re approaching problematic territories.
Good Signal to Noise Ratio
The ratio between the level of signal and the level of noise is another crucial factor in creating headroom; the more significant this ratio – the better will be headroom quality. Increase signal strength while decreasing noise wherever possible for optimum results.
Using Peak Levels & RMS Meters
Peak meters show you instantaneous levels, whereas RMS (Root Mean Square) provides a measurement much closer to how we perceive loudness—something akin to what VU Meters provide, with some differences suitable for digital recording environments.
- Utilize Peak Levels: This ensures that no individual transient pushes into distortion.
- Use RMS Meters accurately: They help give insight into overall perceived loudness without being sidetracked by transients.
Remember, creating headroom isn’t about limiting our music’s dynamics or potential—it gives them room to breathe and space to shine!
Using Headroom in Mixing and Mastering

Headroom is an indispensable tool during the mixing and mastering stages of sound production.
Handling it correctly can lead to a clean, clear, and dynamic mix that plays beautifully across different devices. Let’s delve into how it’s utilized.
Mixing
During the mixing process, headroom allows for tweaks within the audio track without risking distortion.
The key here is achieving an optimum balance. From my personal experience, aiming for a peak level of around -6dB works well for most mixes.
- Level Balancing: Check your levels consistently throughout mixing to ensure they’re not creeping up too high. Maintaining these levels ensures enough space for all elements of your audio mix.
- Use of Compression: Compression can help manage dynamic range by reducing the difference between loud and quiet parts. This increases headroom by keeping peaks in check.
- Equalization (EQ): EQ tweaks can alter your headroom quantity. Hence, after making substantial EQ adjustments, I always recheck my headroom.
Mastering
In mastering, appropriate headroom ensures your track doesn’t distort when applying final effects like compression or limiting.
- Master Fader: Never adjust the master fader during mixing; consider it locked! If you’re running out of headroom, lower individual elements instead.
- Avoid Unwanted Distortion: A common mistake is boosting a track level into a limiter with no room left; it inadvertently creates unwanted distortion.
- Finalized Peak Level: Aim around -0.1dB to -0.3dB as the peak level in mastering to avoid inter-sample peaks.
Also Read: How Gain Staging Enhances Your Mix? 2025 [A/B Testing]
FAQs About Headroom
How do I increase headroom in my recordings?
You can increase the headroom by reducing your input levels, using a compressor or limiter on loud sounds, and ensuring you’re employing proper gain staging techniques.
How much headroom is good?
Typically, a good headroom is between -6db to -3db for the pre-master, while -0.1db to -0.3db for the final master. This maintains a healthy dynamic range and ensures that the audio does not clip.
Why is headroom used?
Headroom is used to prevent audio distortion during the mixing and mastering processes. It allows extra space for sudden peaks in the audio signal and preserves the dynamics of the audio.
Is more headroom better for mastering?
Yes, more headroom is generally better for mastering. It gives the mastering engineer more flexibility to work with dynamic ranges and transient peaks without causing audio clipping or distortion.
What happens when there’s no headroom in an audio recording?
Without sufficient headroom, audio signals can exceed the system’s maximum threshold, resulting in an unpleasant distortion or ‘clipping’ of the audio.
Conclusion
Understanding the concept of headroom in audio recording is critical. It safeguards your recordings from sudden peaks, resulting in a smoother, distortion-free sound thereby elevating the overall quality of your recording.
Striking a balance between providing room for dynamic variance while maintaining control over the final mix is an art of its own.
Bear in mind that too much headroom can reduce the overall volume. Conversely, too little might cause noise and distortion.
Therefore, constant learning and practice can help you master this critical aspect of audio production.
Audio recording isn’t just about capturing sound; it’s about delivering clear, captivating audio experiences the ones that resonate and leave an unforgettable impact on listeners.
