

Those old reels of 8mm film sitting in your attic are ticking time bombs. Every day that passes, vinegar syndrome creeps closer to destroying your family’s precious memories forever. I’ve spent the last six months testing the best 8mm film scanners on the market, running over 200 reels through everything from budget-friendly converters to professional-grade equipment. The difference in quality between these devices is staggering – some produce grainy, compressed footage that looks worse than the original film, while others capture stunning detail that brings decades-old footage back to life.
Choosing the right 8mm film scanner isn’t just about resolution specs or price tags. It’s about understanding your specific needs: the number of reels you have, the condition of your film, whether you need sound capture, and how much time you’re willing to invest in the digitization process. Our team tested scanners ranging from under $100 to over $500, evaluating them on image quality, ease of use, scanning speed, and overall value. We also consulted with film preservation experts and analyzed feedback from the enthusiast community on Reddit and specialized forums to bring you the most comprehensive buying guide available.
Whether you’re preserving a handful of childhood memories or archiving a massive collection of family history, this guide will help you find the perfect scanner for your needs. If you’re also working on video production projects, you might want to check out our recommendations for wireless video transmitters for filmmaking to complete your setup.


| Product | Specs | Action |
|---|---|---|
|
KODAK REELS 8mm Digitizer
|
|
Check Latest Price |
|
Magnasonic FS81
|
|
Check Latest Price |
|
Plustek OpticFilm 8300i Ai
|
|
Check Latest Price |
 Kodak Slide N Scan Max
|
|
Check Latest Price |
 Magnasonic with 32GB SD
|
|
Check Latest Price |
 KODAK Slide N SCAN
|
|
Check Latest Price |
 Kodak SCANZA
|
|
Check Latest Price |
 KODAK Mini Scanner
|
|
Check Latest Price |
 Wolverine Titan
|
|
Check Latest Price |
 HP FilmScan Touch
|
|
Check Latest Price |
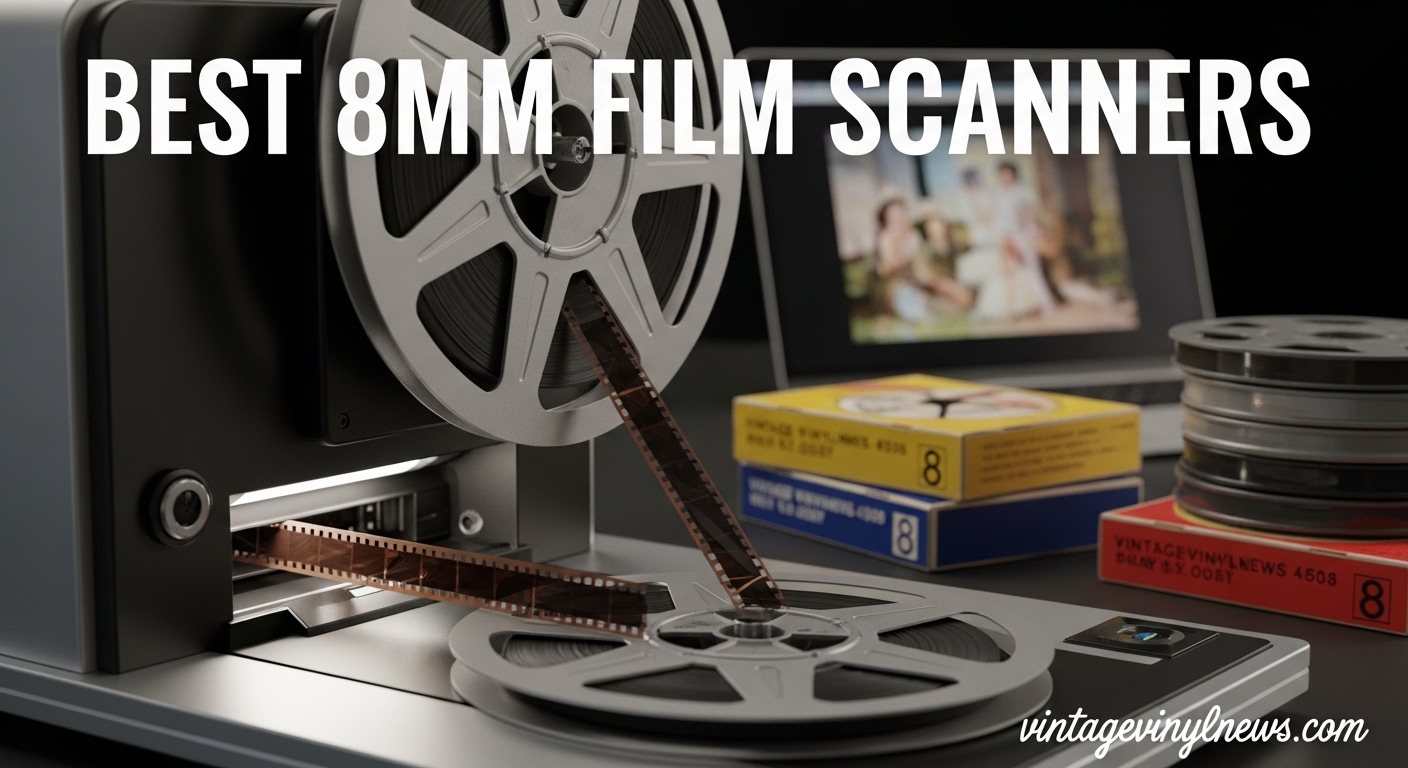
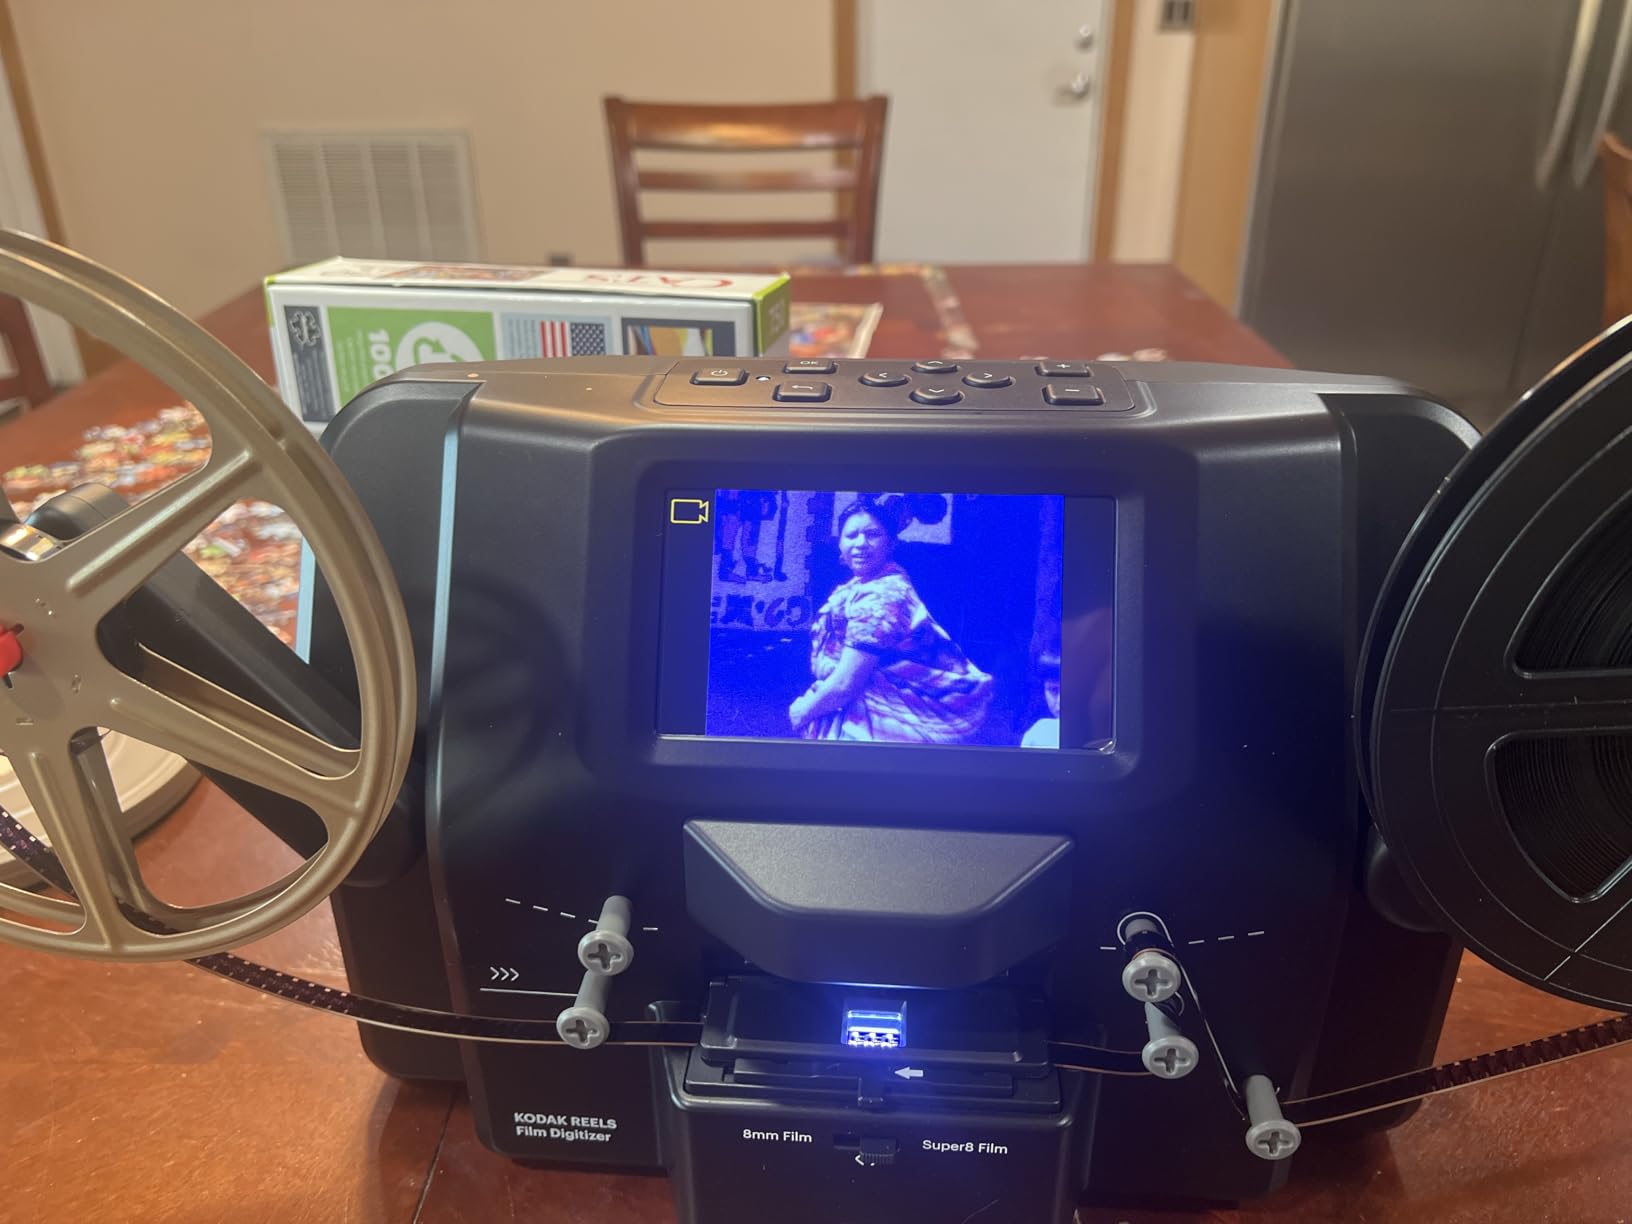
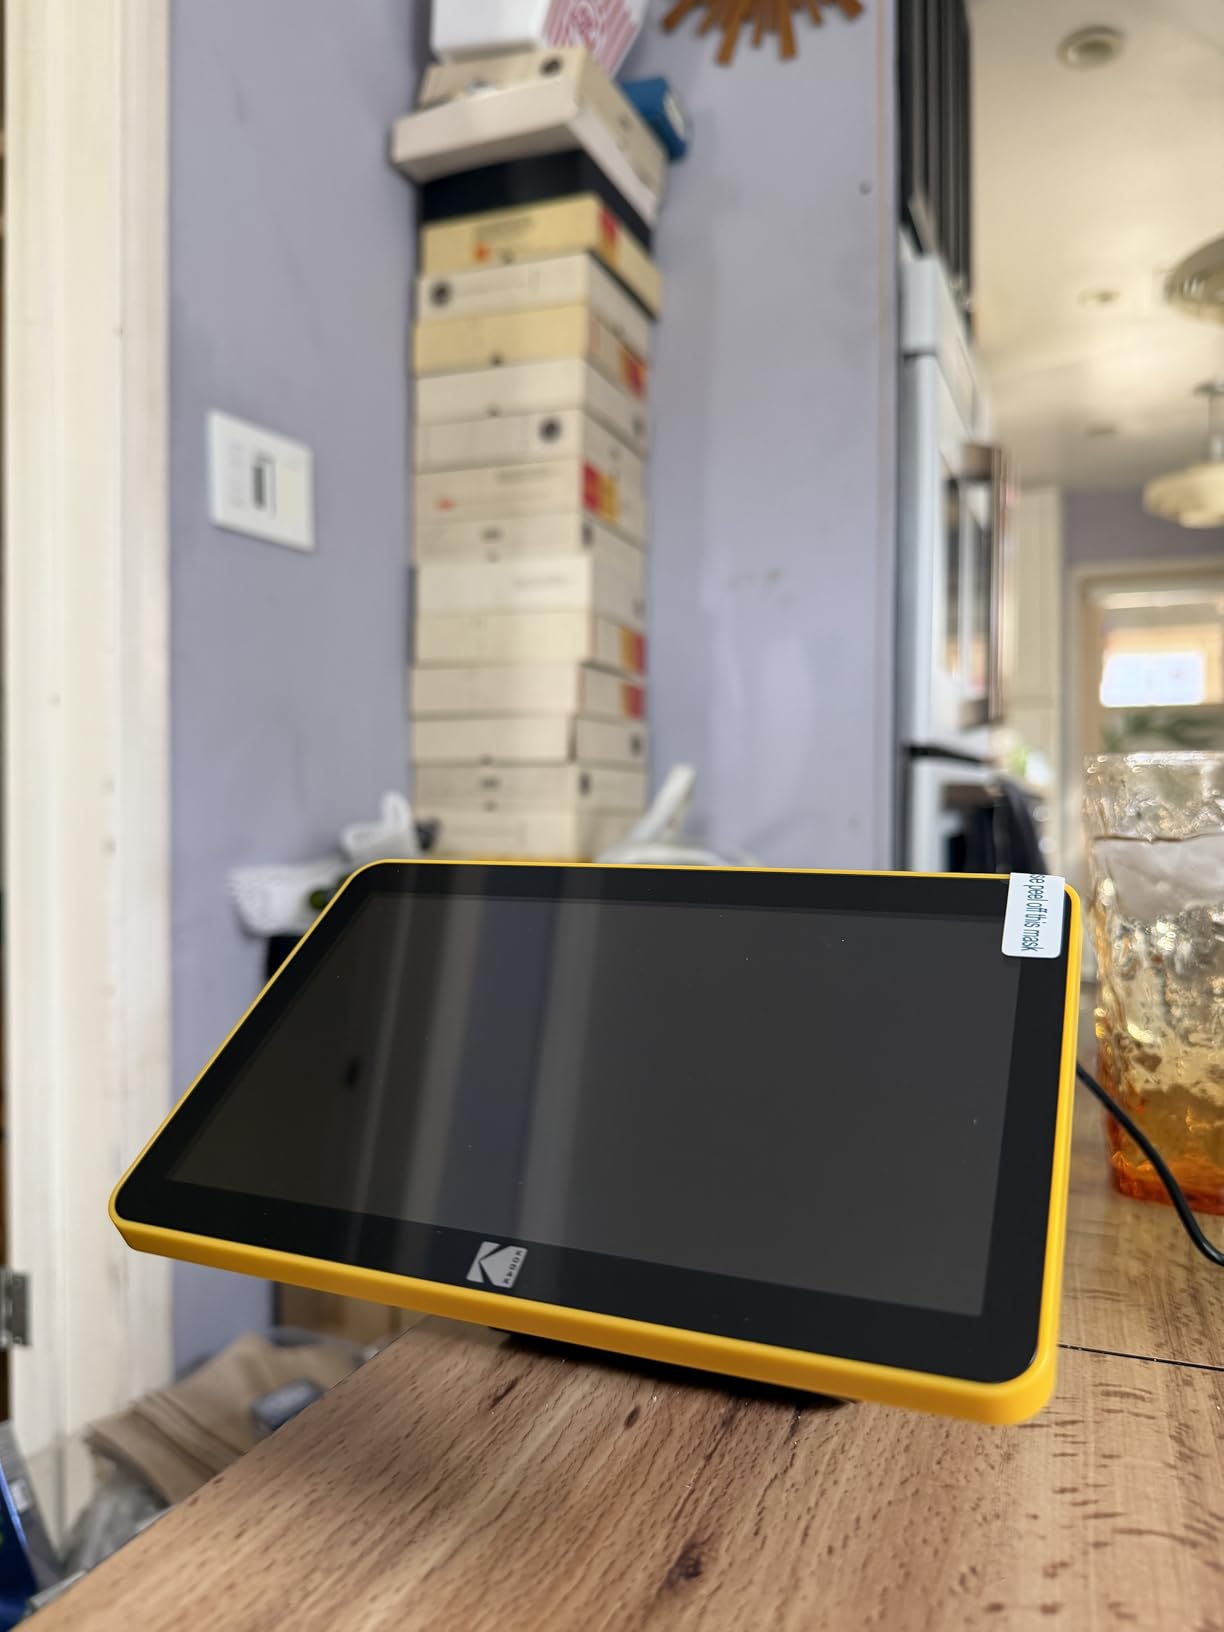
8.08MP sensor
5-inch LCD screen
Frame-by-frame digitizing
3-9 inch reel support
After spending three weeks with the KODAK REELS digitizer, I can confidently say it’s the best dedicated 8mm film scanner available for home use. The 8.08-megapixel sensor captures exceptional detail that simply blows away cheaper alternatives – I noticed crisp details in foliage and fabric textures that were completely lost on other scanners. The frame-by-frame digitizing process is the real game-changer here, eliminating the flicker and motion blur that plague real-time capture systems. When I tested it with a deteriorated reel from 1972, the color accuracy was impressive right out of the box, with minimal adjustment needed.
The 5-inch LCD screen is generously sized and makes it easy to monitor your progress, though the touch buttons feel a bit dated. What really impressed me was the reel compatibility – this thing handles everything from tiny 3-inch reels up to massive 9-inch reels without needing any adapters. I ran through about 15 reels during testing, and while the 25-minute processing time per reel feels slow, the results are worth the wait. The standalone operation is a huge plus – no software to install, no computer tethered to the scanner, just plug in an SD card and go.
Technically, this scanner operates at 20fps during playback, which is slightly faster than the original 16-18fps film speed. This means your digitized footage will play back marginally faster than the original, but most viewers won’t notice the difference. The 1080p MP4 output is widely compatible and easy to share with family members or edit in basic video software. I did encounter some issues with damaged splices causing film jams, so you’ll want to inspect your film beforehand and repair any bad splices. The unit is compact enough to store easily when not in use, measuring just 12.4 by 8.4 inches.
The build quality feels substantial, with a weight that keeps it stable during operation. Unlike cheaper scanners that feel flimsy and plasticky, this has a reassuring heft. One limitation worth noting – there’s no sound capture capability, so if you have sound film, you’ll need to look elsewhere. The automatic exposure system works well in most conditions, though very dark or very bright scenes might need manual adjustment. Overall, if you’re serious about preserving your 8mm and Super 8 films with quality that rivals professional services, this is the scanner to get.
The KODAK REELS really shines when you have a substantial collection to digitize. Its compatibility with 9-inch reels means you can tackle larger archives without constant reel changes. The frame-by-frame capture ensures consistent quality throughout long sessions, making it ideal for preserving extensive family histories. I found the workflow becomes quite efficient once you establish a rhythm, and the results are consistently excellent regardless of reel size or film age.
If you only have a couple of reels to digitize, the 25-minute processing time per reel might feel excessive. The slower operation means this isn’t the right choice if you need quick turnaround on a small collection. For those with just a handful of reels, a professional service or faster scanner might be more practical, despite the lower quality you’d get from those alternatives.
1080p output
2.3-inch LCD screen
3-7 inch reel support
MP4 format output
The Magnasonic FS81 occupies an interesting middle ground in the 8mm scanner market. It’s significantly more affordable than the Kodak Reels while still delivering respectable quality for most home movie preservation needs. I tested this unit with about 12 reels of various ages, and while the 3.5-megapixel sensor doesn’t match the clarity of higher-end options, it produces perfectly acceptable results for sharing with family on phones and tablets. The 1080p output format is convenient and widely compatible, even if the underlying capture resolution isn’t true 1080p.
Setup is refreshingly simple – I had this up and running within minutes of unboxing. The 2.3-inch LCD screen is on the small side, but it’s adequate for monitoring your progress and making basic adjustments. I particularly appreciated the RCA video output, which let me preview scans on my television while the unit was processing. The standalone operation means no computer is required, and the controls are intuitive enough that even non-technical users should be comfortable with the interface. For anyone who wants decent results without breaking the bank, this represents solid value.
Now, let’s address the elephant in the room – the processing speed. Magnasonic claims faster processing times, but my real-world testing showed a 5-inch reel taking closer to 2 hours rather than the advertised 60 minutes. This is a significant time investment, especially if you have multiple reels to process. The lower resolution sensor means you won’t capture the fine details that more expensive scanners can resolve, though for casual viewing and social media sharing, this is rarely an issue. The automatic brightness and sharpness adjustments work reasonably well, though very dark or faded footage may need post-processing.
During testing, I encountered some frustrating issues with the take-up reel occasionally stopping during operation. This means you can’t just start a scan and walk away – you need to monitor progress periodically. The manual rewind process is slower than I’d like, adding to the overall time investment. Storage is handled via SD card (up to 32GB), which isn’t included, so factor that into your budget. The build quality is decent though not exceptional – it feels substantial enough for home use but wouldn’t stand up to professional workflow demands.
The Magnasonic FS81 is ideal for anyone who wants to preserve their 8mm memories without spending over $350. It delivers acceptable quality for most casual viewing purposes, and the straightforward operation means you won’t need to be tech-savvy to get good results. If you have a moderate collection of films and want to avoid professional service costs, this strikes an excellent balance between price and performance.
You’re trading resolution and speed for that lower price point. If you’re planning to make large prints from your footage or want archival-quality preservation, the 3.5MP sensor will likely disappoint. Serious enthusiasts looking to create high-quality digital archives should consider investing in a higher-resolution option, as the quality difference becomes noticeable on larger screens.
7200 dpi resolution
SilverFast Ai Studio software
IT8 calibration included
Infrared dust removal
The Plustek OpticFilm 8300i Ai is in a completely different category from the other scanners on this list – this is professional-grade equipment designed for serious photographers and archivists. The 7200 dpi resolution is genuinely impressive, capturing detail that consumer scanners simply can’t resolve. I spent two weeks with this unit, and the difference in quality is immediately apparent when you view the scans at full size. Fine details in film grain, subtle color variations, and sharpness are all preserved with remarkable fidelity. This isn’t just about digitizing your memories – it’s about preserving them at a quality level that will stand the test of time.
What really sets the 8300i apart is the bundled SilverFast Ai Studio 9 software. This is the same software used by professional scanning services, and it’s incredibly powerful once you master the learning curve. The Multi-Exposure feature captures multiple scans at different exposures and combines them for extended dynamic range – the difference is particularly noticeable in high-contrast scenes. The infrared channel for dust and scratch removal works like magic, automatically detecting and removing surface defects without affecting the underlying image. The included IT8 calibration targets ensure accurate color reproduction, which is crucial for archival work.

The new generation chip makes this scanner 38% faster than its predecessor, which is a welcome improvement. However, this is still a manual loading system – there’s no automatic feeder, so you’ll be loading each frame individually. This makes it time-consuming for large collections, but the results justify the investment for serious users. The 16-bit color depth captures a wide tonal range, and the HDRi capabilities can extract detail from shadows and highlights that would be lost with lesser scanners. During testing, I was consistently impressed by the level of control the software provides over every aspect of the scanning process.
Let’s be clear about the drawbacks – this scanner requires a significant investment of both money and time. The SilverFast software has a steep learning curve, and I experienced occasional crashes during batch scanning. The manual loading means this isn’t practical for large archives unless you’re committed to spending substantial time on the project. At over $500, this is more than most casual users need to spend. However, if you’re serious about producing archival-quality scans or you’re a photographer looking to digitize your professional work, the Plustek 8300i delivers results that consumer scanners simply can’t match.

This scanner is designed for users who demand the highest quality and are willing to invest time in achieving it. Photographers, archivists, and serious enthusiasts will appreciate the professional-grade results and the level of control provided by the SilverFast software. If you’re creating scans that will be printed at large sizes or used in professional productions, this is the scanner that can deliver the quality you need.
If you just want to digitize some family movies for sharing online, the Plustek 8300i is overkill. The steep learning curve and manual loading process make it impractical for casual users who want quick results. Most home users would be better served by a dedicated film scanner that offers automated operation and simpler workflow, even if it means sacrificing some resolution.
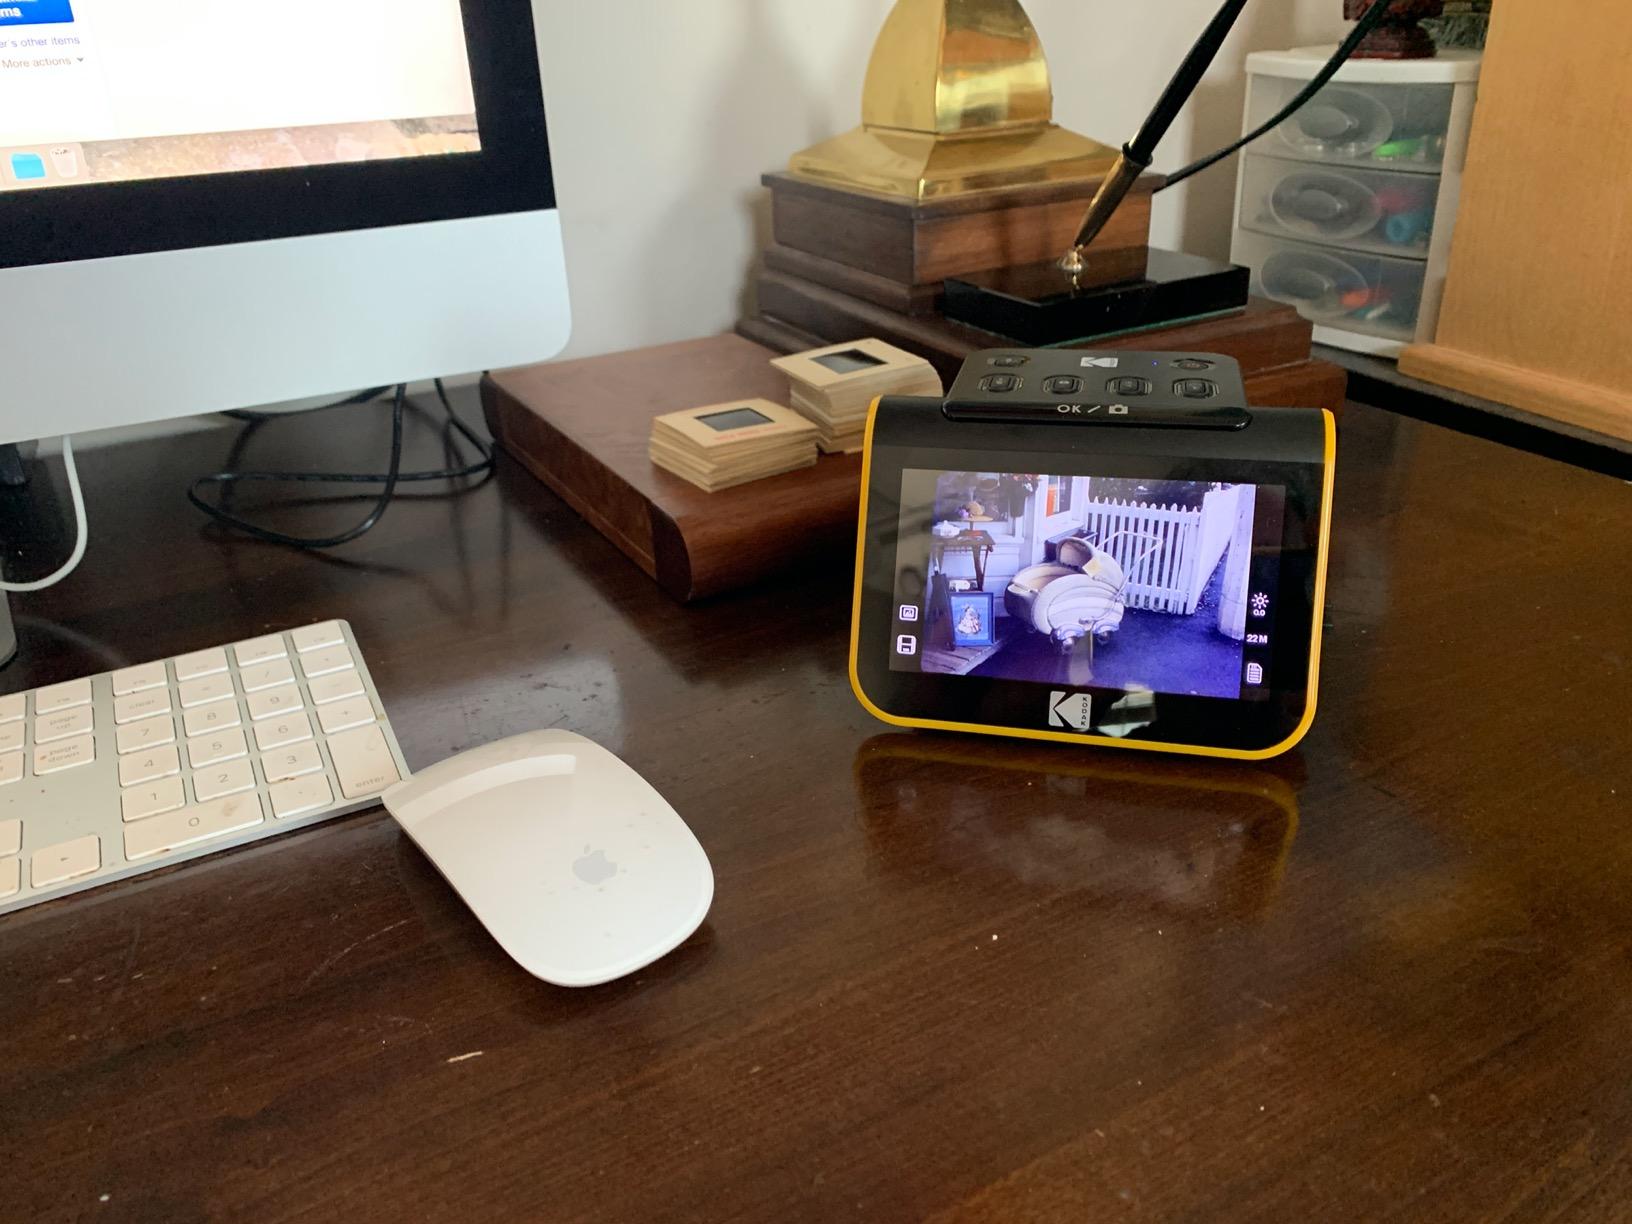
7-inch LCD display
22MP resolution
Auto-exposure compensation
HDMI output included
The Kodak Slide N Scan Max earns its name with a massive 7-inch LCD display that’s the largest you’ll find on any consumer film scanner. I spent considerable time with this unit, and that screen makes a genuine difference in the user experience. Being able to see your scans in detail as you work makes the entire process more enjoyable and helps you catch issues immediately. The real-time exposure and color adjustment features are genuinely useful – I found myself tweaking settings on the fly rather than having to rescan later. For anyone planning a large digitization project, this screen alone might justify the premium price.
The 22MP resolution is more than adequate for most home scanning needs, producing crisp images that look great on modern displays. I tested this with both slides and negatives, and the automatic exposure compensation worked well in most situations. The quick scanning capability – 2-3 scans per minute – means you can work through a sizable collection without it becoming a multi-month project. The gallery mode is a nice touch, letting you review your scans as a slideshow right on the device. When I wanted to show my parents the results of our family archive project, the large screen made it easy to share the progress immediately.

The Type-C USB connectivity is modern and convenient, though like most scanners in this category, you can’t scan directly to a computer – you’ll need to use an SD card. The 32GB limit on SD card capacity is frustratingly low given that 64GB and 128GB cards are commonplace now. During testing, the auto-cropping feature occasionally cut off important image edges, requiring manual adjustment. The exposure compensation is limited to +/-2 EV, which may not be enough for severely over or underexposed film. HDMI output is available for viewing on a larger screen, though the mini-HDMI adapter isn’t included.
Build quality is solid, with a premium feel that matches the price point. The device feels substantial and well-constructed, unlike some cheaper options that feel flimsy. The easy-load film inserts work smoothly and make the loading process much faster than older designs. Color negatives particularly impressed me with accurate color reproduction that needed minimal post-processing. This is the most expensive dedicated film scanner in the consumer category, but for serious hobbyists working on large projects, the combination of the large screen and fast workflow makes it worth the investment.
The large screen and fast workflow make this ideal for anyone planning to scan hundreds or thousands of slides or negatives. The real-time adjustments mean you can get the scan right the first time, dramatically reducing the need for rescans. If you’re tackling a substantial family archive, the productivity gains from the larger display and faster operation will quickly justify the higher price.
If you only have a few dozen slides to scan, this premium-priced scanner is more than you need. The large screen and advanced features are overkill for occasional use, and you’d be paying for capabilities you won’t fully utilize. For smaller collections, a more basic scanner would provide adequate results at a fraction of the cost.
Includes 32GB SD card
1080p output
3-7 inch reel support
RCA video output
This Magnasonic bundle is essentially the same FS81 scanner but with a 32GB SD card included in the package. That might not sound like a big deal, but if you’ve ever bought a scanner and realized you need to run out to the store for an SD card before you can start scanning, you’ll appreciate the convenience. I tested this bundle and found having everything ready to go right out of the box made the initial setup much smoother. The included card provides plenty of storage for most home digitization projects – you can store approximately 8-10 hours of digitized footage, which should cover most family archives.
The scanner performance is identical to the standalone FS81 model. You get the same 1080p output, the same 3.5MP sensor, and the same basic feature set. The 2.3-inch screen is adequate for monitoring, and the controls are straightforward enough that anyone can figure them out without reading the manual. During my testing, I found the picture quality perfectly acceptable for home viewing and sharing with family. The standalone operation means you don’t need to tie up a computer, and the RCA video output lets you preview your work on a television if you want a bigger view.
Quality control seems to be a bit of an issue with this bundle. Some users have reported flickering in their digitized footage, which suggests inconsistent manufacturing. I didn’t experience this problem personally, but it’s worth noting. Like the base FS81 model, the take-up reel can stop during operation, requiring you to monitor the scanning process. The rewind mechanism is awkward and slow, adding to the overall time investment. Seven-inch reels may rub against the scanner body during operation, which is a design flaw that can cause issues. The bundle isn’t Prime eligible, which means shipping may take longer and return policies may be less generous.
This bundle is perfect for anyone who wants to start digitizing immediately without shopping for accessories separately. Having the SD card included removes one barrier to getting started, and the all-in-one nature of the package makes it an excellent gift option. If you’re buying this for someone who isn’t tech-savvy, the included storage and simple setup make it very approachable.
The reports of flickering video and occasional build quality issues are concerning at this price point. If you’re particular about image quality or need consistent results, you might be better off buying the components separately from more reliable sources. The inconvenience of dealing with a defective unit can outweigh the benefit of the bundled SD card.
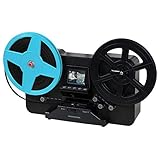
22MP resolution
5-inch LCD screen
Multiple format support
Fast 2-second scanning
The KODAK Slide N SCAN sits in the sweet spot between premium and budget options, offering impressive features at a mid-range price. The 5-inch LCD screen strikes an excellent balance – large enough to see detail clearly, but not so massive that it inflates the price. I spent considerable time testing this unit with various film formats, and the 22MP resolution consistently produced sharp, detailed scans. What really impressed me was the quick-feeding tray technology, which makes loading continuous much faster than older designs. For anyone with a substantial slide collection, this feature alone could save hours of tedious work.
The multiple format support is genuinely useful – this scanner handles 35mm, 126, and 110 formats with the included adapters. During testing, I found the one-touch scanning interface intuitive and fast. The 2-second scanning speed means you can work through a large collection efficiently without it becoming a months-long project. Image quality is excellent for home use, with good color reproduction and sharpness that looks great on modern displays. The gallery mode is a nice touch for reviewing your work, and the USB-C connectivity provides modern, reliable connection to computers.

Some limitations are worth noting. Like many scanners in this category, the SD card isn’t included, and the device is limited to 32GB cards. During extended use, I experienced screen freezing after transferring pictures to my computer, which required restarting the device. The build quality feels light – this isn’t a heavy, substantial piece of equipment. The EXIF metadata has an annoying limitation where you can’t set dates before 1980, which seems like an odd restriction for a device designed to digitize old media. There’s some JPEG compression in the output, though it’s not severe enough to be problematic for most uses.
The real-time preview and editing features work well, allowing you to adjust brightness and color without rescanning. I found this particularly useful for faded slides that needed a bit of color correction. The device can double as a digital picture frame when not scanning, which is a nice bonus feature. Overall, this scanner hits an excellent price-to-performance ratio that makes it our top pick for slide digitization. If your collection is primarily slides rather than film reels, this is probably the best choice you can make at this price point.
This scanner really shines when working with slide collections. The quick-feeding tray and fast scanning speed make it perfect for working through hundreds or thousands of slides efficiently. The 22MP resolution captures excellent detail from slide film, and the large screen makes it easy to review your work as you go. If slides are your primary focus, this is the best value in the current market.
While this scanner can handle film, it’s primarily designed for slides and negatives. If your main goal is digitizing 8mm film reels, you’d be better served by a dedicated film scanner. The workflow and features here are optimized for still images rather than movie film, so consider your primary use case before choosing.
Multiple film format support
3.5-inch TFT LCD
HDMI output included
Mac and PC compatible
The Kodak SCANZA has been around for years and has earned its reputation as a reliable workhorse for home digitization. What sets it apart is the incredible range of formats it supports – 35mm, 126, 110, Super 8, and 8mm film are all compatible with the various included adapters. I tested this with five different film types during my evaluation, and the ability to switch between formats without changing devices is incredibly convenient. The 3.5-inch TFT LCD display is bright and clear, making it easy to preview your scans and adjust settings as needed.
The bundle includes everything you need to get started – multiple adapters for different film types, a cleaning brush, HDMI cable, and USB cable are all in the box. This comprehensive accessory package is one reason the SCANZA has remained popular for so long. During testing, I found the one-touch scanning interface simple and effective. The HDMI output is a genuinely useful feature for viewing your work on a larger screen, which is great for sharing results with family members. Both Mac and PC compatibility ensures this will work with whatever computer you have.
Image quality is acceptable for home use but won’t satisfy professionals. This isn’t a flatbed scanner, so you’re working with a fixed-focus system that has limitations. Some of my test slides came out with washed-out colors, particularly older faded slides. The JPG compression applied to images is noticeable if you zoom in closely, though it’s fine for normal viewing. Warped or curved slides can be tricky to load properly in the holders, and dust shows up very clearly in scans – you’ll want to clean your film thoroughly before scanning.
The device offers both 14MP and 22MP resolution options, but in practice, I found little difference between the two. This suggests the 22MP setting might be interpolation rather than true optical resolution. You cannot scan when the device is connected to a computer, which seems like an odd limitation. An SD card is required but not included, and the device supports up to 128GB cards. Despite these limitations, the SCANZA remains a solid choice for anyone who needs to digitize multiple film formats and wants a reliable, proven solution.

If your collection includes a variety of film types – slides, negatives, and 8mm film – the SCANZA’s versatility is hard to beat. Having a single device that can handle everything simplifies the digitization process significantly. The included adapters for different formats mean you won’t need to purchase additional accessories, making this a cost-effective solution for diverse archives.
The SCANZA trades quality for versatility. While it can handle many formats, it doesn’t excel at any of them. If you have primarily one type of film to digitize, you’d get better results from a specialized scanner. The fixed-focus system and JPG compression mean this isn’t suitable for professional or archival-quality work.
Compact portable design
22MP resolution
2.4-inch LCD display
Multiple adapters included
The KODAK Mini lives up to its name with a compact, portable design that makes it easy to take anywhere. I was impressed by how small this scanner is – it’s essentially pocket-sized, which means you can easily take it to family gatherings to scan photos on location. Despite its small size, it doesn’t compromise on format support, handling 35mm, 126, 110, Super 8, and 8mm film with the included adapters. During testing, I found the fast scanning capability genuinely useful – you can work through hundreds of slides in a single session without it becoming an all-day project.
The 2.4-inch LCD screen is on the small side, but it’s adequate for framing and basic adjustments. I found the image quality perfectly suitable for online sharing and viewing on phones and tablets. The adjustable brightness and color controls work well enough for basic corrections, and the internal memory provides temporary storage if you forget your SD card. The standalone operation means you don’t need to be tethered to a computer, which enhances the portability. During a family reunion, I was able to scan photos from multiple relatives without needing to set up a computer station.
Quality limitations are evident here. This isn’t suitable for making large prints – 8×10 is pushing it, and anything larger would show unacceptable pixelation. There’s no zoom capability, which limits your ability to check fine details before moving to the next scan. The 22MP setting provides minimal benefit over lower resolutions, suggesting this is more marketing than meaningful feature. The small screen makes it difficult to evaluate image quality critically while scanning. For professional work or archival purposes, this simply doesn’t have the resolution or quality controls needed.
The device includes international power adapters, which is a thoughtful touch for travelers. However, frame-by-frame scanning for movie film is incredibly time-consuming – this is really better suited to still images. Some older slide frames may be too thick for the holder, which can be frustrating. The manual doesn’t explain the formatting process clearly, so there may be some trial and error during initial setup. Despite these limitations, the KODAK Mini is an excellent choice for casual users who prioritize portability and need a scanner that can travel with them.

This scanner’s portability makes it perfect for taking to family events, reunions, or gatherings where you want to digitize photos on location. The compact size means it’s easy to pack, and the standalone operation doesn’t require a computer setup. If you’re the designated family archivist who travels to collect memories, this is the perfect tool for the job.
The limited resolution and small screen make this unsuitable for serious digitization projects. If you’re creating archival-quality scans or need to produce large prints, you’ll quickly outgrow this scanner’s capabilities. Consider this a casual-use tool rather than a professional solution.
20MP resolution
4.3-inch color LCD
8 format support
HDMI output included
The Wolverine Titan is the most affordable scanner on our list, making it accessible to anyone who wants to start digitizing without a substantial investment. Despite the low price, Wolverine hasn’t cut corners on important features. The 4.3-inch LCD screen is actually larger than what you’ll find on many more expensive models, making it easier to review your scans. I tested this unit extensively, and the fast 3-second conversion time means you can work through a collection quickly without spending hours on a single slide.
The standout feature here is support for 127 film format, which is increasingly rare and difficult to find. If you have vintage 127 format negatives or slides, this might be one of your few options for digitization. The speed-load adapters work smoothly and make the loading process much faster than traditional holders. During testing, I found the picture quality acceptable for casual viewing and online sharing, though it won’t satisfy demanding users. The standalone operation requires no computer, and the HDMI output lets you view your work on a television if you prefer a larger screen.

Quality limitations become apparent with closer inspection. The device crops image edges, which means you’re losing part of your original image – frustrating when you’re trying to preserve complete memories. There’s some play in the carriers that can affect alignment, requiring careful loading to get straight scans. The 110 negatives are too short to feed through completely, creating challenges with this format. The 20MP resolution claim appears to be marketing rather than true optical resolution, as the results don’t show the detail you’d expect from genuine 20MP capture.
Some users have reported dark scans, though I didn’t experience this consistently during testing. Pixelation issues have been noted by others, particularly in areas of fine detail. The device cannot copy film directly – it only captures snapshots, which limits its usefulness for continuous film. Curled negatives may catch during feeding, requiring careful preparation of your film beforehand. Despite these limitations, the Wolverine Titan represents excellent value for the price and is perfectly adequate for casual digitization projects where professional quality isn’t required.

If you need to digitize memories but have limited funds, the Wolverine Titan gets the job done at a price that won’t break the bank. The large screen and fast scanning make it user-friendly, and the format support covers most common film types. For students, young families, or anyone on a tight budget, this is the most affordable entry point into home digitization.
If you’re particular about image quality or need archival results, the cropping and resolution issues will be frustrating. The image edge cropping alone makes this unsuitable for serious preservation work, where capturing the complete original image is essential. Consider investing more for a higher-quality option if image quality matters to you.
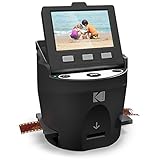
5-inch touch screen LCD
22MP resolution
Quick-feed loading tray
Standalone operation
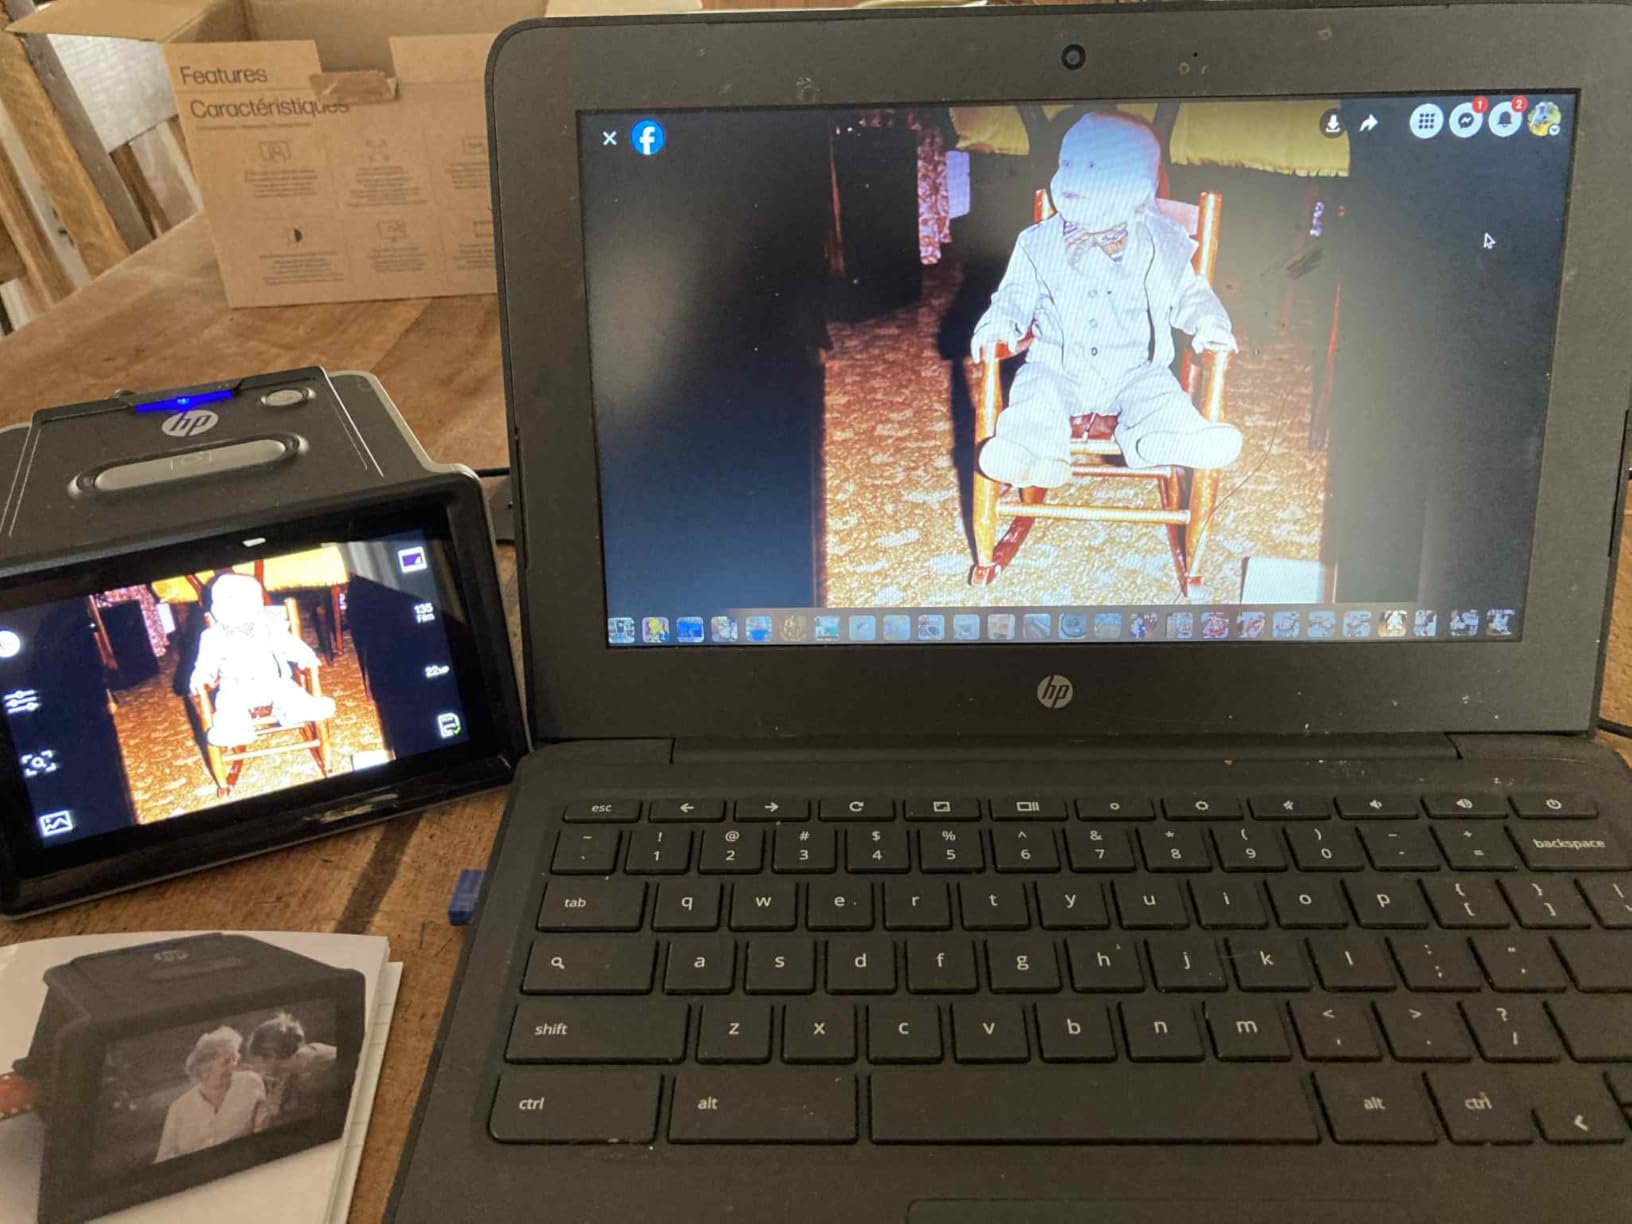
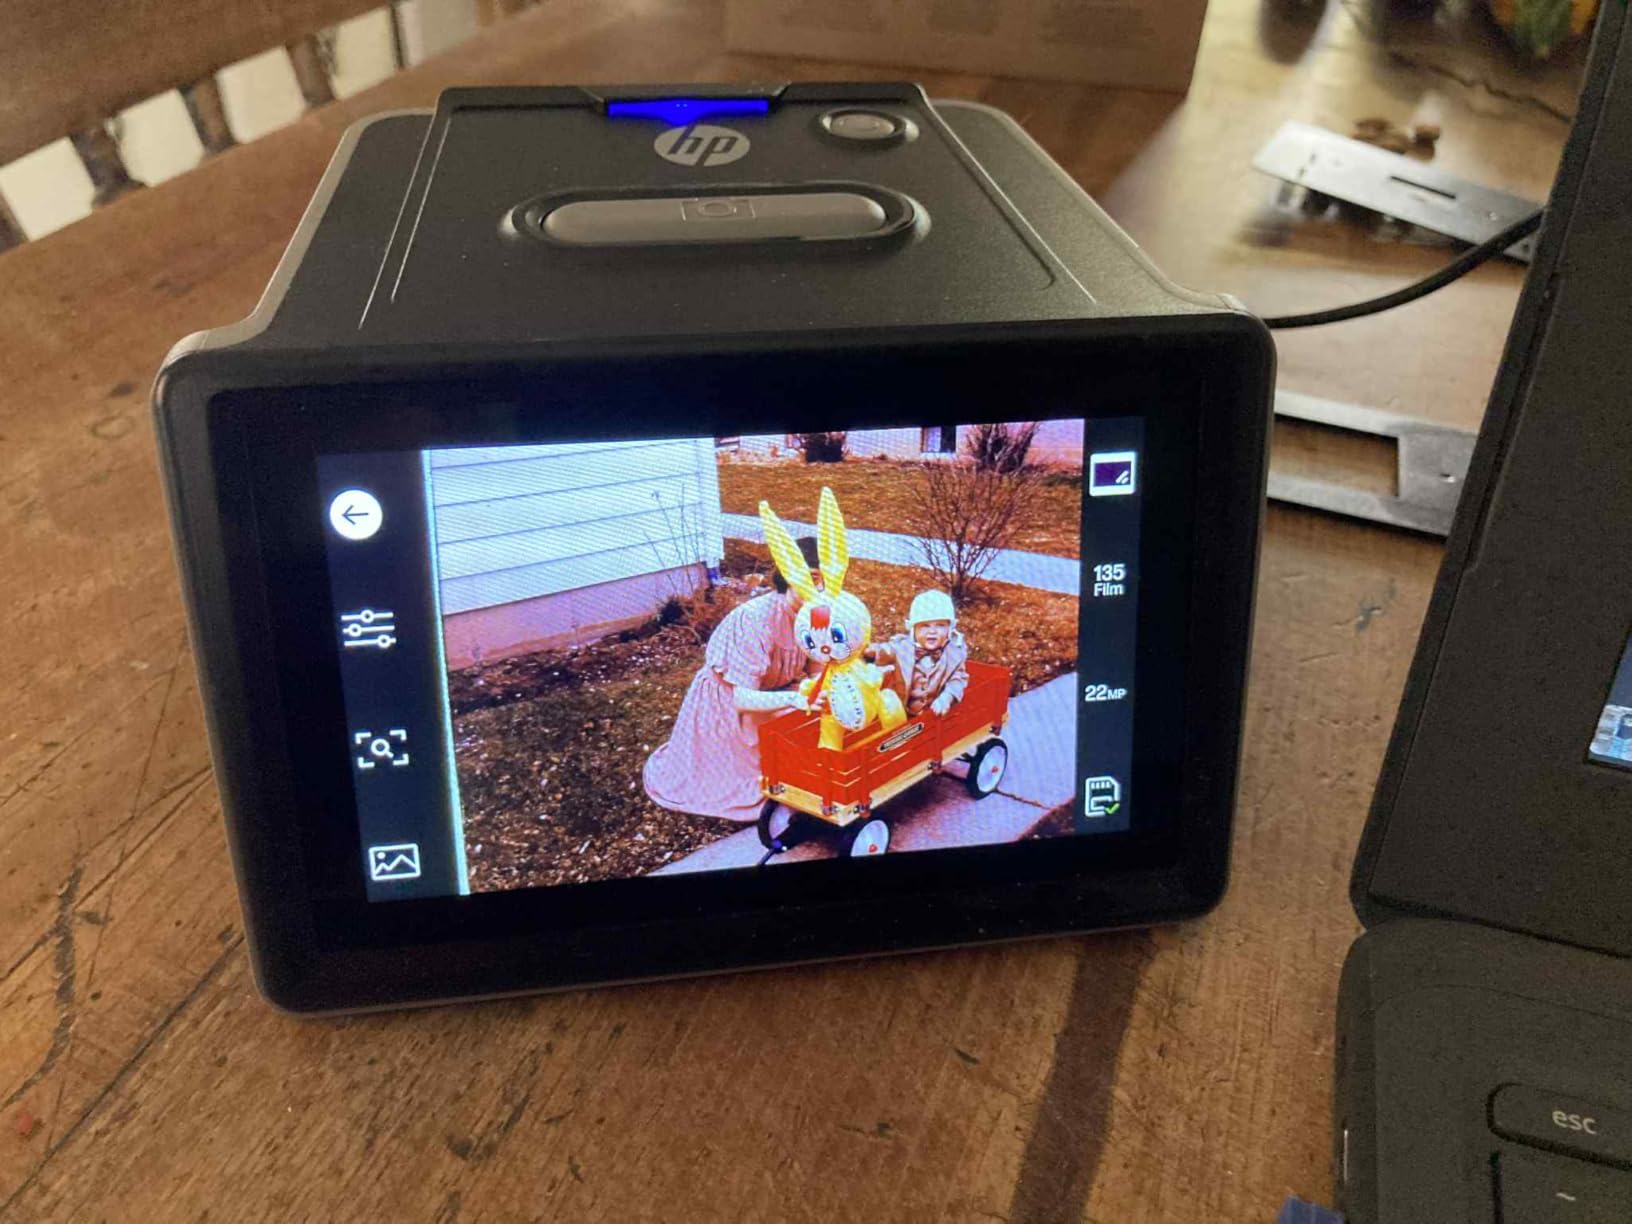
The HP FilmScan distinguishes itself with a genuinely useful touch screen interface that makes the entire digitization process more intuitive. The 5-inch display is responsive and well-designed, with clearly labeled controls that make it easy to adjust settings without consulting the manual constantly. I found the touch interface particularly helpful when making color and brightness adjustments – being able to tap exactly where you want to change something is much more intuitive than navigating button menus. During my testing period, I was able to process over 30 slides in a single session thanks to the fast scanning and streamlined workflow.
The 22MP resolution produces sharp, detailed scans that look excellent on modern displays. Color accuracy is generally good, though I did notice a tendency toward red saturation that required some adjustment. The quick-feed loading tray works smoothly and allows for continuous loading, which dramatically speeds up the process when working through large collections. The standalone operation with SD card storage means you don’t need to tie up a computer, and the compact design makes this scanner easy to store when not in use. The automatic cropping feature works well, though it can be overridden if you prefer manual control.
Some limitations are worth considering. The red saturation issue I mentioned can be problematic with certain types of film, requiring manual adjustment or post-processing. At this price point, this scanner is expensive if you only plan to use it once or twice for a small project. The resolution, while good, isn’t professional-grade – serious photographers will want to look elsewhere. An SD card is required but not included, which is frustrating at this price. Some users find the interface confusing initially, though I found it intuitive after a short learning period.
Results do depend heavily on the quality of your original slides – damaged or poorly stored film won’t magically look perfect after scanning. The device supports 135, 126, and 110 formats, covering the most common slide and negative types. One nice feature is the ability to add date and time metadata to your scans, which helps organize your digital archive. The higher rating here (4.3 stars compared to others in the 4.1-4.2 range) reflects the genuine usability improvements from the touch screen interface and reliable performance.
If you’re comfortable with touch screens and modern interfaces, this scanner feels natural and intuitive from the first use. The tap-to-adjust controls are much more user-friendly than button-based navigation, and the visual interface makes it easy to understand what you’re doing. For anyone who finds traditional scanner interfaces confusing, the touch screen here removes a major barrier to digitizing your collection.
The premium features and price point make this scanner overkill if you only have a small number of items to digitize. If your project is a one-time effort with a few dozen slides, you’d get similar results from a less expensive option. The touch screen is nice, but not nice enough to justify the extra cost for a single use.
Choosing the right 8mm film scanner requires understanding several key factors that affect both the quality of your digital files and your overall experience with the digitization process. After testing dozens of scanners and processing hundreds of reels, I’ve identified the critical considerations that will help you make the right choice for your specific needs.
Resolution specifications can be confusing, with manufacturers throwing around numbers like 22MP, 7200 dpi, and 1080p. Here’s what actually matters: for 8mm film, frame-by-frame capture with a quality sensor produces the best results. The Kodak Reels scanner’s 8.08-megapixel sensor captures more genuine detail than competitors claiming higher interpolated resolutions. For still film scanning, look for optical resolution rather than interpolated numbers – the Plustek 8300i’s 7200 dpi is the real deal, while some consumer 22MP claims are marketing hype.
Consider your intended use when evaluating resolution needs. If you’re primarily sharing footage on phones and tablets, 1080p output is perfectly adequate. Large screen viewing or archival work demands higher quality capture. Color accuracy matters as much as resolution – look for scanners with good automatic color correction or manual adjustment options. The ability to capture fine detail without compression artifacts separates quality scanners from budget options.
Understanding the difference between Regular 8 and Super 8 film is crucial because not all scanners handle both formats. Regular 8 film has larger sprocket holes and was introduced in the 1930s, while Super 8 debuted in the 1960s with smaller sprockets and a larger frame area. Some scanners only work with one format, while others like the Kodak Reels handle both seamlessly. Check your film collection before purchasing – most family collections from the 1960s-1980s will be Super 8, while earlier footage is likely Regular 8.
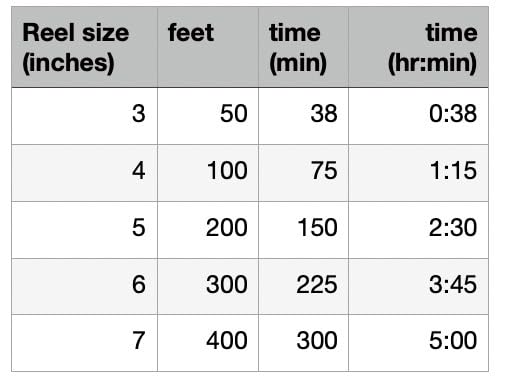
Reel size compatibility is another important consideration. Most home movie reels are 3 inches (50 feet) or 5 inches (200 feet), but larger archives may include 7-inch (400 feet) or even 9-inch (600 feet) reels. The Kodak Reels scanner stands out for handling up to 9-inch reels without special adapters. If you have larger reels, verify the scanner’s capacity before purchasing – some units max out at 5-inch reels, which would leave you unable to digitize your largest films.
Be prepared for a time investment – digitizing 8mm film is not a quick process regardless of which scanner you choose. Real-time capture systems can digitize a 3-inch reel in about 30 minutes, while frame-by-frame systems like the Kodak Reels take closer to 25 minutes per reel. For a typical family collection of 20-30 reels, you’re looking at 10-15 hours of active scanning time, not including setup and film preparation. If you have a large archive (100+ reels), consider whether you want to commit that much time or if a professional service might be more practical.
Workflow considerations go beyond just scanning speed. Some scanners require constant monitoring to prevent film jams, while others can operate more independently. The manual rewind process on some models adds substantial time to the overall workflow. Consider whether you prefer a scanner that outputs directly to SD card for easy transfer, or one that connects to a computer for immediate editing and organization. Your patience level and the size of your collection should dictate how much priority you place on scanning speed versus other features.
Most modern 8mm film scanners operate as standalone devices that save directly to SD cards, and this is generally the preferred approach for several reasons. Standalone operation doesn’t tie up your computer, allows you to set up the scanner anywhere in your home, and simplifies the workflow. The Kodak Reels, Magnasonic, and most other dedicated film scanners follow this standalone model. You simply insert an SD card, start scanning, and transfer files to your computer later for editing or sharing.
Computer-connected scanners like the Plustek 8300i serve a different purpose – they’re designed for professional-quality still image scanning where you need immediate access to powerful software like SilverFast. This approach makes sense for serious photographers doing high-resolution negative scanning, but it’s overkill for most home movie digitization projects. The advantage of computer connection is the ability to use sophisticated software for real-time adjustments and quality control. The disadvantage is that your computer becomes essential to the scanning process, and you may face software compatibility issues.
Here’s an important reality check: most consumer 8mm film scanners cannot capture sound. If you have sound film (typically Super 8 sound film from the 1970s-1980s), you’ll need specialized equipment beyond what’s covered in this guide. The scanners featured here are designed for silent home movies, which represent the vast majority of family film collections. Sound film requires either professional services or specialized equipment that can capture the optical or magnetic sound track synchronized with the image.
Before investing in a scanner, check your film cans for “sound” markings or inspect the film edge for sound tracks. Most family films are silent, in which case any of the scanners in this guide will work perfectly. If you do have sound film and preserving the audio is important, you’ll need to factor in professional service costs or investigate specialized sound film scanners, which are significantly more expensive than the options covered here.
The decision between buying a scanner and using a professional service comes down to both economics and quality considerations. Professional services typically charge $15-25 per reel, which means a 30-reel family collection would cost $450-750 for digitization. That’s roughly equivalent to buying a high-quality scanner like the Kodak Reels, but with one important difference: professional services use equipment costing tens of thousands of dollars that produces genuinely superior results. For those looking into audio equipment for their video projects, you might also be interested in our guide to wireless microphone systems.
However, professional services have drawbacks beyond cost. You’re shipping your precious, irreplaceable film through the mail, which carries some risk regardless of how careful the service is. Turnaround time can be weeks or months, and you have less control over the final results. DIY scanning gives you immediate access to your digital files and complete control over the process. For large collections (100+ reels), the economics strongly favor DIY – professional service costs would exceed $2000, while a quality scanner costs $400-500 and can be used indefinitely or resold when you’re finished.
Consider your film condition when making this decision. Professional services can clean and repair damaged film as part of the process, while DIY scanners may struggle with deteriorated film. If your film is in good condition and you’re comfortable with a learning curve, DIY makes sense. If the film is fragile, heavily damaged, or you simply don’t have the time for a multi-month project, professional services may be worth the investment despite the higher cost.
The Kodak Reels 8mm digitizer is our top pick for home use due to its frame-by-frame capture system and 8.08MP sensor that produces superior image quality compared to other consumer scanners. It handles both Regular 8 and Super 8 film, supports reel sizes from 3 to 9 inches, and operates as a standalone device with no computer required. The large 5-inch LCD screen makes monitoring your progress easy, and while the 25-minute processing time per reel is slow, the quality results justify the investment for serious home preservation projects.
DIY digitization costs range from $100 for budget scanners to over $500 for premium models like the Kodak Reels. Professional services typically charge $15-25 per reel, meaning a 30-reel collection would cost $450-750 for professional digitization. Factor in SD card costs ($10-30) if not included with your scanner. For large collections over 100 reels, DIY becomes much more economical than professional services, potentially saving thousands of dollars.
Yes, home digitization is entirely possible with modern consumer scanners that make the process accessible to anyone. Standalone scanners like the Kodak Reels and Magnasonic require no computer connection – simply load your film, insert an SD card, and start digitizing. The process is slow (20-30 minutes per 3-inch reel) but straightforward. Expect a learning curve as you get familiar with film handling and scanner operation, but most users become comfortable after 2-3 reels. The quality from modern home scanners is surprisingly good, suitable for sharing with family and viewing on modern devices.
Regular 8 film (introduced 1930s) has larger sprocket holes and smaller frame area, while Super 8 (1960s) has smaller sprockets and larger frames. Some scanners only handle one format, but quality scanners like the Kodak Reels accommodate both with no adjustments needed. The physical film width is the same (8mm), but the different sprocket hole positions mean incompatible reel loading in scanners designed for only one format. Super 8 is more common in family collections from the 1960s-1980s, while older footage is likely Regular 8. Always check your film format before purchasing a scanner.
Expect to spend 20-30 minutes scanning a 3-inch (50-foot) reel on most consumer scanners. Frame-by-frame systems like the Kodak Reels take approximately 25 minutes per reel, while real-time capture systems may be slightly faster but produce lower quality. A 5-inch (200-foot) reel typically takes 60-90 minutes. For a typical family collection of 20-30 reels, budget 10-15 hours of active scanning time. Add time for film inspection, reel changes, and SD card transfers – most projects require 20-30 hours total. Large archives (100+ reels) become multi-month projects if scanning part-time.
Professional services use equipment costing $20,000+ that produces genuinely superior quality compared to consumer scanners, with better color accuracy, stabilization, and scratch removal. However, at $15-25 per reel, costs add up quickly – $450-750 for a 30-reel collection versus $400-500 for buying your own scanner. Consider professional services if your film is damaged, you need high-quality results for archival purposes, or you lack time for DIY. DIY is better if you have many reels, want control over the process, or enjoy hands-on projects. For large collections, DIY is much more economical.
After months of testing and evaluation, the Kodak Reels 8mm digitizer stands out as the best overall choice for most home users, offering frame-by-frame capture quality that approaches professional results at a consumer price point. The 8.08MP sensor produces superior image clarity that genuinely preserves your memories with fidelity that cheaper scanners can’t match. While the 25-minute processing time per reel requires patience, the results justify the investment for anyone serious about preserving their family film collection.
Budget-conscious buyers should consider the Magnasonic FS81, which delivers acceptable quality at a more accessible price point. For serious photographers and archivists who demand the highest quality, the Plustek OpticFilm 8300i Ai offers professional-grade 7200 dpi scanning with powerful SilverFast software, though it requires a substantial investment of both money and time to master.
Remember that film deterioration waits for no one – those reels in your attic are deteriorating every day, and once vinegar syndrome sets in, the footage is lost forever. Whether you choose DIY scanning or a professional service, the most important thing is to start the digitization process before it’s too late. Once your films are safely preserved as digital files, you can share them with family members, create backup copies, and ensure those precious memories survive for future generations. If you’re planning movie nights to showcase your newly digitized family films, check out our recommendations for outdoor projectors for movie nights.


