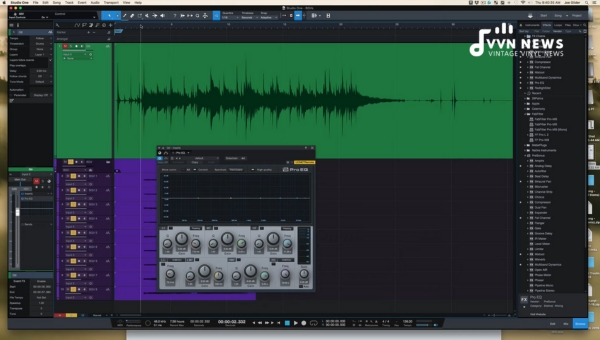
Immersing myself in the intricacies of sound engineering over the years, I’ve discovered that audio mixing is an art form all its own.
The ability to blend various sounds and frequencies into a harmonious scenario truly is a skill that’s honed with time and experience.
Whether you’re a seasoned professional or a novice just starting out on this exciting journey, understand that it’s these fundamental audio-mixing tips & techniques that will help you perfect this craft.
Starting from understanding different styles of audio mixing to the nuts and bolts of gear usage, sound arrangement, equalization, and much more – there’s a world waiting to be explored.
By dipping your toes into these fundamental audio mixing tips & techniques, you’ll soon discover how simple yet intricate maneuvers can transform the quality of any soundscape significantly.
Every great sound mixer began with fundamentals before they proceeded to create sonic masterpieces.
What Is Audio Mixing?
Audio mixing is a process in sound engineering that involves the blending of multiple ‘sound sources’ into a single one.
These sources could comprise various instruments, vocals, ambient recordings, or even orchestrated sound effects.
At its core, audio mixing reshapes the auditory elements contributing to a track, creating a final version that presents a well-balanced and harmonious auditory journey.
Also Read: Can We Mix Bass In Stereo? 2025 [Mixing The Kick Drum & Bass]
Importance of Audio Mixing
The importance of audio mixing cannot be overstated. Utilized properly, it enhances your sonic landscape and allows individual elements within your track to coexist without overpowering one another.
It refines and polishes the raw elements within your composition, ensuring each sound embodies its potential fully while contributing positively to the overall piece.
A well-mixed track presents an experience where every element earns its rightful place in the sonic panorama nothing should feel out-of-place or jarring.
Audio mixing allows for the manipulation of tones and spatial effects (including panning), helping to create depth and space within your soundscape.
In commercial terms, good mixing improves your production’s professionalism and appeal.
Whether you’re dabbling in music production podcasting or anything in between achieving clarity and balance through audio mixing can make all the difference between amateurish results or something truly memorable.
Understanding the Basics of Audio Mixing
An understanding of the essentials of audio mixing will augment your productivity and creativity in countless ways. Three pillars to grasp include:
- The importance of sound frequencies;
- The significance of audio dynamics; and,
- The concept and value of signal flow.
Importance of Sound Frequencies
In the world of audio mixing, different sound frequencies associated with various elements within a track.
Specific frequency ranges relate to different instruments and vocal pitches, dictating their placement ‘low’, ‘mid’, or ‘high’ within the sonic spectrum.
During the audio mixing process, one employs equalization (EQ) to adjust specific frequency areas precisely, thus manipulating timbre and blending sounds harmoniously together.
An understanding of sound frequencies positions me to make educated decisions concerning EQ settings.
I am able to accentuate the vital attributes of a sound or reduce unwanted ones based on their respective frequencies.
Knowledge of Audio Dynamics
Audio dynamics is a term that describes volume level variations within a mix – they can make or break the emotional impact potential in your music.
Two significant parameters here are Dynamic Range and Compression:
The Dynamic Range constitutes the quietest (peak) to loudest parts in your mix – preserving dynamic range can preserve naturalness in music playback while providing available headroom for necessary volume enhancements later on (during mastering).
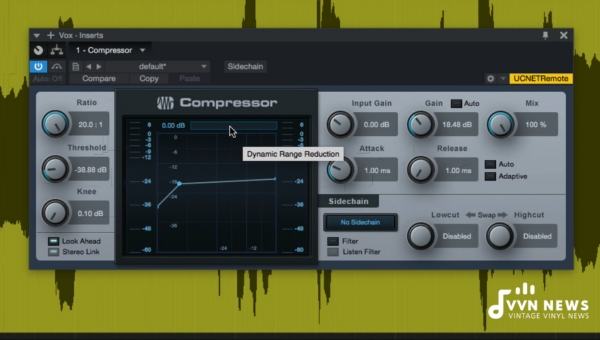
Compression reduces dynamic range – it brings down loud signals while low-level signals are untouched or amplified.
Effective use of compression makes each component audible, contributing balance/consistency yet retaining musical expressiveness when done right.
Understanding Signal Flow
Finally, good knowledge about signal flow might be your hidden weapon as an audio engineer – it is essentially how audio data travels through various stages within your setup/mixing console (from input channels through output).
Understanding signal flow enables me to pinpoint where exactly problems arise whenever issues spring up be it noise, distortion, or simply silence where there should be sound.
It also allows for creative routing such as sends/effects placement for parallel processing or bussing multiple tracks together for uniform processing.
By delving into these fundamental areas – sound frequencies, audio dynamics, and signal flow-, you’re setting strong foundations upon which your mastering house will stand.
Also Read: Studio Headphones Vs Studio Monitors 2025 [Mixing With Both]
25 Fundamental Audio Mixing Tips & Techniques
In an effort to help you navigate this fascinating audio-mixing journey, here are 25 fundamental techniques.
By making these practices second nature, you’ll be well on your way to developing a discerning ear and a keen understanding of the complexities involved in audio mixing.
1. Balance and Panning
The act of balancing entails manipulating the ‘level’ or ‘volume’ of an audio signal. It defines how loud or soft each element will be in relation to other elements within your mix.
Panning, on the other hand, involves assigning each audio track its specific location within a stereo field (left, right, or center).
Both techniques play integral roles in creating depth and spatial significance in your mix.
- Balance: Start by setting levels for each track before adjusting each track’s level relative to the others. This ensures every sound source has its unique space and does not overpower other elements.
- Panning: Arrange sounds across the stereo field to prevent frequency build-up and create a sense of space. For instance, bass frequencies and vocals are usually positioned at the center while instruments like guitars and keyboards get panned to varying degrees.
2. Equalization (EQ) Basics
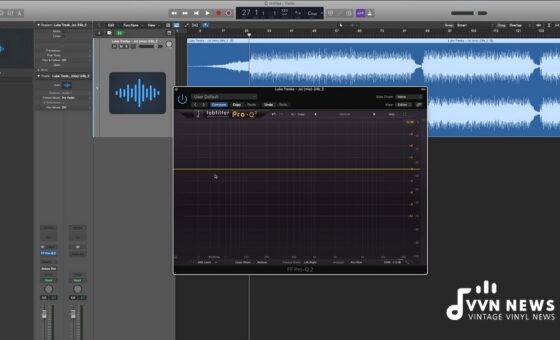
Equalization is an essential process used to balance frequencies within an audio file. Simply put, EQ boosts or reduces frequencies to shape the tonal characteristics of audio signals.
- Understanding frequency bands is crucial here – low frequencies carry bass sounds while high frequencies hold treble sounds.
- When applying EQ, try cutting problematic frequencies first before boosting desired ones instead of resorting exclusively to boosting – this is known as subtractive equalizing.
- Use narrow boosts (high Q) to sweep across the frequency spectrum; when you find a frequency that sounds problematic when boosted, reduce it.
3. Dynamic Range and Compression
The dynamic range in an audio mix refers to the difference between the softest and loudest parts of a track.
It is critical because it plays a significant role in creating tension, heightening emotion, and capturing listener interest.
Conversely, compression is a technique used to control or modify the dynamic range of an audio signal. It essentially reduces the volume of loud sounds or amplifies quiet sounds, thus ‘compressing’ the dynamic range.
To utilize compression effectively:
- Start by setting your threshold at a point where only the peaks of audio feel out of place.
- Apply a minimal compression ratio (2:1 or 3:1) ensuring that subtlety is maintained in your sound.
- Adjust your attack time correctly based on whether you wish to alter either the transient (short span) or sustained (longer term) aspects of a sound.
4. Using Reverb Effectively
Reverb can create space and depth within your mix – if used artistically, it can lend ambiance and character to an otherwise dry recording.
Excessive or poorly applied reverb can also smear clarity, cause muddiness, or push elements too far back in a mix.
Here are some techniques for using reverb effectively:
- Use pre-delay to separate the source sound from its reverberation, consequently improving clarity.
- Cut low frequencies on reverb returns to minimize clutter or rumble.
- Turn down your reverb while mixing – if it still enriches your mix even at low levels, then you’re likely using it effectively.
5. Delving into Delay Effects
Delay effects produce repeats (or echoes) of a signal and you can use them creatively for various purposes – from thickening tracks up with short slapback delay tactics to creating enveloping soundscapes with longer echo-based techniques.
To master delay effects:
- Adjust feedback controls for altering repeat frequency.
- The time settings should be synced with your music’s tempo for rhythmic coherence.
- Pan delayed signals opposite their original source for enhanced stereo width.
6. Parallel Processing Techniques
Parallel processing is when you duplicate audio tracks and apply processing on one version while leaving another untouched – blending these creates unique textures without affecting the original signal dramatically.
A popular usage includes parallel compression – used commonly in drums where one signal is heavily compressed for punchiness which later gets mixed with an uncompressed version that retains natural dynamics.
-Try heavy EQ on duplicate tracks to introduce different tonalities, blending these lets you retain the original tone while infusing added complexity simultaneously.
7. Sidechain Compression
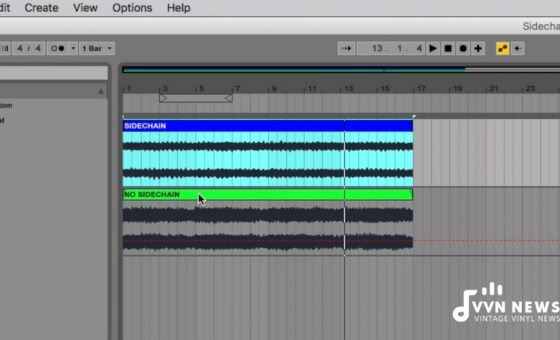
Sidechain compression is a powerful mixing technique that allows one audio source to automatically lower (or ‘duck’) the level of another based on its volume.
This technique is pervasive in many music genres perhaps most notably in dance music, where it assists with making the kick drum prominent in the mix and creates a pulsating effect with other instruments.
To implement sidechain compression, follow these steps:
- Add a compressor plugin to your track that needs to be ‘ducked’.
- Enable the sidechain function on your compressor.
- Select the audio source that will control the compression as your ‘key input’ or ‘sidechain input’.
- Begin adjusting parameters: Threshold level, Ratio, Attack, and Release times to taste.
Also Read: 15 Best Vocal Compressors of 2023 [Improve Your Vocal Mixing]
8. High-Pass and Low-Pass Filtering
High-pass filter (HPF) and low-pass filter (LPF) are fundamental EQ tools used by every sound engineer to sculpt the frequency spectrum of their mix dynamically.
- High-Pass Filter: Removes low frequencies from an audio file—permitting frequencies higher than a certain threshold (the “cutoff”)’ to ‘pass through’. An HPF can assist you in cleaning up muddy mixes by getting rid of unnecessary low-end information from non-bass instruments.
- Low-Pass Filter: Removes high frequencies from an audio file—allowing frequencies lower than the cutoff point to break through. An LPF may be used for removing overly harsh or shrill high-end information from tracks when needed.
9. Creating Stereo Width
Creating Stereo Width is a critical technique in audio mixing that gives the illusion of space and depth to your tracks, which in turn, enhances the listener’s experience.
Careful placement of elements within the stereo field can help each instrument stand out while also providing cohesiveness to your mix.
Here’s how you may engage with this:
- Use panning strategically: Pan different elements within your stereo field.
- Employ a stereo imaging plugin: This can help enhance stereo width. Use it sparingly as too much expansiveness can result in a disoriented mix.
- Use delay techniques: Simple delays can create a perception of space by bouncing sounds around left and right speakers.
10. Understanding Phase and Phase Cancellation
Phase refers to the position of a wave within its cycle at any given time. When two identical frequencies are playing together but at differing points in their cycles, they’re said to be ‘out-of-phase’.
Without careful attention, this can lead them into phase cancellation, where two waves cancel each other out when they’re perfectly out-of-phase.
Avoiding phase cancellation involves multiple efforts:
- Proper mic technique during recording: Reducing phase issues during recording is effective.
- Using dedicated plugins: These highlight any phase relationship issues between your tracks to address them effectively.
- Corrective EQing: Carving out overlapping frequencies using an EQ is also beneficial when handling phase cancellations.
11. Mixing in Mono
Mixing in mono may seem counterintuitive to many, especially when stereo is the current norm in music and media.
However, there’s much to be gained by practicing this antique technique. Mixing your soundtracks in mono allows you to perceive the balance of different audio elements at a fundamental level, regardless of their placement within the stereo field. It prevents complications due to phase cancellation which might not become obvious during a stereo mix.
- Flatten your audio’s stereo field temporarily.
- Adjust the level and tone of each track until you achieve an optimum balance.
- Regularly switch between mono and stereo to gauge the transformation your mix undergoes.
Mixing in mono can help highlight issues that aren’t detectable when drowned out by the binaural richness of a stereo mix.
12. Reference Tracks for Clarity
Reference tracks serve as a practical benchmark for your audio mixing process, yielding clarity and focus.
They are professionally mixed and mastered songs that share sonic characteristics with the music you’re working on.
By comparing your mix to these ‘references,’ you can set a standard for your dynamic range, balance, tonal quality, stereo width, and more.
- Choose a reference track similar to the genre and energy of your mix.
- A/B test between your mix and the reference track periodically.
- Apply EQ, compression, reverb, volume adjustments, etc., lessoned from the reference.
13. Fading and Automation
Fading and automation play key roles in refining your mix. They allow you to control changes in volume or effects over time automatically.
- Fading at the beginning or end of a track can eliminate unwanted noise and create smooth transitions.
- Automation is excellent at emphasizing (or de-emphasizing) certain elements during specific points of the song without affecting other sections.
- From automating EQ changes in particular sections to manipulating send levels for delay or reverb effects – there is a lot automation can do if used tactfully.
14. Subtractive EQ Method
Subtractive EQing revolves around minimizing unwanted elements in an audio track rather than increasing desired sound frequencies.
This approach generally results in cleaner-sounding mixes compared to additive EQing which might introduce distortion or tonal harshness when overdone.
Here’s how you generally apply subtractive EQ:
- Identify resonant frequencies causing issues (like muddiness or harshness) using an analyzer.
- Dip these problematic frequency areas down before experimenting with boosting other areas if needed.
- Take care not to excessively cut frequencies which might make your song sound thin or hollow.
15. Adding Harmonic Excitement with Saturation
Saturation is a powerful audio mixing tool that often goes unnoticed. It adds harmonics to the original sounds, adding depth, warmth, and life.
When applied subtly, saturation can give a mix of that “vintage”, analog feel making it feel more “natural” and less digital.
To apply saturation:
- Identify the track you want to enhance.
- Select a saturation plug-in from your DAW (Digital Audio Workstation).
- Apply the plug-in subtly – slight touches make a significant impact.
- Mix down and compare the before/after effects.
16. Utilizing Multiband Compression
Multiband compression is a technique where you compress different frequency bands independently. It provides greater control over your mix, allowing you to sculpt the audio more delicately and with precision.
This technique is particularly beneficial when you want to limit certain frequencies without affecting others – for instance, compressing bass frequencies while leaving higher frequencies untouched.
Here are some steps to use a multiband compressor:
- Select a multiband compressor from your DAW.
- Choose the frequency bands you wish to compress.
- Adjust the threshold, ratio, attack, and release for each band.
- Customize further with your desired outputs.
17. Frequency Masking Awareness
Frequency masking can result in a muddy mix as it occurs when two or more instruments within the same frequency range compete for attention.
Awareness about this phenomenon is key in order to maintain a balanced and clear mix.
To fight frequency masking:
- Be aware of the frequency range of each instrument in your mix.
- Use EQ to cut certain frequencies in one instrument to let another stand out.
- Avoid too many layers within the same frequency spectrum.
18. Bus Processing for Cohesion
Bus processing refers to applying effects on an entire group (or “bus”) of tracks at once rather than individual ones.
This method can help achieve cohesion in your mix by treating all elements of a group (like drums or backing vocals) consistently.
Here’s how you can create bus processing:
- Group related tracks together (for example, all drum elements).
- Send these grouped channels to a separate bus/auxiliary channel.
- Apply the chosen effects (EQ, reverb, compression, etc.) on this bus channel.
Each mixing technique has its own unique functionality and purpose.
It’s equally vital for every audio engineer or music producer, regardless of expertise or skill level, to understand and leverage these techniques effectively for optimal outcomes.
19. De-using Vocals
Vocals often carry strong ‘s’ and ‘t’ sounds. These high-frequency pops, known as sibilance, can feel sharp or grating in a mix.
De-essing is a technique that reduces these harsh frequencies, creating a smoother vocal mix.
- To de-ess vocals, you first need to identify the sibilance frequency in your vocal recording. You can do this by using an EQ and sweeping through the high-frequency range (typically 5 kHz to 9 kHz).
- Once you’ve found the sibilance frequency, insert a de-esser plugin on your vocal track. Set the de-esser’s detection frequency to the identified sibilance frequency.
- Adjust the threshold of your de-esser until it’s only activating on ‘s’ and ‘t’ sounds. Be mindful not to overdo this process as it can lead to muffled or lisping vocals.
Also Read: 20 Best Volume Pedals [Top Picks For Controlling Your Sound]
20. M/S Processing for Precision
The M/S (Mid/Side) processing is a remarkable technique that allows you precise control over the stereo field.
In essence, it manipulates the center (Mid) of your mix separately from the sides (Side).
- Mid-channel tends to comprise the vocals, kick, snare, and bass—elements that you typically want to be centered in your mix. The Side channel adds perceived width by including elements that are different in the left and right channels.
- To utilize M/S processing, first, ensure your audio plugin supports this feature. Adjustments made to the ‘Mid’ channel will affect sounds panned to the center of your stereo field while changes to the ‘Side’ channel affect sounds on the periphery.
- Use M/S equalization for precise frequency control. Boost or reduce specific frequencies in either channel allowing for clear separation between central and peripheral elements.
21. Utilizing Binaural Panning
In sound engineering, binaural panning creates a 3D stereo sound sensation for listeners – making it seem as if sounds are coming from different directions.
- Unlike standard panning which only controls the volume between left and right channels, binaural panning manipulates phase and time delay for each ear, creating a lifelike sonic environment.
- To use this technique effectively in an audio mixer software that supports it: choose ‘Binaural Pan’ or a similar option from your pan settings. Dragging towards left or right will determine where in our hypothetical 3D space our sound is positioned.
22. Mixing for Different Playback Systems
Listening to your mix on various speaker systems helps ensure it translates well across diverse listening scenarios be it headphones, car systems, or studio monitors.
- You have to anticipate how listeners will consume your track and try mimicking those setups during mixing.
- Consider using reference tracks that are professionally mixed and mastered in a similar genre/style during the mixing session. This can help achieve a balanced sound across various systems.
23. Spatialization and 3D Audio
Spatialization is a technique used to convey a sense of space in your mix. This process involves conscious panning decisions, depth positioning via reverbs, and volume balancing.
Here’s how you can maximize these techniques in your mixes:
- Panning: Start with your main elements such as vocals, kick, snare, and bass mostly center-panned. Then assign instruments to either the left or right channel as per their prominence.
- Reverb: Use reverb sent from multiple tracks to single ‘room’ reverbs for a coherent spatial image.
- Volume Balancing: Remember that sounds should be louder the closer they are meant to appear.
3D audio takes spatialization much further, creating an immersive multichannel listening experience that emulates the real world’s omnidirectional listening environment.
24. Creative Use of Effects
Mastering the use of audio effects will inject life into your mix.
- Delay and Echo: Try using differing delay times on each stereo channel for some captivating stereo effects.
- Distortion: A bit of tube or tape saturation on a lackluster vocal track can instantly add character.
- Modulation Effects: Don’t shy away from experimenting with phasers, flangers, and chorus effects to add an edge.
Remember, less is usually more so use these devices subtly for flavor and coloration.
25. Continuous Learning and Experimentation
Learning in the audio industry is a never-ending journey.
- Stay updated: Technologies change at warp speed today. Be up-to-date with the newest plugins or hardware processors.
- Networking: Attend workshops or webinars, join online producer forums where you can learn from others’ experiences too.
- Experimenting: Trial and error also contribute significantly to learning in this field.
Acknowledge that there are no definitive rules in mixing–only guidelines–and it’s absolutely alright to make mistakes while trying new ideas!
Tips for Successful Mixing Session
Proper Preparation
Investing time in proper preparation prior to the actual mixing session plays a pivotal role in achieving optimal results.
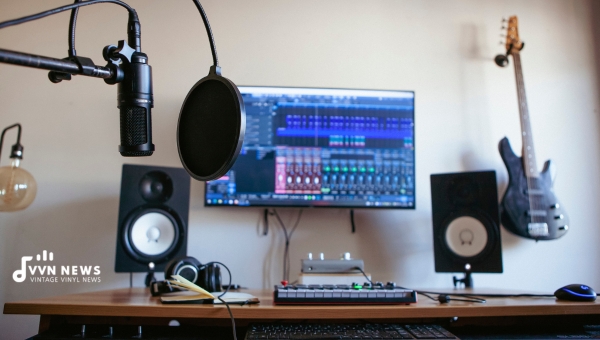
Beginning with a clutter-free and organized workstation can significantly impact your productivity and efficiency.
A clean, systematic workspace allows you to focus entirely on the creative process without any unnecessary distractions or time sinks.
After setting up, carry out some routine checks and tune-ups:
- Ensure that all your essential software, plugins, and hardware are functioning correctly.
- Clear out unnecessary files in your DAW to free up CPU space for smoother operations.
- Prep all your tracks by naming, color-coding, grouping related tracks together, and performing initial volume balancing.
Also crucial is developing a clear roadmap for yourself by identifying what you hope to achieve in each session (for instance, getting bass and drums to mesh well or nailing the vocal reverb).
This will guide your decision-making process as you mix.
Listening at Low Volumes
Another essential habit that can significantly enhance your mix quality is adhering to low volume levels during most of the mixing process.
At high volumes, our ears naturally compress sounds, making it harder to make accurate mixing decisions what sounds balanced at high volumes may not necessarily translate well when played back at regular levels.
Committing to lower volumes also serves the added benefit of safeguarding your ears against potential hearing damage a hazard sound engineers often overlook that can nonetheless have long-term repercussions.
Breaks during Long Mix Sessions
Mixing demands taxing cognitive labor – it’s an exercise engaging both your creative faculties and technical acumen intensely over prolonged periods.
Overworking can result in ear fatigue which compromises our sonic perception leading us down a rabbit hole of poor mix decisions (have you ever found yourself wondering why the mix you were so proud of last night suddenly sounds subpar or unimpressive?)
To alleviate this risk while maintaining productivity over longer sessions:
- Schedule regular breaks, a 5-10 minute break every hour is sensible.
- Engage in non-sonic activities during these recesses – read a book, or take a stroll, it helps rest & refresh our auditory senses effectively.
These fundamental practices can spur efficiency and enhance decision-making during sessions ensuring that every minute spent brings you closer to creating superior soundscapes with meticulous balance & distinction.
FAQs About Audio Mixing
What are the basic audio mixing techniques?
Basic audio mixing techniques include balancing levels, panning, equalization (EQ), compression, reverb and delay, and automation.
How can I get better at audio mixing?
To improve at audio mixing, practice regularly, study the work of professional mixers, seek feedback on your mixes, and continue researching new techniques and equipment.
What gives better audio quality?
High-quality audio can be achieved by using a good microphone and signal path (including preamps), recording in a well-treated acoustic space, recording at the correct levels to avoid clipping or distortion, and making careful use of effects processing during mixing.
What is the best sound level for mixing?
The ideal sound level for mixing is around 85dB SPL (Sound Pressure Level). This level provides a good balance between detail in the quieter elements of a mix and avoiding listening fatigue.
What are the 4 stages of mixing?
The four stages of mixing usually include Preparation (importing tracks, checking phase relationships), the Static mix stage (balancing levels and pan positions without any processing), the Processing stage (applying EQ, compression, reverb, etc.), and the Automation stage (changing parameters over time to provide expression and interest).
Conclusion
Impressive audio mixing executes a delicate dance between science and artistry. It not only sends the message intended in your track but makes sure it is received with the desired impact.
The tips and techniques shared herein will help form a strong foundation to develop expertise in this craft.
Practice is key, so don’t be shy about experimenting with these techniques, making each process uniquely yours.
With time, you’ll uncover your distinctive sound and style, resulting in personal growth as a sound artist.
