For many musicians, achieving the perfect guitar sound can be quite a chase. One of the essential steps in this pursuit is guitar Amp Mic mixing, which allows you to shape the tone and impetus of your guitar sound significantly.
Quite often, I see aspiring musicians overlook this critical aspect, resulting in a sonic output that is less than optimal.
Through various digital audio workstations and other tech-heavy approaches, it’s easy to get overwhelmed when confronted with post-processing tasks.
Nonetheless, untangling the complex maze of amplifier microphones can transform an ordinary and flat guitar sound into something lush, harmonious, and unique.
If you hope to deliver that sublime performance or groove to your soulful creations, read on as we delve into the intricate world of post-processing on guitar amp mics!
Introduction to Guitar Amp Mic Mixing
Amp mic mixing is the first step in post-processing that brings out that distinct guitar sound.
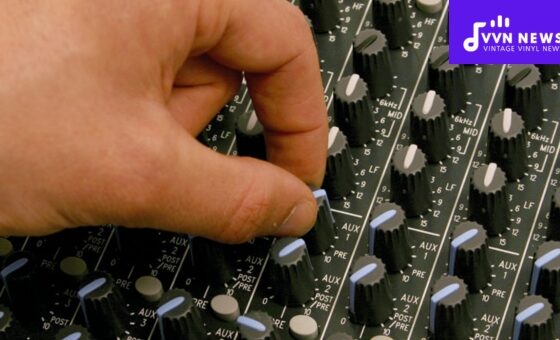
The process begins with strategically placing a microphone in front of the speaker of your guitar amplifier. This is crucial as the position of the mic will dramatically affect the tone captured.
Mastering amp mic mixing can add depth and versatility to your sound as you’ve honed the craft of playing your instrument to perfection.
As we explore further, you’ll discover that, like playing an instrument, mixing requires equal skill, intuition, and creativity to capture that ideal sound from a guitar amplifier microphone.
Importance of Post-Processing in Guitar Amp Mic Mixing

Often, musicians undervalue the importance of post-processing in creating that touch of excellence to their guitar sound.
While the initial sound recording is crucial, what you do after this process can further refine and enhance your music.
Enhancing the Tone
Post-processing can aid you in manipulating the tone to fit your desired sound or blend into a particular genre of music.
You can tweak the treble, mid, and bass frequencies to develop an individual sonic palette.
Music production has gradually leaned towards more techniques within digital audio workstations (DAW), where plugins offer thorough control over your desired result.
Managing Noise and Imperfections
Using post-processing methods, unwanted noise and harshness that inevitably crop up during recording can be effectively managed or eliminated.
Through tools like equalization and noise reduction plugins found in most DAWs, you can easily tackle these problems.
Creating a Balanced Mix
Balance is key in any mixed track. With multiple instrument tracks competing for attention, guitars should be heard without overshadowing other essential parts of a mix.
By adjusting volumes, panning instruments on the stereo field, or enhancing specific frequencies – you are guaranteed a balanced mix where every instrument receives its deserved limelight.
Post-processing goes beyond just amplification. It opens up a new creative landscape for exploring different textures and tones.
So delve headfirst into Ableton, Pro Tools, or any DAW that suits your needs and experiment with integrating this vastly versatile tool into your music production workflow!
Equalization Techniques for Guitar Amp Mic Mixing
Equalization (EQ) is a fundamental aspect of post-processing for guitar amp mics.
It allows you to mold and shape the sonic landscape of your recording, providing control over frequency-specific volumes and enhancing the overall mix.
Understanding Frequency Ranges
The cornerstone of efficient EQ-ing lies in understanding the frequency range of a guitar, which typically spans 80 Hz to 5 kHz. Here’s a bird’s-eye view:
- Bass Frequencies (80 – 200 Hz): This is where you’ll sense the “thickness” or “weight” of your guitar sound. Too much can make your sound boomy or muddy, while too little may make it thin and weak.
- Mid Frequencies (200 Hz – 2 kHz): This range majorly determines the character of your guitar tone. The lower mids can add warmth, while the higher mids contribute to bite and presence in a mix.
- High frequencies (2 – 5 kHz) add sparkle and clarity.
Also Read: Multiband Compression And EQ 2025 [How And When To Use?]
Practical EQ Techniques

Now, let’s delve into some practical EQ techniques to harness these frequencies:
1. Cutting Rather Than Boosting: One fundamental principle in EQ-ing is that cutting undesirable tones is usually better than boosting desired ones. Excessive boosting can often lead to an unnatural or harsh sound.
2. High-Pass Filtering: Using a high-pass filter allows you to remove bass frequencies that are often unnecessary for guitar recordings. This technique can clean up your overall mix by eliminating low-frequency rumble or noise that might interfere with other instruments.
3. Selective Notch Filtering: In some instances, there might be specific problematic frequencies causing issues like feedback or resonances in your amp recording. Notch filters allow you to dial back these specific areas without affecting the overall tone.
4. Use Multiple EQs: Don’t limit yourself to using one EQ plugin.
Post-processing on guitar amplifier microphones is both an art and a science. It requires trial and error, experimentation, and a good ear.
Compression in Guitar Amp Mic Mixing
Compression plays an integral role in controlling the dynamic range of your guitar sound when utilized correctly during post-processing.
It ensures that the sound remains consistent, reducing volume peaks while raising quieter moments, leading to a more balanced tone.
Understanding the Basics
A compressor activates when your guitar’s volume hits a set threshold. Above this level, any further increase in volume is reduced according to a ratio set on your compressor. This can create a more uniform sound, allowing subtle parts of your playing or particular sonic characteristics of the guitar and amp to be heard more clearly.
Critical Compressor Parameters
There are several critical parameters on most compressors:
- Threshold: This determines the level at which the compressor starts working.
- Ratio: Dictates how much compression is applied once the threshold is exceeded.
- Attack: The speed at which compression begins after surpassing the threshold.
- Release: The time it takes for compression to stop after dropping below the threshold.
Adjusting these settings allows you to tweak your compressor to provide enough control over your output signal without choking your guitar’s natural dynamics.
Also Read: Stereo Compressors Explained [How They Shape Your Audio Experience]
Effective Use Of Compression
Getting accustomed to using compression may take some time; it’s more about tweaking and experimenting.
Not to over-compress as it might remove dynamics and nuance from your performance.
- Set a light-to-medium ratio (2:1 – 4:1).
- Gradually reduce the threshold until you notice that the dynamic range has become controlled.
- Adjust attack and release times for a transparent effect (quick attack times can reduce pick impact, while slow release times may result in decreased contrast between note volumes).
Post-processing on guitar amplifier microphones should retain expressive elements in your music while providing a consistent sound that sits well within an entire mix.
Using Multiple Mics for Guitar Amps

In some situations, using a single microphone may not fully capture the depth and nuances of your guitar’s outputted tone.
That’s where multiple mic techniques come into play, providing a more full-bodied and more detailed capture of your amp’s sound.
Why Should You Consider Using Multiple Mics?
Combining different microphones can significantly enhance the tonal complexity and richness of your audio recording.
Each mic adds its character to the mix, allowing you to explore new dimensions in your guitar sound.
Furthermore, altering their positioning or switching between dynamic, condenser, or ribbon mics is like painting with an expanded color palette – you have much more potential to create a unique sonic landscape.
Here are three steps that will guide you to use multiple mics effectively:
- Positioning: Start by placing one dynamic mic up close to catch the detailed output and another condenser mic further back capturing broader tonal elements. Balancing these two will give a rich blend of both details.
- Direction: Try setting each microphone at different angles (one straight on and one at 45 degrees, for example).
- Switching Between Mics: Experiment with different types and brands of microphones to discover unique combinations that suit your style.
When mixing the tracks, aim for balance rather than dominance. Blend so that each microphone enhances the other; do not let one overpower the others. After all, it’s about creating a symphony rather than a solo performance.
With patience and practice, using multiple mics can revolutionize how you record guitar amps – making your music richer, bolder, and distinctively ‘you’.
Also Read: 25 Tips For Recording And Mixing Vocals In 2025
Recording Off-Axis for Unique Guitar Amp Mic Sound
Off-axis recording is often overlooked, but it’s undoubtedly one of the most effective methods to create a unique guitar amp mic sound in post-processing.
The term “off-axis” refers to directing the microphone slightly away from the speaker’s center, typically at an angle.
Dynamics of Off-Axis Recording
When you record off-axis, you capture less direct sound from the speaker, capturing more room ambiance.
This provides a darker tone when compared to on-axis (direct) recording. It’s all about striking a balance that serves your music best.
Proper Angle for Off-Axis Recording
In practicality, steeper angles tend to produce more significant variations in sound.
A good rule of thumb is starting with a 45-degree grade and then altering it slightly per your taste and requirement.
Adding Depth with Off-Axis Recording
Off-axis recording will add depth and variety to your sonic palette since differing angles capture different tonal elements from the amplifier.
Experimenting with different off-axis positions can give you an impressive range of tonal colors during post-processing.
While often termed “the road less traveled” while recording guitars, off-axis microphone placement can lend your guitar amp mic sound some exquisite personality traits!
Nonetheless, trial and error remain at the heart of understanding this technique in its full glory.
Tips for Perfecting Guitar Amp Mic Mixing During Mixing

Delving into the art of mixing, here are practical and valuable tips to perfect your guitar amp mic mixing during post-production.
1. Avoid Clipping:
Ensure that your microphone isn’t clipping during recording–having overly loud sound sources can distort your recordings, leading to unwarranted distortion in your tracks.
Test this by playing the loudest part of the piece and adjusting levels accordingly.
2. Room’s Acoustics Matter:
Don’t forget about the room’s acoustics. Though some see it as an extraneous factor, it can significantly contribute to capturing the unique texture and flavor of your guitar’s sound, making it feel more organic and vibrant.
3. Balancing Levels:
An essential part of mixing is finding a delicate balance between elements in a track, including guitar, bass, drums, vocals, etc. Keep experimenting with volume levels until you find a happy equilibrium where nothing overshadows another element.
4. Time alignment:
If you’re recording with multiple microphones, ensuring proper time alignment prevents phase issues, resulting in cleaner sound output.
5. Use High-Pass Filters:
Applying a high-pass filter (HPF) can free up space in the mix by eliminating unnecessary low-end frequencies from your guitar tracks that may interact negatively with other elements like bass or kick drum.
Perfecting this process usually requires patience and experimentation–you might not get it right initially, but perseverance will inevitably lead you toward that sonic sweet spot!
It’s all about finding what works best for you and bringing out the most captivating qualities of your instrument.
FAQs About Guitar Amp Mic Mixing
What is the purpose of post-processing on guitar amp microphones?
Post-processing helps to shape and refine the raw sound captured from a guitar amplifier microphone, enhancing the texture and clarity.
How does the placement of my microphone impact my guitar amp sound?
The mic’s position significantly influences the tone you capture. Placement closer to the speaker’s center can yield brighter tones, while toward the edge renders warmer tones.
What is equalization in amp mic mixing?
Equalization (EQ) in amp mic mixing refers to adjusting different frequency bands’ volumes to balance and shape your captured guitar sound.
Why use multiple mics for guitar amp recording?
Using multiple mics adds dimension and depth to your recording by capturing different tonal characteristics. This technique often yields a fuller, richer mix.
What does recording off-axis mean in amp mic mixing?
Recording off-axis refers to positioning the mic at an angle relative to the speaker instead of directly in front. This technique can produce a unique, softer tone.
Conclusion
To sum it all up, post-processing on guitar amplifier microphones is not something to be overlooked.
The careful application of EQ and compression techniques, strategic mic placement, and experimenting with off-axis recording can considerably enhance the sonic quality of your output.
The key here is never to stop exploring. As our playing styles evolve, our mixing skills should too. After all, post-processing is nothing but another instrument in a musician’s toolkit to paint their sonic canvas.