I’ve always been fascinated by how subtle changes in sound engineering can create profound impacts on our listening experience.
One particular phenomenon that truly captures my interest is the Haas Effect: Gain Depth & Width with a Slight Delay.
By weaving a slight pause or delay into the fabric of sound, we can perceive an enhanced degree of depth and richness.
Audio engineers and enthusiasts have long utilized this fascinating principle to create an immersive audio environment that leaves a lasting impression.
Honestly, it’s also pretty astounding how a little understanding of the Haas Effect can change their approach to sound design.
Even for the average person who enjoys playing with sound on their home computer, diving deeper into this intuitive principle could reveal an entirely new world of auditory possibilities lying just beneath the surface of their old stereo system, waiting to be discovered.
Here’s what you need to know about the Haas Effect and its potential to augment your listening experience like never before.
What is the Haas Effect?
The Haas Effect, also referred to as the precedence effect, is a psychoacoustic phenomenon named after Helmut Haas who described it in his 1949 Ph.D. thesis.
In layman’s terms, it’s all about how our brains process sound and determine where it’s coming from.
This principle works based on simple time differences between sounds reaching our ears.
When the same sound reaches one ear slightly (less than approximately 40 milliseconds) before the other, our brain perceives the sound as coming from the direction of the first ear to receive it.
This man-made delay plays with our natural audio perception and behavioral reflexes creating an illusion of depth and width in a stereo mix.
Let me break this down a bit:
- Precedence: Normally, when a sound source is off to one side of us, it will reach one ear before the other because of distance differences. Our brains use this delay, along with differences in volume levels, to determine exactly where a sound is coming from.
- Psychoacoustic Principle: Our brains are masterful data processors that can locate where a sound source originates based on these interaural time differences (ITD) and interaural level differences (ILD). To ensure we maintain this focus on direction rather than echo or reverb if two identical sounds reach us within code of each other, our brain treats them as if they came from the same source.
In music creation and mixing we introduce artificial delay to control these innate auditory behaviors for adding space and coordinates to sound panorama within a stereo field without changing its actual volume levels or tone color – that’s the Haas Effect put into practice.
The Haas Effect opens up idyllic vistas of auditory possibilities – providing us with a toolkit for manipulating the placement and space of each instrument within the stereo field which will make your music more immersive and profound. Isn’t that marvelous?
Application of the Haas Effect, like any other sound engineering tool, requires understanding and the right touch.
It should not be overused or it could have unintended results. In the right hands though, it can create a unique audio experience that engages listeners at a deeply instinctual level.
Also Read: What Is Proximity Effect? [Understand Its Impact On Audio Quality]
The Science Behind the Haas Effect
Understanding how our brains process sound localization is key to unraveling the essence of the Haas effect. So, let’s plunge headfirst into the scientific abyss and dissect this auditory phenomenon.
How Our Brains Process Sound Localization
Our brains have an uncanny ability to determine where a sound is coming from by processing the differences in which each ear perceives that sound. This ability to triangulate auditory sources is called sound localization.
So, how is sound localization achieved? The answer lies in two fundamentally vital concepts: Interaural Time Differences (ITD), and Interaural Level Differences (ILD).
Interaural Time Differences (ITD) and Interaural Level Differences (ILD)
On a broad spectrum, ITD and ILD are simply ways our brain uses to decode spatial information from the sounds we hear. Let’s dive deeper:
- Interaural Time Difference is all about time: it’s the difference in arrival time of a sound between two ears. Consider this – if a dog barks on your left side, your left ear will hear it slightly earlier than your right ear due to its closer proximity to the sound source.
- Interaural Level Difference, on the other hand, pertains to intensity: it’s all about volume differences. In that same scenario, your left ear would discern a louder bark than your right since it’s closer to the barking dog.
Our brains meticulously assess these disparities to decide where exactly a sound originates from.
The Role of Haas’ Research in Understanding Auditory Perception
Helmut Haas’s groundbreaking research has prominently shaped how we perceive hearing at its most fundamental level.
His preeminent research paper on The Influence of a Single Echo on The Audibility of Speech was one of the first comprehensive studies that delved into how our brains experience sound.
Specifically, Haas’s work explored the extent to which our brains ‘fuse’ two similar sounds heard in quick succession, treating them as a single sonic event.
This gives life to The Law of the First Wavefront principle, also known as The Haas Effect: a slightly delayed copy of a sound (up to 40 ms) will be perceived as coming from the same direction as its source and not from the location of the second, delayed source.
To put it simply, his research allowed us to tap into an extra dimension of sound. He opened our eyes (or should I say… ears?) to how subtle delays can drastically enhance our experience and perception of audio.
Haas’s discovery gives us an exciting tool for modifying the perceived direction and depth of sound in a stereo mix, bringing music production to a new level by creating an illusionary, broader, more immersive sonic environment.
The Haas effect is a testament to the fantastic interplay between science and art – giving us a deeper insight into how we perceive and experience music in terms of width and depth within the stereo field.
My advice would be to open your favorite DAW, play with these concepts, experiment with delay times, and balance between direct/delayed signals, but remember – use your ears!
Start painting your unique auditory landscapes by applying the Haas Effect, and you’ll have added another effective tool to your audio engineering toolbox.
Also Read: How To Teach Rhythm? [Effective Methods For Music Educators]
Reverb And the Haas Effect Sound
Before we delve into the interplay between reverb and the Haas Effect, it might be helpful to understand these terms individually.
Reverb, short for reverberation, refers to the way sound naturally bounces off surfaces in an environment and creates a sense of space within the context of audio production.
Imagine clapping your hands inside an empty cathedral; you’ll notice that the sound continues for several moments before fading out.
That trailing sound is reverb, a key component that audio engineers use to emulate various environments ranging from small studios to large halls.
Meanwhile, as we’ve previously touched upon, the Haas Effect exploits our brain’s intuitive understanding of sound directionality.
By slightly delaying one channel in a stereo signal (usually less than 40 milliseconds), the Haas Effect can accentuate or extend the perceived width and depth of an audio source within a mix.
Now that we have that cleared up, let’s explore how these two can work together.
Crafting Depth and Width
To create an illusion of depth in your mix, you’d use reverb. The more distant an object is from us, our ears detect more reflected sounds (reverbs) compared to directional sounds – this is how we perceive distance.
Thus by altering the amount of reverb on individual tracks in your mix, you control their perceived distance.
On the other hand, when looking to manipulate the perception of width within your stereo image – enter the realm of the Haas effect!
By introducing a slight delay between left and right channels, you make certain sounds seem coming from one or another side, thus creating a panoramic effect within the stereo field.
In terms of application:
- Determine where you want your audio source to “sit” in your sonic space.
- Apply reverb to create a sense of distance (depth).
- Use the Haas Effect judiciously – typically on overlapping frequencies – to enhance the perceived width of the audio source.
An important strategy while experimenting with both reverb and Haas is to continuously A/B compare your processed audio against the dry, unprocessed source.
This process helps highlight any shifts in tonal balance or unwanted side effects.
Both these techniques, when combined in the right proportions, can add a cinematic audio illusion of width & depth to your mix, making it more engaging for the listener.
But remember, as powerful as these tools may be, misuse or overuse can make a mix lose its clarity and definition. So use them wisely!
Haas Delay vs Panning
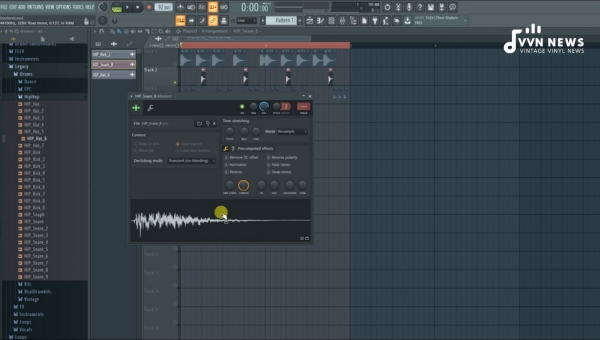
When it comes to widening the stereo image of a mix, two methods that often come up are the Haas effect, also known as Haas delay, and panning.
While both techniques seek to create depth and space within sound production, they do so in different ways and with distinct advantages and nuances.
What is Panning?
In essence, panning involves distributing a sound in a stereo or multi-channel sound field.
When mixing music, you can position various instruments and vocal tracks at different points from left to right in the stereo field.
Panning can strategically shift audio tracks between the right channel, the left channel, and somewhere in between.
How does Panning Compare to the Haas Effect?
Both panning and the Haas effect assist us in achieving that expansive stereo image we all strive for, but each uses fundamentally different methods.
- Positioning: While panning manually adjusts an audio signal’s volume balance between two channels to give the perception of position within the stereo field, the Haas effect accomplishes this via slight time delay differences between our ears.
- Width: The exceptional feature of using Haas delay is you can create an illusion of width without actually adjusting volume levels on any side as you would with traditional panning.
- Combination: What might amaze many is how compelling using these two methods together can be! You can pan an instrument off-center and then apply a bit of track delay on the opposite side; this gifts your production a wider feel without throwing off balance.
Although it’s important to remember that due to phase issues that may arise when applying delays (especially on mono playback systems), extra care needs to be taken when implementing both approaches together.
As with all aspects of music production and sound engineering, effectively utilizing these tools requires practice and fine-tuning.
Always trust your ears and never hesitate to experiment with different amounts of delay or different panning placements.
There’s no “one size fits all” solution when it comes to creating your unique sound signature.
Also Read: What Is Audio Clipping? [Digital Clipping Vs Analog Clipping]
Why Use the Haas Effect in Music Mixing?
When applied with subtlety and an understanding of its strength, the Haas Effect becomes a powerful asset in a producer’s toolset.
Let’s delve into the benefits and possibilities that adopting this approach could bring to your production process.
Greater Stereo Depth and Width
Firstly, the Haas Effect offers an efficient pathway to achieving greater stereo depth and width without changing volume or tone color.
Instead of struggling with complex post-production techniques, you can introduce a slight delay, giving the illusion of broader, richer soundscapes.
Clutter-Free Mixes
Another potential advantage is achieving clutter-free mixes. The delicate nature of the Haas Effect means it doesn’t add any physical elements to your mix.
So unlike panning or reverb, which could burden your mix with ‘too much going on’, this psychoacoustic hack maintains the makeup of your mix.
It neatly sidesteps excessive layering or problematic frequency overlap by introducing only subtle time shifts to change perception without altering actuality.
Artistic Scope For Layering Sounds
In my own experience, I’ve found that using the Haas Effect opens up artistic scope for layering sounds.
While other techniques have their merits as well, using an early reflection closely followed by a longer delay (not more than 40 milliseconds) allows one to mimic natural hearing response and make music that resonates at both intellectual and instinctual levels.
Reduced Phase Cancellation Risks
Lastly, let’s face it: some mixing techniques can introduce unwanted phase cancellation risks that could compromise your sound quality.
The Haas effect can offer similar depth and width effects but with a reduced risk of phase cancellation – thus ensuring your sound quality doesn’t get compromised.
Implementing the Haas effect in audio production isn’t about complicating things it is about enhancing what’s already there in a smart, perceptually-driven way.
Mastering it may take practice, but it’s certainly worth the effort for the added depth and clarity it lends to the overall soundscape.
How to Use the Haas Method?
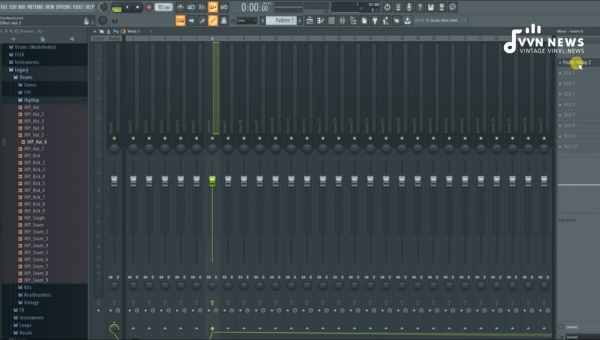
Implementing the Haas Effect in your mixes is an art that requires a fair understanding of your workspace, equipment, and, above all, the sound you want to achieve.
It isn’t just about plugging in numbers but creating an immersive auditory experience for listeners. Here’s how you can make it happen:
Step 1: Understand Your Mix
Before you start tweaking knobs or moving sliders, take a moment to understand your mix. What are the dominant instruments, vocals, or sounds? Where do they sit in the mix? Once you’ve dissected your mix into basic elements, it’s time to choose which tracks will benefit from the Haas Effect.
Bold Point: Not every track in your mix might need a Haas delay. Use it on select tracks where width and depth can enhance the overall sound.
Step 2: Apply Delay
Start by applying a delay on one channel of the stereo track (usually right). This delay is what creates that sought-after depth and width that we attribute to the Haas Effect.
Please note: Choosing exactly how much delay is applied depends upon your creative impulses and requirements.
Bold Point: Make sure not to exceed 40ms because, beyond that, listeners may perceive echo instead of depth.
Step 3: Balance Dry and Delayed Signals
Now, this part is crucial – balancing between dry (original) and delayed signals. When balance is skewed excessively towards either side, it can disrupt spatial perception, causing phase issues. Therefore, adjust levels carefully until you find what works best for your track.
Step 4: Monitor Results in Mono
Once you’ve adjusted levels and added delay, monitor results not only in stereo but also in mono. This will help you identify any phase cancellation issues that could flatten out your mix, an undesired effect.
Step 5: Subtle Adjustments
Monitor the newly mixed track with other elements within your mix. Make necessary gain or EQ adjustments on the track to sit well within the whole mix. Remember, subtlety is the key when using Haas Effect.
Also Read: What Is Sidechaining? [5 Best Sidechain Compression Plugins]
Challenges and Considerations when using the Haas Effect
Like all tools and techniques in sound engineering, the Haas Effect is not without its pitfalls and considerations.
While it can undeniably enhance the depth and width of your soundscape when used thoughtfully, a heavy-handed or misguided approach may lead to unforeseen complications.
Here, we delve into some of the potential challenges that come with applying the Haas effect:
Phase Cancellation Problems
One of the primary concerns tied to the use of the Haas Effect is phase cancellation.
Essentially, phase cancellation occurs when waves from two identical sounds meet at opposing points in their cycles, causing them to cancel each other out.
The application of artificial delays, as per the Haas effect, can easily give rise to such a situation—especially if you utilize longer delay times.
As a result, you might notice certain frequencies vanishing from your mix, generating a hollow or thin sound that lacks depth and fullness—an outcome diametrically opposite to what you were aiming for using the Haas effect!
A possible solution? Try keeping your delay times under 40 milliseconds as per Helmut Haas’ original studies. A short delay might help prevent significant phase cancellations.
Potential Mono Compatibility Issues
While it may be tempting to focus on stereo imaging alone with its captivating auditory illusion, don’t forget about your mono listeners!
When transitioning from a stereo mix down to mono, much of your hard work optimizing width can be lost due to an issue known as mono compatibility.
In practice, this can mean that certain elements in your stereo mix completely disappear when listened to in mono.
The good news is that there’s an easy way around this—regularly check your mixes in mono. This simple preventative measure will save you plenty of headaches down the line!
Subtle Versus Exaggerated Use
Lastly, remember – subtlety often yields the most effective results when applying principles like the Haas Effect.
While it may be exciting to plunge into the extremes of auditory manipulation, remember that “less is more” often holds even in the world of sound design.
Exaggerated use of the Haas effect can translate into an overtly dramatic, unpredictable soundscape.
Not only might this disturb the clear placement of musical elements, but also lead to unwanted ‘smearing’ effects or even generate unwanted echoes.
Tips for Implementing the Haas Effect in Music Production
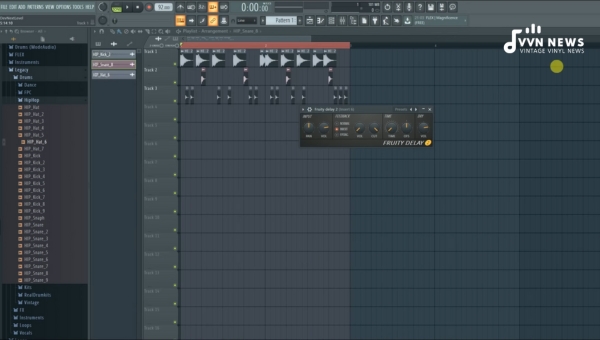
Implementing the Haas Effect successfully in music production is an art form as well as a science.
Knowing when to use it and how much to apply can be the difference between an engaging mix and a disjointed one.
Here are some of my best tips for applying this fascinating audio phenomenon to your music production.
Best Practices for Achieving Optimal Results with the Haas Effect
Implementing the Haas Effect effectively requires a keen ear, careful attention to detail, and a good understanding of your mix’s stereo imaging.
1. Be Selective About Your Sound Sources
Not all sounds will benefit equally from the Haas Effect. Percussive elements such as drums, for instance, may not see much improvement because our brain is so used to them being centered in traditional mixes.
Sounds that occupy a broader frequency range—like synths or pads—are excellent candidates since they usually benefit from a wider spatial image.
2. Use it Sparingly
-The Haas effect can be seductive—it’s exciting to hear your mix suddenly open up with depth and width.
But don’t go too heavy-handed with it; otherwise, you might risk making your mix sound unnatural or cluttered.
Instead of applying it to every channel, think of it as a special sauce that you sparingly pour over select tracks for added flavor.
3. Experiment with Different Delay Times
Getting creative with various delay times can lead to diverse results as longer delays produce more noticeable width enhancements but may also lead to unwanted phase issues.
A standard delay time range was recommended, finding that the sweet spot would be between 10-35 milliseconds.
4. Using EQ Effectively in Conjunction With Delays
When you introduce artificial delay into your tracks, the newly generated reflections often carry strong equalization (EQ) characteristics of the source signal, which could overcrowd certain frequency regions, leading to a muddied mix.
EQ shaping applied post-delay can help you sculpt and clear space within your mix to prevent this issue.
To effectively use EQ in conjunction with the Haas Effect, follow these simple steps:
- Choose your signal for stereo enhancement (synths, pads, or rhythm guitars are perfect starting points).
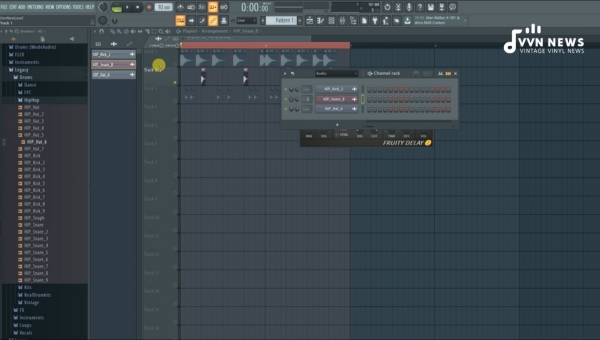
- Apply a simple delay plugin on the chosen track and set it between 10-35 milliseconds.
- After applying delay for the Haas effect, use an EQ to gently filter out unnecessary frequencies on each channel (a low cut is often a good start).
5. Mixing at Lower Volume Levels to Achieve Better Balance
This might come as a surprise, but one of the keys to achieving a better-balanced mix using the Haas Effect is reducing your monitoring volume throughout most of the mixing process.
When we listen at high volumes, our ears can easily confuse loudness with clarity, which often leads us to overlook intruding ‘muddy’ frequencies.
At lower levels, however, we tend to objectively focus more on balances between different elements in our mix.
When implementing The Haas Effect in your music production strategy, there are several considerations and best practices that could help optimize its potential.
Be selective about what sounds get treated, use it sparingly, overlap delays with complementary EQ sculpting, and keep volume levels generally low during the mixing stage. The difference it makes could certainly be rewarding! Trust me.
FAQs About Haas Effect
What is the core principle behind the Haas Effect?
The Haas Effect, also known as the precedence effect, leverages our brain’s ability to determine where the sound originates based on slight time and volume differences when sounds reach our ears.
How does the Haas Effect impact music production?
In music production, the Haas Effect is utilized to add a sense of depth and width in a stereo mix, significantly enhancing the auditory experience.
How does our brain perceive sound manipulated by the Haas Effect?
Our brain interprets a delayed sound introduced by the Haas Effect as part of the original, thus creating an illusion of spatial depth and directionality in audio perception.
What’s the difference between using delay via the Haas Effect and panning for stereo width?
While both methods can enhance stereo width, panning adjusts volume levels between left and right channels whereas the Haas effect uses temporal differences – a small delay added to one channel to create a sense of space.
Are there any potential challenges when implementing the Haas Effect in audio mixing?
Yes. Overuse or incorrect implementation of the Haas effect may lead to phase cancellation issues or problems with mono compatibility. Careful use and balance are needed for optimal results.
Conclusion
Creatively employing the Haas Effect in sound design essentially opens up a new dimension in your soundscape, conjuring depth and width into what would otherwise be a flat stereo mix.
It’s by no means a magic solution and does require understanding and practice. But when dialed right, it can unnervingly create powerful illusions of spatial design, animating your stereo field with palpable realism. Remember, effective use of this principle often lies in subtlety and balance.
