If you’ve ever sat down with a raw vocal track and wondered how to make it shine, then this article is for you.
The secret sauce to those radio-ready vocals is compression, a technique that when mastered, can bring a professional edge to your sound production.
Today, I’m going to break down the art of how to compress vocals for pro results and share some tips I’ve garnered over years of working with sound engineering.
Have you ever heard a song where vocals stand out beautifully, intertwining with the music yet making their distinctive mark?
That’s not just about having an exceptional voice (though it helps!). It’s also about mastering technical details we often overlook- notably audio compression.
By learning the skill of compressing vocals, even amateur recordings can get that polished sheen professionals have. Let’s decode these methods together!
What is Audio Compression?
Audio compression is a technique used to reduce the file size of digital audio data for purposes like storage and transmission.
It is achieved through a process known as data compression, which minimizes the size of audio files without losing the quality of sound.
There are two types of audio compression: lossless and lossy. Lossless compression reduces file sizes while retaining original quality, perfect for settings where sound precision matters.
On the other hand, lossy compression produces much smaller files by removing some data permanently, which might lead to degradation in good quality but is often not noticeable to average listeners.
Popular formats using these compressions include FLAC (lossless) and MP3 (lossy).
How does it work?
Audio compression does its magic by first setting a threshold. Any volume above this threshold gets reduced according to a set ratio.
For instance, if you select a percentage of 4:1, every 4dB above the threshold turns into 1 dB.
The attack and release parameters decide how quickly the compressor starts and stops working.
Importance of Audio Compression
Without audio compression, vocals may get lost in the mix or become too loud during powerful passages.
Particularly in music, where multiple instruments are playing at different volumes, a singer’s voice can drown unless we control their vocal dynamics.
Mastering audio compression is critical to professional-sounding vocals. Balanced and consistent songs sound pleasing—even more so when they punch through a mix with clarity and richness.
Also Read: 15 Best Vocal Compressors of 2023 [Improve Your Vocal Mixing]
Key Elements of Vocal Compression
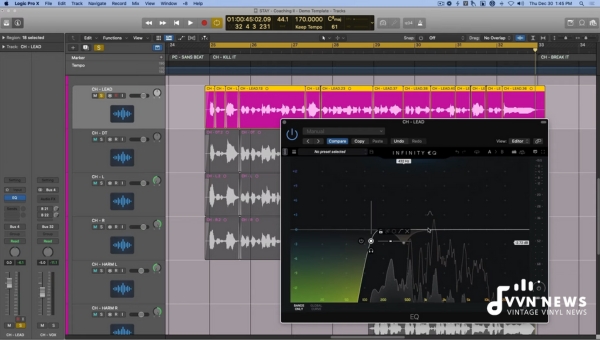
Mastering audio compression hinges heavily on understanding its key parameters. There are typically four: threshold, ratio, attack, and release.
Threshold
The threshold is measured in decibels (dB). It’s the point at which compression kicks in.
If you set your threshold at -20dB, the compressor will start reducing the volume once it crosses that point.
Ratio
The ratio controls how much compression is applied above the threshold. A low ratio, such as 2:1, is mild and natural sounding.
A higher ratio, like 8:1, is more noticeable and can make your vocals sound punchy.
Attack
Attack determines how quickly the compression starts after the threshold has been exceeded.
Setting a fast attack will squash transients (sharp, short peaks in sound), while slower attack times let some transients through for a punchier feel.
Release
Release sets how long it takes for the compression to stop after volume drops back below the threshold – when it ‘releases’ its grip on your vocal track so to speak.
Short release times can make a track seem more natural, but too short can result in “pumping” or rhythmic artifacts in your audio.
Remember, effective compression depends on balancing these four parameters according to your vocal track needs.
By having a deep awareness of these elements and how they interact with each other, you’re sure to achieve magnificent pro results!
How to Compress Vocals for Different Genres?
Each genre of music has its demands when it comes to audio compression.
The style, rhythm, and feel of the music, combined with the artist’s unique voice, dictate how you should approach compression.
Here are some insights on tailoring your compression techniques for pop, hip-hop/rap, and rock vocals.
Compressing Pop Vocals
Pop music is known for its crystal-clear vocals that carry the melody. Compression for pop vocals often requires a continual balancing act.
The objective is to make the vocal upfront and intelligible without compromising dynamics.
- Start by setting a soft ratio (2:1 or 3:1).
- Use a fast attack (around 20ms) and moderate release settings (50–100ms).
- Adjust the threshold to catch between 5–10dB gain reduction on louder passages.
Finally, use a de-esser before compressing as it helps to reduce sibilance.
Compressing Hip-Hop/Rap Vocals
Hip-hop/rap vocals are typically punchy and upfront in the mix. You’ll want it loud and clear over heavy beats.
- Set a moderate to high ratio – (4:1/5:1).
- A quick attack time (10–15ms) can help maintain clarity.
- Opt for slower release times between 120-250ms.
- Watch your threshold until you get approximately 7-12dB gain reduction on the meter.
Compressing Rock Vocals
Rock music can be very dynamic – ranging from soft verses to roaring choruses – therefore needing careful treatment while compressing vocals.
- Apply a lower ratio of around 3:1 for smoother passages.
- Use medium attack settings (30–60ms); this helps preserve some dynamics.
- With releases longer than in other genres often upwards of 200ms allows your compressor enough time to reset before the next phrase
4. Test threshold settings until approximately 5-8dB reduction is achieved at the loudest parts.
Also Read: Common Mistakes With Mix Bus Compression & How To Avoid Them
How to Compress Vocals for Pro Results
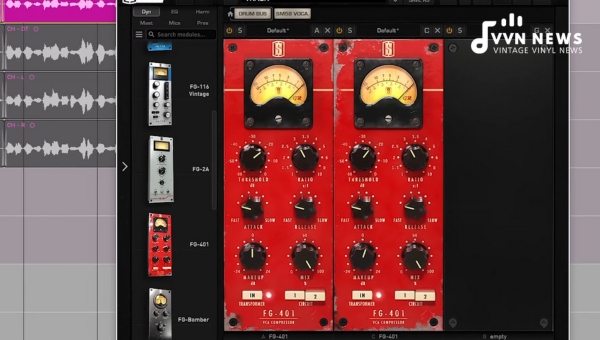
When it’s time to step behind the soundboard, understanding how to effectively use compression can give your vocals that sought-after professional finish.
Follow these steps to start exploring the world of vocal compression:
Set Up Your Compressor
After recording your vocals and removing any errors and breaths you don’t want, it’s time to insert a compressor onto your vocal track.
There’s a variety of compressors available, both included in your Digital Audio Workstation (DAW) and third-party plugins that you can buy or download.
Adjust the Threshold
The threshold is where compression starts. When audio goes above this level, compression kicks in.
Start by setting a moderate threshold level so your vocals are compressed most of the time.
Determine the Ratio
Next, adjust your ratio. This determines how much compression will occur when vocals cross the threshold.
A lower ratio like 2:1 results in more subtle changes, while a higher ratio like 10:1 will be much more noticeable.
Set the Attack Time
Then comes the attack setting—how quickly the compressor responds once vocals exceed the threshold level.
Slow attack time lets some transients pass through uncompressed—a tactic used in rock music for more aggressive tones.
Conversely, a fast attack time results in smoother vocals since nearly all transients get compressed.
Set the Release Time
Consider your release setting—the time it takes for compression to stop after dipping below the threshold again.
A slow release can keep vocals at a consistently lower volume, while a fast release allows more dynamics between phrases.
It’s crucial not to overlook that different types of music require different kinds of vocal presence; hence, distinct compression settings are applied.
As a rule of thumb:
- For Pop and R&B genres that demand smooth and controlled vocals, use lower ratios with faster attack and release times.
- For Rock and Country music eons that require raw aggression yet clarity, opt for higher ratios with slower attack times.
Bear in mind these are just starting points—tweak settings as per requirements!
Achieving professional-sounding vocals using compressors involves mastering concepts such as thresholds and ratios while paying attention to details unique to specific genres and songs themselves—and ultimately trusting yourself as an artist over generic guidelines!
Top Compressor Plugins for Professional Sounding Vocals
Whether you’re mixing vocals for a pop anthem or an indie rock ballad, compressor plugins are essential tools in achieving the sound you desire.
Here’s a rundown of some top-rated compressor plugins that can help you get professional-sounding vocals.
Analog Obsession FETISH
Analog Obsession FETISH stands out for its efficiency and simplicity while delivering a punch with its transparent character.
- Pros: Highly adjustable ratio and blend controls, excellent transient control.
- Cons: Simplicity might not appeal to those seeking extensive control over parameters.
FETISH comes highly recommended for those seeking a simple, efficient tool that provides compelling results.
Arturia TUBE-STA
This is Arturia’s homage to the classic ’60s-era Gates STA-Level broadcast limiter. The Tube-STA offers warmth that feels organic and natural—a perfect stage for our vocals.
- Pros: Rich tube emulation, auto-gain functionality after compression.
- Cons: Lacks modern enhancements such as side-chain filters or mid/side processing.
TUBE-STA is ideal when you want to add character and warmth to your vocals.
Klanghelm MJUC Jr.
The Klanghelm MJUC Jr. has earned a reputation as one of the best free compressors available today, cherished for its incredibly easy-to-use interface and versatile performance!
- Pros: High versatility, and intuitive user interface.
- Cons: Limited control over settings compared to its premium counterpart (MJUC).
Softube CL1B
The Softube CL1B is renowned in professional studios. It’s based on the hardware unit by Tube-Tech which combines tube sound with solid-state reliability—the secret behind countless hit records from pop masters like Rihanna and Taylor Swift!
- Pros: Super-smooth sound quality, very low distortion.
- Cons: A bit pricey; not intended for limited budgets.
Waves CLA-2A
The Waves CLA-2A is an emulation of the revered Teletronix LA-2A optical compressor—an industry favorite known for its unique smooth compressing characteristics.
- Pros: Ideal for treating single vocal channels and instruments; simplicity means fewer chances of mucking things up!
- Cons: Simplicity might feel limiting to audio engineers searching for more tweakability.
Each plugin listed above has its unique strengths and limitations. What matters most is understanding how to employ them correctly and what suits your distinct taste and requirement best.
Also Read: Stereo Compressors Explained [How They Shape Your Audio Experience]
Common Mistakes While Compressing Vocals and How to Avoid Them
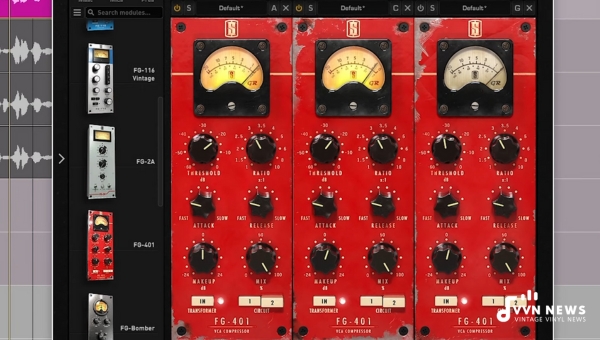
In my years of experience, I’ve noticed that people often make the same mistakes when first learning how to compress vocals.
Let’s take a quick peek at what they are and how to avoid them.
Over-Compression
Since we’re dealing with dynamics, the most common blunder stands out as over-compressing. People tend to hammer down every peak in the vocal, resulting in a lifeless, flat sound.
Avoid this by being selective about what you compress and aim for an even yet dynamic performance.
Inappropriate Attack and Release Times
Selecting inappropriate attack and release times is another common pitfall.
Too fast, you’ll lose the natural feel of the vocals; too slow, consonants might slip through uncompressed.
The trick is to listen carefully while adjusting and settle when it sounds most natural.
Ignoring The Vocal’s Needs
Letting a preset dictate your compression settings without actually listening to what the vocals need is another frequent mistake.
Each vocal is unique and may need different settings even within the same song.
It’s always a good idea to maintain a ratio of 3:1 – 6:1 for professional-sounding vocals and set the attack time between 2-10ms, and release time around 40-60ms. But let your ears guide you!
Not Utilizing All Available Tools
Over-reliance on compression and ignoring other aspects like EQing can yield poor results. Use everything in your toolkit comprehensively to make the vocals shine through.
Keep these mistakes in mind and how to dodge them; soon enough, you’ll master the technique of compressing vocals for professional results.
FAQs About audio compression
What is the primary purpose of audio compression?
Audio compression primarily aims to balance the dynamic range of an audio file, attenuating loud peaks while amplifying softer parts.
Can I bypass using a compressor for my vocals?
While it’s possible to bypass using a compressor, it might result in inconsistent volume levels which may affect the overall quality and clarity of your track.
Why are my vocals still not sounding professional even after Compression?
Compression is only one facet of processing vocals. You might also need to EQ, reverb, level or even automate your vocals besides ensuring a clean, noise-free recording.
Is there one agreed-upon setting for compressing all types of vocals?
Not really. The parameters – like threshold, ratio, attack, and release times – can greatly vary based on the genre and vocal performance in question.
Are expensive compressor plugins necessary for quality vocal compression?
High-end plugins can offer more features and flexibility but many free or cheaper versions provide satisfactory results. Ultimately, understanding how to use a tool matters more than its price.
Conclusion
In this gig industry, delivering pro results might just be your golden key to unlocking endless opportunities.
As we’ve established, getting the hang of audio compression is instrumental in producing that professional sound.
Just remember, every vocal track is unique, so play around with your compressor settings to find that sweet spot.
Armed with this information, you should have a solid starting point for compressing vocals like a pro.
And don’t forget: mastering any skill takes time and patience, but when the result is professional-sounding vocals, it’s certainly worth the effort.
