Sound has always intrigued me, and if you’re reading this, chances are it intrigues you, too. I love how we can manipulate it to create music and hit our audience right in the feels.
In this sonic world, few tools are as necessary as a studio compressor. So, what is a studio compressor & what does it do?
The answer lies in refining sound quality and giving it that polished feel we all love to hear through our earbuds.
A studio compressor is like that secret ingredient in your grandma’s famous cookies – hard to pinpoint but essential to the final result!
Now, let’s dive into more detail about a studio compressor’s role in music production. Trust me; by the end of this article, you’ll view this powerful sonic tool in an entirely new light!
What is a Studio Compressor, and what Does It Do?
A Studio Compressor is a piece of audio equipment used in sound recording and mixing. It controls the dynamic range of an audio signal, which is the difference between the loudest and quietest part of a track.
Compressing the range ensures that volume levels are kept within acceptable limits to prevent distortion or clipping.
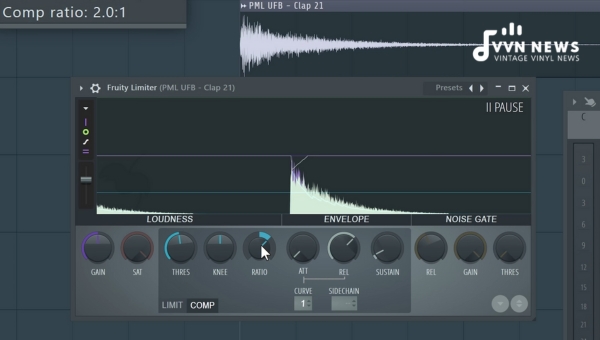
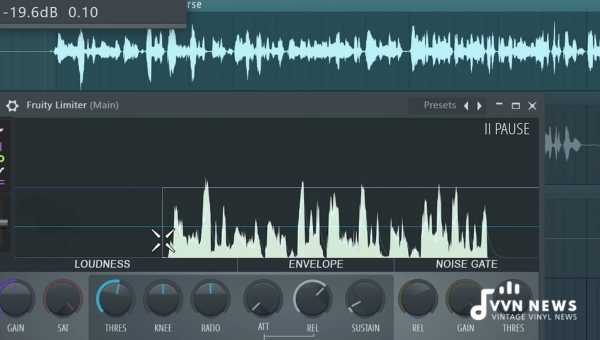
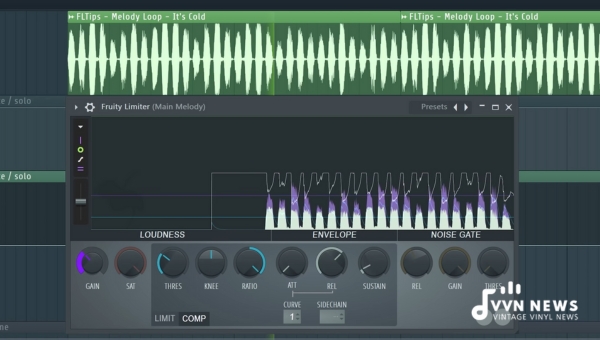
The primary controls on a studio compressor include threshold, ratio, attack, release, and makeup gain.
A compressor can be both hardware and software-based depending on a user’s preference or the requirements of the audio project.
How Does a Studio Compressor Work?
Studio compressors work on an exciting concept; they reduce the volume of loud sounds while amplifying quieter ones, ensuring an evenly balanced sonic output.
They do this through various control parameters such as:
- Threshold: This is the level at which compression starts.
- Ratio: Determines how much compression occurs.
- Attack: How quickly the compressor reacts once the threshold level is reached.
- Release: The time it takes for the reduction to stop once below the threshold.
These parameters allow sound engineers and musicians to manipulate audio signals precisely.
By tinkering with them, you can attain your desired sound output – clear, punchy, and enjoyable.
So whether you’re working on spoken word content like podcasts or complex music tracks needing that final polish, learning about studio compressors can tremendously benefit your work.
Also Read: 15 Home Studio Must-haves For Comfort & Productivity
Types of Studio Compression
Understanding the types of studio compression can seem complex, but don’t worry, I’m here to break it down.
Each class offers distinct characteristics suitable for different recording and mixing situations.
Tube Compressor
Tube compressors are so named because they use vacuum tubes in their circuits. This type of compressor provides a warm, analog sound that we often associate with vintage recordings. A notable example is the iconic Fairchild 670 compressor from the ’60s.
Key Features:
- Provides rich harmonics and a warm sound
- Can handle quick transients gracefully
- Adds desirable coloration to the signal
Optical Compressor
Optical compression relies on a light source and photosensitive cell to control gain reduction – hence the term “optical.” They are known for their smooth and unobtrusive contraction, making them suitable for vocals and bass instruments.
Key Features:
- Has a smooth and musical quality
- Typically provides slower attack times
- Ideal for vocals, bass guitar, as well as master bus compression
FET Compressor
FET compressors use Field Effect Transistors (FET) to control gain reduction. They are renowned for faster attack times than other compressors – reacting swiftly to transients in an audio signal.
Key Features:
- The swift response makes it great for controlling fast attacks.
- You can add sparkly, high-end tonal coloration.
- Popular on drums or any percussive instruments
VCA Compressor
VCA stands for Voltage Controlled Amplifier Compressor. This type is incredibly flexible, with quick response times and a transparent sound.
Key Features:
- High versatility – work well with any instrument or vocal
- Capable of both smooth or punchy compression
- He is a good all-rounder, making him famous in modern recording studios.
Each compressor type has distinctive sonic features, making them more suitable for specific applications than others. Experimenting with these types could lead you to create your signature style.
Also Read: Stereo Compressors Explained [How They Shape Your Audio Experience]
Different Compression parameters
When achieving optimal results in audio production, understanding the different parameters of compression is fundamental.
Each parameter fundamentally changes how the compressor affects your sound. Below, I’m going to explain each in detail.
Knee
The ‘Knee’ determines how smoothly or abruptly the compression kicks in once the signal surpasses the threshold.
A hard knee applies maximum compression above that level, producing a more aggressive sound.
On the contrary, a soft knee gradually increases reduction as you go further beyond the threshold, resulting in a more natural or subtle sound.
Make-Up Gain
After compressing a signal, you may find that the overall volume has reduced significantly.
That’s where the makeup gain comes into play. It allows you to compensate for this loss by boosting output level post-compression.
Ratio
The compression ratio determines how much the signal will be reduced once it crosses the threshold.
For instance, a 3:1 ratio means that for every 3dB above the threshold entering the compressor, only 1dB will be allowed out.
Input Gain
The input gain refers to the amount of signal sent into the compressor before any processing occurs.
Controlling this lets you regulate how hard you hit your compressor’s input.
Threshold
The threshold is directly tied with when compression begins – it’s like setting rules about what level is acceptable and which isn’t in your audio environment.
If your signal exceeds this set point, your compressor springs into action.
Release
Once compression ceases (when input drops below the threshold), how quickly should your track return to its uncompressed state? The release control determines this duration.
Longer release times can smooth out volume fluctuations and risk suppressing vital transients if set too high.
Attack
Attack time refers to how quickly compression starts after exceeding our defined threshold; think of it as reaction time for your compressor!
Swifter attack times catch loud transients faster but risk sounding unnatural if overdone.
Each parameter plays a unique role and significantly shapes our final output – ensuring our sonic creation hits just right!
Understanding how these parameters interact helps us wield control over our desired sound output effectively.
When to Use Compression?
One of the essential steps in mastering a track is knowing when to use compression.
Although a fantastic tool, it can be misused or overused if not understood properly. Let’s deeply dive into when and how to use the compressor effectively.
Sidechain Compression
Sidechain compression, often called “Ducking,” allows you to lower the volume of one sound whenever another is playing.
It is frequently used in electronic music, where a kick drum and bass might occupy the same frequency range. Here’s how it works:
- Step 1: Apply the compressor on the track you want to ‘duck.’ Most commonly, this would be your bass line.
- Step 2: Open up the side-chain settings on your compressor and select the input source – typically your kick drum.
- Step 3: Adjust your threshold, ratio, attack, and release parameters depending on how aggressively you want the effect.
Parallel Compression
Parallel Compression, or ‘New York Compression,’ involves mixing an unprocessed ‘Dry’ signal with a heavily compressed version of the same signal.
This brings out quiet elements in tracks without sacrificing dynamic range. Here’s a step-by-step guide for setting up parallel compression:
- Step 1: Start by duplicating the track you want to compress.
- Step 2: Apply heavy compression on one track while leaving the other untouched.
- Step 3: Mix them until you achieve your desired sound.
Adding Color
Some compressors can add what audio engineers call ‘color’ or unique characteristics to their signal.
This is due to the different components inside each device that impart distinct sonic qualities such as warmth or grit into your tracks.
To Reduce Dynamic Range
Reducing dynamic range (the difference between loud and quiet parts) is perhaps what compressors are best known for.
By delicately reducing these extremes, we can prevent sudden jumps in volume that could lead listeners to a harsh experience while providing an overall louder perceived volume.
Sound Shaping
Finally, remember that compressors aren’t just tools for correcting issues – they’re also creative tools for sound shaping! Compressors can help tighten up individual instruments or give punch & clarity within mixes if used judiciously.
Studio compressors are indeed Swiss Army knives of audio production tools! While compression can seem daunting at first glance due to its many intricate parameters — threshold levels and ratios, amongst others – practice makes perfect with these powerful devices!
Also Read: Common Mistakes With Mix Bus Compression & How To Avoid Them
Challenges Faced In Using Audio Compression
Audio compression is a double-edged sword. On one hand, it helps balance out the dynamic range of audio signals, which can elevate sound quality tremendously.
But like every tool in suitable production, it also comes with various challenges. If not used cautiously and judiciously, it can lead to a decreased audio quality.
Overcompression
One major issue encountered with studio compressors is over-compression. This is when too much compression is applied across an audio file, leading to what’s known as a ‘pumping’ or ‘breathing’ effect.
Overcompression removes too much dynamic range from your sound – making drums less punchy or vocals sound flat and unappealing.
Harmonic Distortion
Another common challenge faced in using compressors is dealing with harmonic distortion.
Improper use of the attack and release settings may introduce harmonic distortion into your tracks, making them sound distorted or “crunchy.”
To avoid this, constantly adjust your attack and release times to suit the bass line or drum hit you’re working on.
Loss of Micro Dynamics
Lastly, when you compress audio too much, you risk losing micro dynamics – those slight variations in volume crucial for keeping tracks lively and engaging for the listeners.
Compressors must be used strategically and subtly to protect these critical sonic characters.
Finding the right balance in using a studio compressor involves avoiding these obstacles while achieving smooth dynamic control over your audio.
Remember that mastering this device is a sonically rewarding journey that takes time and constant practice.
Always trust your ears while calibrating settings, but also trust your logic during this process as well!
Challenges Faced In Using Audio Compression
Utilizing a studio compressor to its fullest can be a daunting task. It’s very much like learning a new language with its own set of rules and complexities.
The most common challenges one might face with audio compression include:
Overcompression
Undoubtedly, this often tops our list. Overcompression happens when the settings on the compressor are cranked up too high, resulting in lifeless, muddy sounds. This can strip away the original sound’s rich dynamic and emotive feel.
Setting Attack and Release Correctly
Figuring out how quickly your compressor responds (attack) and stops reacting (release) to your audio can be tricky, especially for beginners. It’s an art as much as a science, requiring time, practice, and a finely tuned ear.
Maintaining Transparency
The ideal outcome of compression should sound natural or ‘transparent,’ where the listener notices no alteration of the original sound. Achieving this level of subtlety requires skillful adjustment of compression parameters.
Choosing the Right Type of Compressor
From tube and VCA compressors to FET and Optical types, each compressor has unique characteristics and colors to enhance sounds in different ways. Selecting which best suits your project requires understanding these nuances.
Content Understanding
Understanding the content you’re trying to enhance is crucial, too – human speech variants differ from instrumental music aspects.
A handy tip I’ve come across is to start with light ratios (such as 2:1 or 3:1) before moving on to harsher settings (like 10:1) for more drastic effects if needed.
Using audio compression does come with challenges that require patience and practice.
Like any craft, it involves honing your skills over time, but believe me, mastering it will immeasurably elevate your audio production skills,
Also Read: How Does MP3 Compression Work? [Lossy vs Lossless Compression]
FAQs About Studio Compressor
Why is a studio compressor necessary for audio production?
Studio compressors ensure the audio output is more listenable by balancing out the loud and quiet sounds.
How does a studio compressor differ from an expander?
While a studio compressor decreases the dynamic range of a track, an expander works inversely, increasing it.
When should I use a studio compressor in my mix?
A studio compressor should be used when you want to control and limit dynamic range and add color to the sound or shape audio signals.
What happens if I misuse a studio compressor?
Misusing a compressor can result in an over-compressed mix that sounds unnatural and lacks dynamic range.
Can software compressors match the performance of hardware compressors?
Although their impact might differ, hardware and software compressors perform the same primary function of controlling the dynamic range.
Conclusion
A studio compressor is indispensable for any sound engineering professional or passionate musician.
Its ability to control the dynamic range can make your audio output clear, punchy, and enjoyable.
This indispensable tool’s parameters, including Threshold, Ratio, Attack, and Release, give you the power to shape your sound with supreme precision.
As you engage more with the sonic world, may understanding how a studio compressor works guide you in creating ear-pleasing content loved by all.
Don’t hesitate to get hands-on with a compressor and unleash its full potential in your sonic productions!