There’s a moment that every music enthusiast has experienced at least once: you’re listening to a song when suddenly, the audio distorts.
The sound scratches harshly against your eardrums, seemingly bursting in spikes before it trails off. If you’ve ever wondered, what is audio clipping? then you’ve come to the right place.
Audio clipping is much more than a minor annoyance. Whether you’re jamming out to your favorite track or recording your own music, understanding this phenomenon can go a long way in enhancing the quality of your auditory experiences.
This knowledge is not just for professionals but can be handy for anyone who deals with sound systems or enjoys music.
What is Audio Clipping?
Audio clipping, sometimes also referred to as peaking, is an instance where an audio signal exceeds its maximum amplitude capacity.
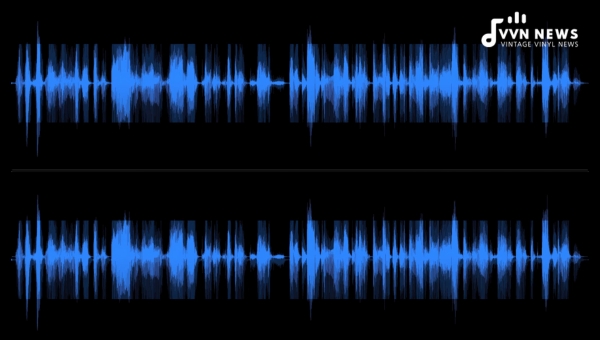
If you imagine the sound wave of your audio track as a smooth curve, clipping would force the peaks and valleys of the wave to flatten out or cut off, distorting the waveform.
This often results in a sound that seems to sting your eardrums, described by listeners as crackling or popping noises.
Clipping is significant because, apart from being unpleasant to listen to, it can also potentially damage your speakers if uncontrolled.
It is a common occurrence particularly when music or sound signals are amplified beyond their stable capacity.
Causes of Audio Clipping
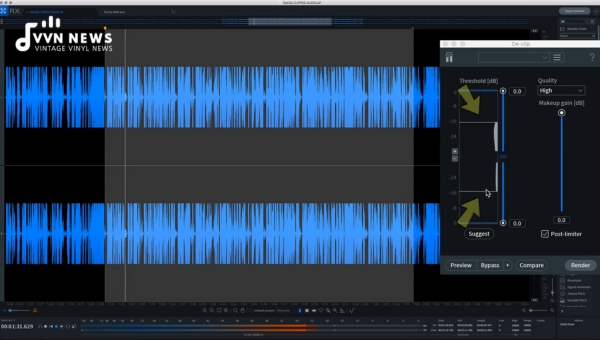
Sometimes, audio clipping can seem like an inevitable, frustrating part of recording or listening to music, especially if you’re not certain what’s causing it.
Understanding the four main causes of audio clipping can help you prevent it or mitigate its effects effectively.
Peak Amplitude Exceeding Maximum Limit
In layman’s terms, amplitude is essentially the ‘volume’ of a signal – the louder it is, the higher its amplitude.
When the peak amplitude of your audio signal supersedes what your equipment can handle, clipping happens.
This is a kind of distortion that occurs when an attempt is made to boost certain parts of an audio signal beyond its maximum limit. The result? A rough sound that may remind you far more of static than it does music.
Also Read: Should I Upgrade My Mastering Equalizer? [Things To Consider]
Overdriven Audio Equipment
Audio equipment and electronics have specific thresholds for how much power they can process effectively and safely.
Pushing your equipment beyond these limits—whether through increasing volume excessively or driving more wattage into your speakers than they were designed to handle—can cause overdriving, which in turn leads to clipping.
Inadequate Headroom
In an audio-context, ‘headroom’ refers to the difference between nominal operating level (average) and maximum permissible level before clipping sets in within your system’s dynamic range.
Limited headroom may cause unexpected transient peaks (sudden bursts) in loudness that cross over into distortion i.e., audio amplifiers and loudspeakers often have some amount of headroom available to accommodate temporary peaks in level without distorting.
Low Bit Depth or Sample Rate
In digital audio systems particularly, low bit depth or sample rates can contribute significantly to clipping issues because they define how accurately sound can be digitally represented or reproduced as electrical signals by your computer and output hardware respectively.
Audio clipping could be a result of peak amplitude exceeding maximum limit, overdriven audio equipment, inadequate headroom, or low bit depth or sample rate. By understanding these causes and
Digital Clipping Vs Analog Clipping
To better comprehend audio clipping, it’s essential to understand its two main types: Digital Clipping and Analog Clipping.
Digital Clipping
In the age of digital audio production, digital clipping represents one of the most common forms.
It primarily arises when an audio signal within a digital system surpasses 0 decibels, exceeding its peak limit.
This causes flattening at the top and bottom of the waveform resulting in distortion, often perceived as harsh noises.
Causes
- Overloading the signal chain during recording can lead to digital clipping.
- Amplifying a signal whilst mixing or mastering beyond 0 decibels can also cause this issue.
Solutions
- When recording, ensure your levels fall between -12 to -6 decibels so as to provide enough headroom thus preventing distortion caused by unexpected loud signals.
- During mixing or mastering stages, utilize mastering limiters or peak limiters that will allow sound amplification without allowing the level to exceed 0 decibels.
Analog Clipping
On the other hand, analog clipping is a product of older technology but still relevant in some forms and contexts today.
Much like its digital equivalent, analog clipping occurs when an audio signal exceeds the maximum amplitude possible by an amplifier.
Causes
- Amplifying a sound input beyond what your equipment can handle leads to analog clipping.
- Overdriving either instruments or microphones might result in this distortion.
Solutions
- Similar to handling digital clipping, maintaining appropriate input levels forms a critical step towards mitigating analog clipping.
- Regularly monitor your amplifier’s output power; if there’s any hint of distortion lower it immediately.
Understanding these two concepts holds key significance for anyone interested in comprehending how sound systems function and how to rectify potential mishaps when they occur.
Dealing with audio clipping is about addressing the right place at the right time; it’s about maintaining optimal input levels during recording and a safe margin when amplifying sounds afterwards.
By following these guidelines, you can not only avoid unwelcome distortions in your audio enjoyment but also ensure a longer lifespan for your audio equipment.
Also Read: 15 Best DAW In 2025 [Top Digital Audio Workstations]
How to Fix Clipping Audio
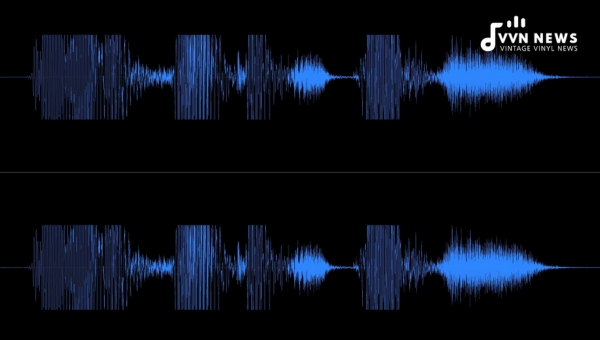
Fixing audio clipping involves several steps that help maintain the integrity of your sound.
These steps might differ slightly based on your specific audio equipment or software, but the principles remain largely the same. Let’s delve into these fixes.
Reducing the Input Gain
The first step to fix audio clipping is by reducing the input gain. This may seem counterintuitive, especially if you’re trying to amplify your sound.
However, remember that amplifying the signal too much is typically what causes clipping in the first place.
By reducing your sound source’s input gain, you effectively decrease the amplitude before it reaches your amplifier or digital workstation (DAW).
When adjusting your input gain levels, aim to keep them in check such that they peak around 75% of maximum output – this leaves ample headroom for unexpected signal spikes and can help avert distortion.
Using a Limiter or Compressor
Another handy tactic when fixing audio clipping is employing a limiter or compressor – tools readily available in most DAWs and often on audio interfaces as well.
A compressor controls dynamic ranges; when an audio signal breaches the threshold level set by you, it drives down its amplitude, preventing those nasty spikes.
Meanwhile, a limiter acts like a volume ceiling above which no sound can go. This shield enables higher overall volumes without risking distortion from peaks piercing through.
Adjusting Levels in the Mix
Sometimes clips occur due to mixing imbalances where certain elements are overly loud compared to others — usually vocals or lead instruments versus backing tracks.
For resolving this issue, try adjusting your mix levels i.e., balance out individual track volumes until no single element dominates too much space.
To get this mix right takes some time and practice but having a well-balanced mix ensures that every element has its rightful place in space and thus largely avoids clipping.
Utilizing Fades or Crossfades
Last but not least, another effective method to prevent audio clipping is to use fades or crossfades.
Fades smoothly transition a sound in or out while crossfades merge two clips, ensuring there are no sudden jumps in volume.
If your software permits, try automating fades to gradually decrease volume levels whenever they approach the red zone, which can assist in averting potential audio clipping.
In all, dealing with audio clipping requires a keen sense of understanding your sound equipment and systems.
But with careful observation and consistent practice of these strategies, one will be able to maintain the quality of their auditory expressions, be it music or any sound production.
Also Read: 19 Best Audio Interfaces For Home & Studio Recording 2025
How to Avoid Audio Clipping?
Audio clipping might seem like an inevitability, particularly if you’re in the habit of pushing your volume controls to the limit.
However, by observing a few key practices, you can work towards mitigating its occurrence.
Setting Proper Gain Structure
One of the most straightforward ways to avoid audio clipping is by setting the proper gain structure.
Gain represents the amplification factor for your audio equipment. By managing it correctly, you can keep your sound within acceptable limits.
Never set your gain too high right out of the gate. Instead, start with low gain settings and slowly increase them until you achieve the desired loudness level. This way, you ensure that your audio maintains optimal quality throughout.
Monitoring Levels During Recording and Mixing
Remember what I said about not amplifying too much too quickly? That isn’t just a one-time thing—you should monitor your levels continually throughout recording and mixing, too. Keep an eye on your meters and adjust levels whenever necessary.
Take particular note of peak level meters, as they give real-time feedback about whether or not an audio source is clipping or close to it. Maintain sound levels within -6dB to -3dB for clean, undistorted sound.
Using a Pop Filter for Vocal Recordings
When recording vocals – whether speaking or singing – certain sounds known as plosives (like ‘p’ and ‘b’) can cause sudden surges in sound pressure, resulting in clipping.
Simply placing a pop filter between the speaker/singer and microphone can effectively reduce these surges.
A pop filter acts as a barrier that diffuses these rapid bursts of air pressure before they hit the mic’s diaphragm—making sure nothing gets abruptly loud enough to cause clipping.
Employing Dynamic Range Compression
By using dynamic range compression, it’s possible to reduce the chances of audio clipping further.
Compression essentially squashes the louder sounds while amplifying quieter ones, evening out your overall sound levels.
Apply a compressor to your audio track and adjust the threshold level—this is the point at which compression begins.
Set a lower threshold, and more of your track will be compressed. Adjust ratio to determine how much compression takes place; higher ratios result in more intense compression.
Finally, use the ‘makeup’ or ‘output’ gain on the compressor to compensate for any lost volume due to compression.
By taking these steps and combining them with constant vigilance during production and post-production, you can successfully mitigate—and prevent—the occurrence of audio clipping.
Also Read: Haas Effect [The Powerful Tool To Upgrade Your Audio Mix]
FAQs About audio clipping
What is the impact of audio clipping on sound quality?
Audio clipping leads to distortion, making the sound harsh and unpleasant, thereby ruining the overall sound quality.
Are there any potential damages caused by audio clipping?
Continual exposure to clipped audio has the potential to damage speakers due to excessive heat generated from continuous wave distortion.
Can I fix a clipped audio file in post-production?
While you can alleviate some symptoms of clipping, it’s challenging to completely restore a heavily clipped audio file. Preventing clipping during recording is crucial.
Is audio clipping ever used intentionally?
Some music producers deliberately use mild analog clipping as an artistic effect to achieve a certain grit or bite in the sound.
What tools can help prevent audo clipipng during recording?
Using a limiter or compressor during recording and keeping tabs on your levels can help you avoid audio clipping.
Conclusion
Audio clipping is a distortion that occurs when an audio signal surpasses its maximum amplitude.
While sometimes perceived as crackling or popping, it presents a risk of damaging your sound equipment.
To prevent clipping, basic steps include proper gain setting, monitoring audio levels, utilizing pop filters in vocal recordings, and employing graduated dynamic range compression.
A deeper understanding will demand a bit of time and practice, but the payoff will be enjoyable, high-quality sound-—whether you’re listening to your favorite jam or recording your own.
