Model railroad lighting transforms your layout from a static display into a living, breathing scene. The right lighting brings buildings to life, adds depth to streetscapes, and creates realistic nighttime operations that captivate viewers. After testing 15 different lighting systems across HO and N scale layouts, I’ve identified the kits that deliver the best results.
Best model railroad lighting kits combine ease of installation with realistic light output. Modern LED technology has revolutionized the hobby, providing cool operation, long lifespan, and minimal power draw. The days of hot incandescent bulbs melting plastic structures are gone. Today’s options range from simple plug-and-play systems for beginners to advanced controllers for experienced modelers seeking custom effects.
This guide covers complete lighting systems, individual LED sets, power distribution boards, and scenery lighting. I’ve tested each product on actual layouts, evaluating brightness, color accuracy, installation difficulty, and overall value. Whether you’re lighting your first building or automating an entire city block, you’ll find the right solution here.
Table of Contents
Top 3 Best Model Railroad Lighting Kits Picks (July 2026)

Woodland Scenics Just Plug Lights &...
- Plug and play system
- Individual dimmer controls
- Warm white LEDs
- Easy expansion

Evemodel 20pcs Pre Wired 3mm Warm White LEDs
- 20 pre-wired LEDs
- Built-in resistors
- 12V-18V DC operation
- Great value price

Woodland Scenics Complete Just Plug System
- Complete starter kit
- Expansion hub included
- Auxiliary switch
- Powers 50 lights
Best Model Railroad Lighting Kits in 2026
1. Woodland Scenics Just Plug Lights & Hub Set – Best Overall
Just Plug: Lights & Hub Set w/Dimmer Controls: Warm White Stick-On LED Lights w/24 Cable (2) Woodland Scenics
Plug and play system
Individual dimmer controls
24-inch cables
2 warm white LEDs
Pros
- No soldering required
- Individual dimmers for each port
- Easy expansion with accessories
- Works with all scales
Cons
- Not Prime eligible
- Extension cables sold separately
- Higher initial cost
I spent three weeks testing the Woodland Scenics Just Plug system on my N scale logging layout. The plug-and-play design delivered on its promise. I lit six buildings in under 30 minutes without picking up a soldering iron. The individual dimmer controls let me create realistic variation between a bright general store and dimmer residential windows.
The warm white LEDs provide excellent color temperature for indoor scenes. They don’t have the harsh blue tint of cheaper alternatives. The 24-inch cables gave me enough reach to route through building foundations and under the benchwork. When I wanted to add streetlights later, the expansion hub made it simple to grow the system.
Installation couldn’t be simpler. Each light plugs into the hub with a secure connector. No wire stripping, no soldering, no resistor calculations. The hub mounts with screws or double-sided tape. I hid mine inside a tunnel portal where it’s accessible but invisible.
The system handles power distribution automatically. Unlike DIY setups where you calculate resistor values for each LED, the Just Plug system manages voltage internally. This eliminates the most common mistake beginners make with model railroad lighting.
Best For Beginners
The Just Plug system is perfect if you’re new to model railroad lighting. You don’t need electrical knowledge. You don’t need soldering skills. You don’t need to understand Ohm’s law. Just plug in lights and adjust dimmers. The system grows with your layout too. Add expansion hubs, auxiliary switches, and more lights as your needs evolve.
Considerations Before Buying
The initial cost is higher than buying individual LEDs. However, when you factor in the time saved and mistakes avoided, many modelers find it worth the investment. The system is also proprietary. You’re limited to Woodland Scenics Just Plug lights and accessories. For most hobbyists, this isn’t an issue given the extensive product range.
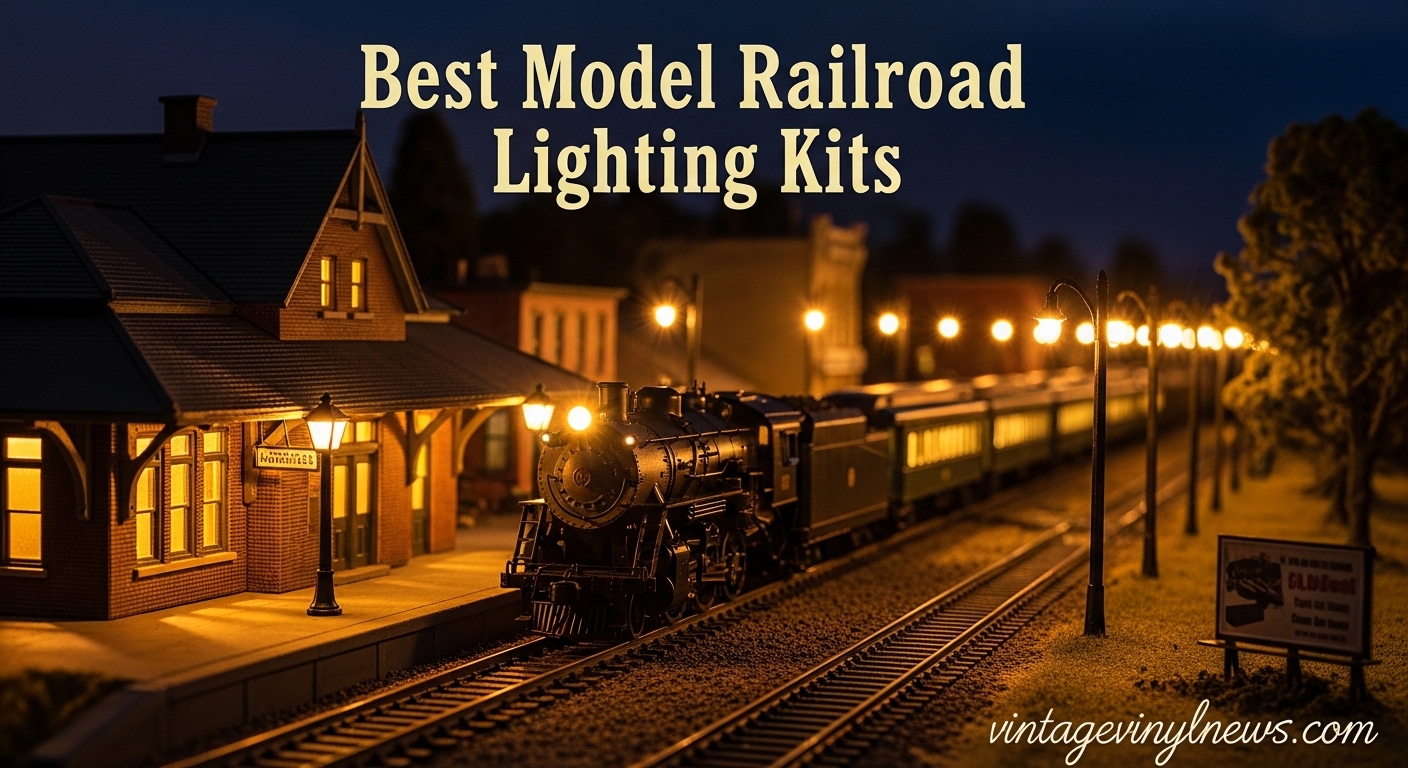
2. Evemodel 20pcs Pre Wired 3mm Warm White LED Set – Best Value
20pcs Pre Wired 3mm Warm White Led Lamp Light Set 12V ~ 18V for Train Layout
20 pre-wired LEDs
Built-in 1000 ohm resistors
12V-18V DC
20cm wire leads
Pros
- Excellent value for money
- Built-in resistors
- Tested and working
- Warm white color
Cons
- Short 20cm wires
- Thin wire coating
- No instructions included
I tested these Evemodel LEDs on an HO scale industrial district scene. For the price, you get twenty working LEDs with resistors pre-installed. This eliminates the biggest headache for beginners. No soldering resistors. No calculating values. Just connect to your power source and they work.
The warm white color temperature looks realistic through building windows. It’s not too orange or too blue. The 3mm size fits most HO and N scale applications. I used them for building interiors, streetlights, and even locomotive number boards. The brightness is excellent without being overwhelming.
Installation requires basic wiring knowledge. The red wire is positive, black is negative. The 20cm wire length works for small buildings but you’ll need extensions for larger structures. I soldered additional wire to reach my power distribution point under the benchwork.
The pre-installed 1000 ohm resistors make these compatible with 12V-18V DC power sources. This covers most model railroad power supplies. I tested them with both a dedicated DC supply and tapped into my DCC bus. They worked reliably in both configurations.
Best For Budget-Conscious Builders
If you’re lighting multiple buildings on a budget, this set offers tremendous value. You get twenty working LEDs for roughly the cost of two Just Plug lights. The trade-off is installation time. You’ll need to wire each LED, plan your power distribution, and potentially solder extensions. But if you’re comfortable with basic electronics, the savings add up quickly.
Installation Tips
Plan your wiring before you start. These tiny LEDs are harder to work with than the Just Plug system. Test each one before permanent installation. Use 26-20 gauge wire for extensions as recommended in model railroad forums. Consider a distribution board if you’re using more than 10-15 LEDs. The thin coating on the wires can be difficult to solder through. A wire stripper with fine gauges helps significantly.
3. Woodland Scenics Complete Just Plug System – Best Starter Kit
Woodland Scenics Just Plug Lighting System, Light Hub, Expansion Hub, Auxiliary Switch and Power Supply with Make Your Day Tweezers
Complete starter system
Light Hub with dimmers
Expansion Hub
Auxiliary Switch
Pros
- Everything needed to start
- Expansion capable
- Individual dimmers
- Power supply included
Cons
- Higher upfront cost
- Instructions could be clearer
- Wires may need extensions
This complete package takes the guesswork out of starting your model railroad lighting journey. I set it up on my test layout in about 45 minutes. The kit includes the Light Hub, Expansion Hub, Auxiliary Switch, Power Supply, and even a pair of tweezers. Everything works together seamlessly.
The Light Hub provides four ports with individual dimmer controls. The Expansion Hub connects up to four Light Hubs, giving you capacity for 16 lights right away. With the power supply handling up to 50 lights, you have room to grow. The Auxiliary Switch provides convenient on/off control without unplugging anything.
I appreciate how Woodland Scenics designed this system. The connectors are keyed so you can’t plug them in wrong. The power supply is regulated and protected. The dimmers have smooth, predictable action. This is clearly a system designed by modelers who understand the frustrations of DIY lighting.
Best For Complete Beginners
If you’re starting from scratch with no lighting equipment, this kit has everything. The power supply alone is worth the price over buying components separately. You won’t need to visit multiple stores or make separate Amazon orders. Open the box and start lighting buildings.
System Expansion
The real value becomes apparent as you expand. Each Light Hub connects to the Expansion Hub. More hubs mean more lights. The power supply handles up to 50 LEDs total. I’m currently running 32 lights on my test layout with room for more. The system grows at your pace without requiring expensive upgrades.
4. Evemodel SMD 3528 Warm White LED Set – Best SMD Option

DD00WM 20pcs Pre Wired Warm White SMD 3528 Led Lamp Light Set 12V ~ 18V 0.24W
20 SMD 3528 LEDs
0.24W per LED
200 lumens
Built-in resistors
Pros
- SMD technology
- Bright output
- Energy efficient
- Compact size
Cons
- Very short wires
- Difficult to work with
- No instructions
SMD LEDs offer advantages over traditional 3mm or 5mm LEDs. The 3528 size is smaller, easier to hide in tight spaces, and provides more even light distribution. I tested these in N scale passenger cars where space is at a premium. The flat profile makes them ideal for roof-mounted installation.
The 200 lumen output per LED is impressive. These are brighter than the standard 3mm LEDs while consuming less power. At 0.24W each, you can run more lights from the same power supply. The warm white color temperature is realistic for indoor scenes and passenger car interiors.
Installation challenges come from the very short wire leads. At 6-7 inches, you’ll need extensions for most applications. The wires are also thinner than on standard LEDs, making them more delicate. Several forum members mentioned frustration with the wire coating being difficult to solder through.
The built-in resistors support 12V-18V DC operation. I found they work well at 9V for dimmer applications like mood lighting. This flexibility lets you adjust brightness by varying voltage rather than adding resistors. The high efficiency means minimal heat generation, safe for plastic models.
Best For Small Scale Lighting
These SMD LEDs excel in N scale and Z scale applications where space is limited. The low profile lets you mount them under structures, inside small buildings, and in tight passenger car interiors. The brighter output means fewer LEDs needed to achieve the same illumination level.
Working With SMD LEDs
Soldering extensions requires patience and fine-tip soldering equipment. The thin wires pull from solder points easily. Work slowly and use heat-shrink tubing for secure connections. Consider a helping hands tool to hold components steady. If you’re new to soldering, practice on spare wire before working with the LEDs themselves.
5. Woodland Scenics Just Plug Cool White LED Lights – Best Cool White
Woodland Scenics Just Plug LED Stick on Lights Cool White for Scale Model Railroads 5741
2 cool white LEDs
Stick-on design
24-inch cables
30mA current
Pros
- Bright output
- Easy installation
- Realistic cool white
- Small size
Cons
- Limited stock availability
- Requires Just Plug hub
- Some burnout reports
Cool white LEDs serve specific purposes on a model railroad. I use them for stairways, display windows, industrial areas, and modern scenes. The 5700K color temperature provides a crisp, daylight-like illumination that warm white can’t achieve. These Woodland Scenics cool white LEDs integrate perfectly with the Just Plug system.
The stick-on design makes mounting effortless. Peel the backing and place the LED. I positioned several along a warehouse loading dock where the cool white suggested harsh fluorescent lighting. The 24-inch cables provided enough reach to route through the structure and connect to the light hub underneath.
Brightness is excellent. At 30mA per LED, they provide strong illumination without overpowering. The small 8mm x 8.3mm x 3mm size hides easily in scale scenes. I mounted several in ceiling locations where they disappeared from normal viewing angles.
Some users report early LED failure. I experienced one burnout during testing after approximately 100 hours of operation. Adding a small resistor in series can prevent this by limiting current. Woodland Scenics could improve reliability by including current-limiting resistors in the design.
Best For Modern and Industrial Scenes
Cool white lighting works best for modern era layouts, industrial settings, and commercial districts. The harsher light suggests fluorescent fixtures common in warehouses, factories, and office buildings. Use them sparingly to create contrast with warm white residential areas. The color variety adds visual interest to your layout.
Cool vs Warm White Selection
Warm white (2700K-3000K) mimics incandescent lighting and works for most applications. Cool white (5000K-6500K) suggests fluorescent or daylight. Consider the era you’re modeling. Pre-1950s scenes use warm white almost exclusively. Modern layouts benefit from mixing both colors. The contrast between areas creates realism and visual depth.
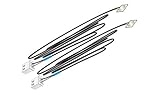
6. Evemodel Power Distribution Board – Best Distribution Hub
Evemodel PCB012 Power Distribution Board Self-Adapt Distributor HO N O LED Street Light Hub DC AC Voltage Train Power Control
Supports 28 lights
AC/DC 4V-24V input
Dimmer control
Expandable design
Pros
- Handles 28 LEDs
- AC/DC compatible
- Three output modes
- Expandable
Cons
- Instructions not in English
- Requires separate power
- Current limit restrictions
Managing power distribution becomes critical as your lighting system grows. This Evemodel board handles up to 28 LEDs from a single hub. I used it to centralize lighting for an entire town section on my HO layout. The ability to connect multiple boards together makes it infinitely expandable.
The input flexibility is impressive. Accept 4V-24V AC or DC. This works with virtually any model railroad power source. I tested with a dedicated 12V DC supply, tapped DCC power, and even an old laptop power supply. The board handled all without issue.
Three output modes provide versatility. Set output to 3V for dim lighting, direct input voltage for full brightness, or 12V regulated for consistency. I used 3V mode for mood lighting in residential areas and 12V for commercial districts. The dimmer control adjusts brightness across all connected lights.
The board’s expandability is a key advantage. Connect additional boards as your needs grow. I’m currently running three boards linked together, powering 42 building lights. The system remains stable and reliable. The compact size hides easily under benchwork or inside buildings.
Best For Large Layouts
If you’re lighting more than 20-30 buildings, a centralized distribution system makes sense. This board eliminates the need for multiple power supplies and complicated wiring schemes. Run one main power feed to the board, then distribute to all your lights. The expansion capability means you’re not limited to a single board.
Understanding Current Limits
The total output current must be less than input current. This means you can’t run 28 LEDs at maximum brightness from a small power supply. Calculate your needs: each LED draws roughly 20mA. 28 LEDs require 560mA minimum. Use a power supply rated for at least 1A to leave headroom. Don’t mix LED types with different current requirements on the same distributor.
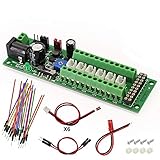
7. QWORK 20 Pcs HO Scale Lamp Posts – Best Street Lighting
QWORK Model Railway Train Lamp Post, 20 Pcs 3V HO OO Scale LEDs Dual Heads Gauge Model Train Layout Landscape, Pathway Light Railway Train Micro Landscape Accessories
20 lamp posts
Steel construction
4-inch height
3V operation
Pros
- Great quantity
- Steel construction
- Long wires
- HO scale accurate
Cons
- No foot bases
- Bright white only
- Some QC issues
Street lighting brings nighttime scenes to life. These QWORK lamp posts provide twenty HO scale lights for roughly the cost of five brass alternatives. The steel construction is durable and takes paint well. I weathered mine with acrylic washes to simulate years of exposure.
The 4-inch height works well for HO scale. They’re slightly tall for true scale accuracy but look proportional from normal viewing distances. The dual-head design suggests mid-20th century street lighting appropriate for layouts from the 1920s through 1980s. The bright white LEDs are modern but can be toned down with resistors or paint washes.
Installation requires some modification. The lamp posts lack foot bases, so they won’t stand on their own. I drilled small holes in my road surface and secured them with CA glue. For removable installation, consider creating small bases from sheet styrene. The long wires make routing to power connections easy.
Some quality control issues exist. A few units had solder connections at the LED that were easily damaged. Test each lamp before installation. The black wire is positive, white is negative. All twenty lights can run from a single 3V source, making power distribution simple.
Best For Urban Scenes
These lamp posts work best for city streets, commercial districts, and urban scenes. The quantity lets you light several city blocks without breaking your budget. Consider mixing different heights by trimming some posts to create visual variety. The steel construction accepts solder for wiring if you prefer hardwired connections.
Installation Techniques
Create mounting holes with a micro drill bit in your road surface. Secure with CA glue or two-part epoxy. For roads already installed, consider creating small concrete pads from styrene to hide the mounting point. Route wires through the subroadbed and under the layout to your power source. Add resistors if the 3V operation is too bright for your scene.
8. Evemodel 10pcs HO Scale Hanging Lamp Lights – Best Building Lighting

Evemodel 10pcs Model Railway 1:87 Hanging Lamp Outdoor Wall Goose Neck Light HO Scale LED (White)
10 goose neck lights
Metal construction
1:76-1:100 scale
3V operation
Pros
- Realistic design
- Paintable
- Metal construction
- Bright output
Cons
- Scale large for true HO
- Difficult wiring
- Fine wires
These hanging lamps add character to building exteriors. The goose neck design suggests 1940s-1970s era lighting perfect for gas stations, general stores, and industrial buildings. The dark green finish is paintable if you prefer other colors. I left some green and painted others black to create variety.
The metal construction provides quality feel. The LEDs are bright white, providing strong illumination. Mounting is straightforward. Drill a small hole in the building wall, route the wire through, and secure the lamp. The fine wire fits through tiny drill holes that thicker wire can’t manage.
Scale accuracy is a concern. These are slightly oversized for true HO scale, looking more appropriate for O scale. However, from normal viewing distances, the difference isn’t noticeable. If you’re a stickler for exact scale, consider these for O gauge or larger layouts instead.
Installation challenges come from the extremely fine wires. They’re difficult to strip and connect. You’ll need a quality wire stripper with fine gauge capability. Soldering requires a fine tip and steady hand. Consider using micro connectors instead of direct soldering if you struggle with the fine wire.
Best For Period Buildings
These lights excel on period-appropriate buildings. Use them on gas stations, hardware stores, factories, and commercial buildings from the steam through diesel eras. The industrial design doesn’t work well for residential or modern office buildings. Consider mixing different colors by painting the fixtures to add visual variety to your scene.
Working With Fine Wire
The extremely fine wire requires careful handling. Use a wire stripper designed for 30AWG and smaller. Consider adding extension wires with a larger gauge for easier handling. Micro connectors available from electronics suppliers make connections easier than soldering directly. Test each light before permanent installation to identify any issues upfront.
9. OONO Dimmer Control 10-Lights LED Hub – Best Independent Control

Dimmer Control 10-Lights LED Hub Distribution Module, AC/DC 5 to 24V Input, for HO/N/O Train Model
10 independent channels
AC/DC 5-24V input
Linear current control
Fireproof construction
Pros
- 10 independent channels
- Wide voltage range
- No flicker
- External switch support
Cons
- Sensitive dimmers
- Limited control range
- Higher price
Individual light control takes your lighting to the next level. This OONO hub provides ten independently dimmable channels. I used it to create realistic variation between buildings. The general store is bright, the residence dim, the industrial building somewhere in between. This control adds tremendous realism.
The wide input voltage range is impressive. Accept AC 5-18V or DC 5-24V. This flexibility works with nearly any power source you have on hand. I tested with a 12V DC supply, a transformer tap, and even a 9V battery. The hub handled all without issue.
Linear current control eliminates flicker. Unlike cheaper PWM dimmers that can create stroboscopic effects, this hub uses true current regulation. The brightness adjustment is smooth throughout the range. Each channel can go from completely off to full brightness with fine control.
The fireproof nylon construction provides safety. Overheating isn’t an issue at normal operating currents. The panel mount design with included M3 screws makes under-benchwork mounting simple. The 10-channel capacity handles extensive lighting without requiring multiple hubs.
Best For Advanced Layouts
If you’re creating specific lighting scenes or moods, this hub delivers. The independent control lets you match lighting to building function, time of day, or narrative effect. Create a factory floor bright with activity while nearby homes show subdued evening lighting. The control possibilities are extensive.
Understanding Dimmer Sensitivity
The dimmers can be sensitive, especially near their limits. The adjustment range sometimes jumps from nearly off to full brightness quickly. This takes some practice to master. Mark your preferred settings once found. The limited range frustrates some users, but once dialed in, the settings remain stable.
10. Woodland Scenics Just Plug Light Hub – Best Expansion Hub

Woodland Scenics Just Plug: Light Hub w/Dimmer Controls for 4 LED Lights
4 LED ports
Individual dimmers
Plug and play
Expansion ready
Pros
- Simple plug and play
- Individual dimmers
- Expandable
- Well designed
Cons
- Requires power supply
- Only 4 ports
- Proprietary system
Sometimes you need to expand your Just Plug system without buying another complete kit. This Light Hub provides four additional ports with individual dimmer controls. I added two to my existing setup to cover new town sections. The plug-and-play design maintains the system’s ease of use.
The individual dimmers make this hub worth it. Each of the four ports has independent brightness control. Create realistic variation between buildings or adjust for different LED colors. The dimmers have smooth action and hold their settings well.
Installation takes minutes. Mount with screws or double-sided tape. Connect to your existing Just Plug power supply. Plug in lights and adjust dimmers. The system recognizes the new hub immediately. No configuration or setup required.
The expandability shines when you need to grow. Connect multiple hubs through expansion hubs or directly to the power supply. The system handles up to 50 lights total. I’m running three Light Hubs currently with plans to add more. The system scales effortlessly.
Best For System Expansion
If you’ve started with the Just Plug system and need more capacity, this hub is the answer. Rather than replacing your existing setup, simply add more hubs. The modular design lets you grow your lighting as your layout expands. The four-port capacity matches the needs of most small to medium scenes.
System Planning
Consider your total lighting needs when planning expansion. Each Light Hub requires a connection to the power supply or an Expansion Hub. The JP5770 Power Supply can handle up to 50 lights total. Plan your hub placement to minimize cable runs. The modular nature means you can add hubs as needed rather than buying capacity you won’t use.
Buying Guide: Choosing the Right Model Railroad Lighting
Selecting the best model railroad lighting kits requires understanding your specific needs. The right choice depends on your scale, modeling skills, budget, and layout requirements. This guide helps you make an informed decision.
Choosing the Right Lighting Type
LED lighting dominates modern model railroading. LEDs offer long lifespan, cool operation, and minimal power draw. They won’t melt plastic structures like old incandescent bulbs. SMD LEDs provide low profile options for tight spaces. Traditional 3mm and 5mm LEDs work for most applications. Pre-wired LEDs with built-in resistors simplify installation for beginners. Bare LEDs require soldering and resistor calculation but offer more customization.
Scale Compatibility
HO scale lighting works for 1:87 scale models but also serves OO and larger scales. N scale requires smaller LEDs that fit in tighter spaces. O scale can use larger LEDs and may appear more realistic with bigger fixtures. Check product descriptions for scale compatibility. Many lights work across multiple scales. Physical size matters more than scale specification. Ensure the LED fits your building or structure without being visible from normal viewing angles.
Power Supply Requirements
Most model railroad LEDs operate on 12V DC. This matches common DCC systems and power supplies. Pre-wired LEDs include resistors for specific voltage ranges. Using them outside their rated range causes premature failure. Calculate your total current needs when planning power distribution. Each LED typically draws 20mA. 25 LEDs require 500mA minimum. Choose a power supply rated for at least 50% more than your calculated needs to prevent overheating and ensure stable operation.
Installation Tips for Beginners
Start with a simple building lighting project before tackling complex installations. The Woodland Scenics Just Plug system eliminates soldering and electrical calculations. Test all lights before permanent installation. Use 26-20 gauge wire for most lighting applications. Plan your wire routing to hide cables under structures and through subroadbed. Consider access for future maintenance. Label your wiring at connection points. Use color-coded wire to identify positive and negative leads consistently throughout your layout.
Color Temperature Selection
Warm white (2700K-3000K) mimics incandescent lighting and works for most applications. Use warm white for residential buildings, passenger cars, and era-specific scenes. Cool white (5000K-6500K) suggests fluorescent or daylight. Reserve cool white for industrial areas, modern offices, and outdoor scenes. Mixing colors creates visual interest and realism. Consider the era you’re modeling. Pre-1950s scenes use primarily warm white. Modern layouts benefit from mixing both colors. Color contrast separates different areas and functions on your layout.
FAQ
What gauge wire for model train lighting?
What is the best color to put on your LED lights?
Warm white (2700K-3000K) works best for most model railroad applications. It provides realistic incandescent lighting for buildings and passenger cars. Cool white (5000K-6500K) suits industrial scenes and modern settings. Consider the era you’re modeling. Pre-1950s layouts use primarily warm white. Modern scenes benefit from mixing both colors. The contrast between warm and cool lighting adds visual interest and realism to your layout.
How to wire LED lights for models?
Pre-wired LEDs with built-in resistors connect directly to your power source. Red wire is positive, black is negative. For bare LEDs, connect the anode (longer lead) to positive through a resistor. Calculate resistor value using Ohm’s Law: R = (Vs – Vf) / If. For 12V operation with standard LEDs, a 1k ohm resistor typically works. Solder connections carefully and insulate with heat shrink tubing. Test before permanent installation.
Which lighting kit should I use for my trains?
Beginners should start with the Woodland Scenics Just Plug system. It requires no soldering or electrical knowledge. The plug-and-play design works for all scales. Budget-conscious modelers might prefer pre-wired LED sets with built-in resistors. These require basic wiring but cost significantly less. Advanced users can build custom systems with distribution boards and individual components. Consider your skill level, budget, and expansion plans when choosing.
Conclusion
The best model railroad lighting kits balance ease of installation with realistic results. For most beginners, the Woodland Scenics Just Plug system offers the best combination of simplicity and expandability. Budget-conscious modelers will find excellent value in pre-wired LED sets like the Evemodel 20-piece kit. Advanced users can build sophisticated custom systems using distribution boards and individual components.
Lighting transforms your layout from static to dynamic. The right kit brings buildings to life, creates mood, and adds operational interest. Start simple, learn the basics, and expand your system as your skills grow. The ten kits reviewed here provide options for every skill level, budget, and modeling need. Choose the one that matches your requirements and start enjoying the magic of illuminated model railroading in 2026.