If your studio monitors are sitting directly on your desk, you are hearing your furniture vibrate almost as much as your music. I spent years mixing with monitors perched on foam pads and piles of books before I realized how much acoustic coupling was wrecking my low-end accuracy. The right pair of studio monitor stands can clean up your bass response, position your speakers at ear level, and give your mixes the honesty they deserve.
Studio monitor stands do more than just hold your speakers off the ground. They decouple your monitors from whatever surface they rest on, which stops vibrations from traveling through your desk or floor and coloring what you hear. That means tighter bass, clearer mids, and fewer surprises when you play your tracks in the car or on headphones. Whether you are building a home studio in a spare bedroom or upgrading a professional mixing room, finding the best studio monitor stands for your setup is one of the cheapest upgrades you can make to your sound.
Our team tested 6 different pairs of studio monitor stands over several weeks, ranging from compact desktop clamp-on models to heavy-duty floor-standing tripods. We evaluated each one on stability, adjustability, build quality, and real-world sound improvement. Below you will find our honest reviews, a detailed buying guide, and recommendations for every budget and studio size.
Table of Contents
Top 3 Picks for Best Studio Monitor Stands

Liquid Stands MS112 Clamp-On
- Stainless Steel
- 65lb Capacity
- Tilt 0-20 Degrees
- 10-Year Warranty


Vondynote Basic Clamp Stands
- Compact Design
- 50lb Capacity
- Height 9-14 Inches
- Lifetime Warranty
Best Studio Monitor Stands in 2026
| Product | Specifications | Action |
|---|---|---|
|
Liquid Stands MS112 Clamp-On
|
|
Check Latest Price |
|
Pyle Tripod Monitor Stands PSTND32
|
|
Check Latest Price |
 Vondynote Tilt Clamp Stands
|
|
Check Latest Price |
 OnStage SMS6000 Monitor Stands
|
|
Check Latest Price |
 PERLESMITH Floor Speaker Stands
|
|
Check Latest Price |
|
Vondynote Basic Clamp Stands
|
|
Check Latest Price |
1. Liquid Stands MS112 – Premium Clamp-On with Full Adjustability
Liquid Stands Studio Monitor Stands - Music Studio Desktop Speaker Stand - 2 Pack 12x9 Clamp-on Adjustable Short or Tall Speaker Support for Music Booth Desk Audio Monitor Stand Mount with Tilt
Stainless Steel Clamp-On
65lb Load Capacity
Height 9.5-13.5 In
Tilt 0-20 Degrees
Platform 9x12.5 In
Pros
- Highest rated at 4.8 stars with 90% 5-star reviews
- Heavy stainless steel construction for maximum stability
- Full adjustability with height tilt and orientation options
- 10-year warranty for long-term peace of mind
Cons
- Premium price compared to other clamp-on options
- Slight manufacturing tolerance issues noted by a few users
Out of every pair of stands I tested, the Liquid Stands MS112 left the strongest impression. The moment I unboxed them, the weight of the stainless steel components told me these were built for serious studio work. At 4.8 stars with roughly 90% of reviewers giving 5 stars, the consensus from other users matched my own experience. These are simply the best-built clamp-on stands I have used.
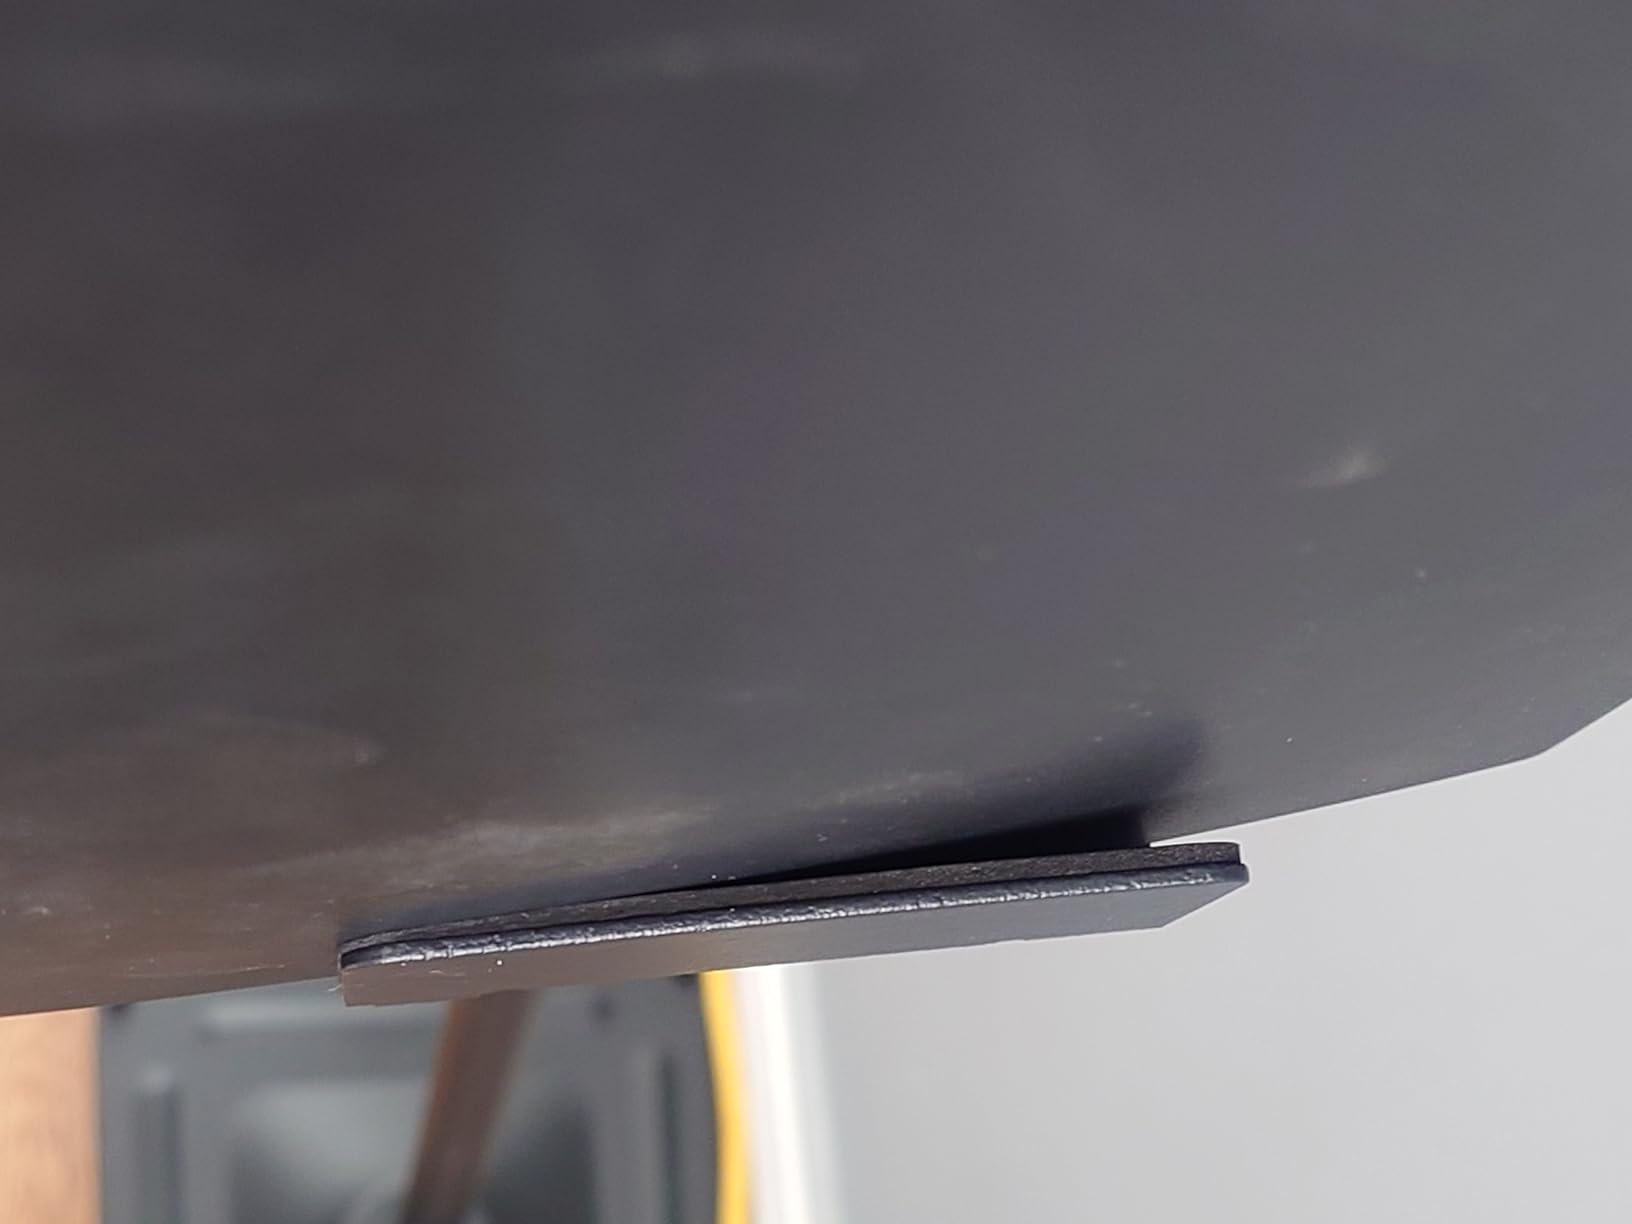
I mounted them on my studio desk with 5-inch and 8-inch monitors, and the 9-by-12.5-inch platform handled both sizes without any overhang issues. The 6mm anti-slip isolation padding does a surprisingly good job of keeping monitors from vibrating against the metal surface. I noticed an immediate tightening in my bass response compared to my previous foam pad setup.

The tilt adjustment range is the widest I found in this category at 0 to 20 degrees. That extra range makes a real difference when you need to angle your monitors down toward your listening position from a higher shelf or mounting point. The height range of 9.5 to 13.5 inches worked well for my seated mixing position, putting the tweeters right at ear level.
One detail I appreciated is the ability to orient the stands horizontally or vertically, giving you more flexibility in how you position them on your desk. The clamp fits desks from 0.5 to 2 inches thick, which covers most studio desks on the market. Liquid Stands also claims to have sold over 250,000 units, which speaks to their track record in the audio community.
Who Should Buy the Liquid Stands MS112
These stands are the right pick if you want the highest quality clamp-on option available and are willing to invest a bit more for premium materials and a 10-year warranty. They suit producers and engineers who need full tilt, height, and orientation control for precise near-field monitoring setups.
They are especially good for studios running heavier monitors up to 65 pounds, where cheaper clamp-on stands might flex or wobble. If you have a solid desk between 0.5 and 2 inches thick and want something that will last a decade or more, this is your pair.
Setup Tips and Desk Compatibility
Before installing, measure your desk thickness carefully. The clamp range of 0.5 to 2 inches is generous but not infinite. If your desk has a lip or edge trim, account for that in your measurement. I recommend positioning the clamps near the back edge of your desk to maximize your work surface area.
When adjusting tilt, make small increments and test from your listening position. Even a 5-degree change can shift your sweet spot noticeably. Use the orientation flexibility to your advantage by trying both horizontal and vertical configurations to see which gives you the best viewing angle to your monitors.
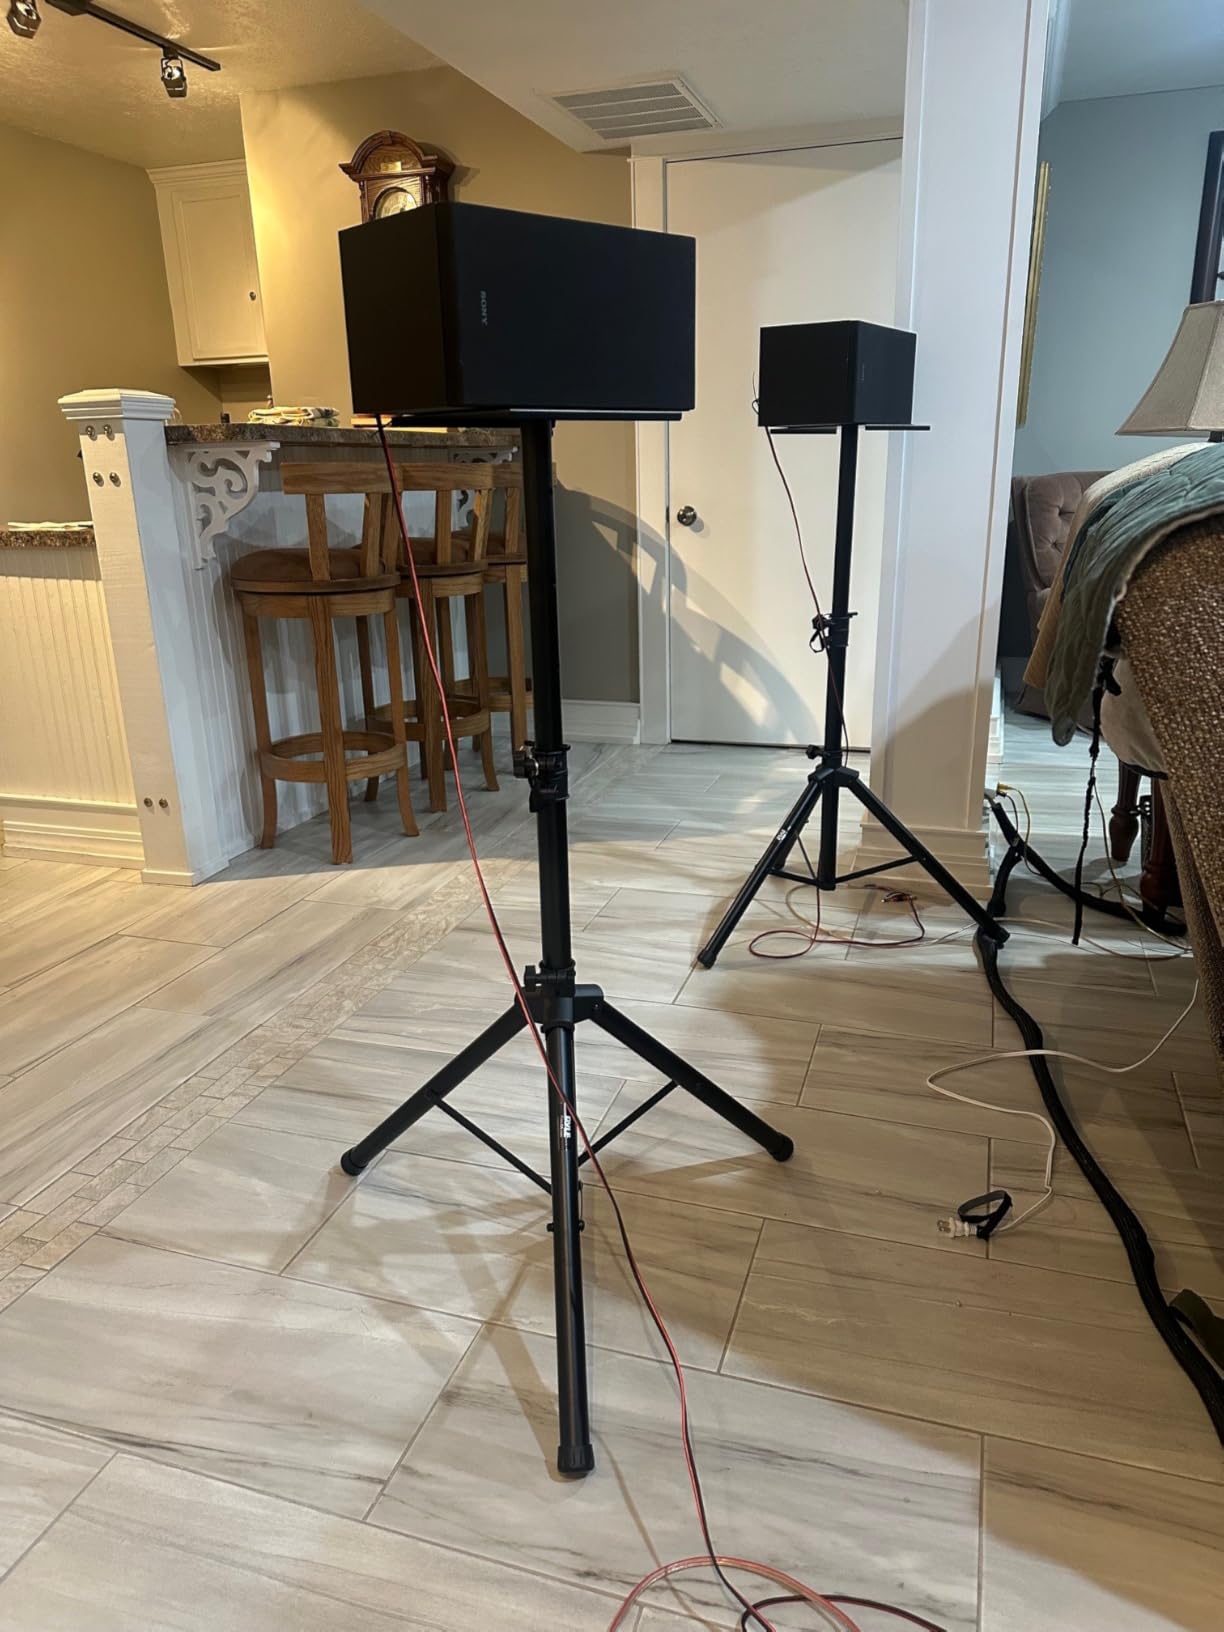
2. Pyle PSTND32 – Heavy Duty Tripod Stands with 90lb Capacity
Pyle Adjustable Speaker Stand Pair – Dual Studio Monitor Tripod with Metal Base, Anti-Slip Speaker Pads, Height Adjustment from 34” to 53” – Ideal for Home, Studio, and DJ Use, 90 lbs Weight Capacity
Tripod Floor Stands
90lb Load Capacity
Height 34-53 In
Metal Platform 8.9x8.9 In
Collapsible
Pros
- Massive 90-pound weight capacity handles any monitor
- Affordable for the quality and stability provided
- Wide height range from 34 to 53 inches
- Collapsible design for easy storage and transport
Cons
- Large footprint when fully extended
- Platform size may be small for some larger monitors
The Pyle PSTND32 tripod stands are the workhorse of this group. With a 90-pound weight capacity and a height range of 34 to 53 inches, these floor-standing stands can handle just about any pair of studio monitors you throw at them. I tested them with a pair of heavy 8-inch monitors and the tripod base with center brace never felt anything less than rock solid.
What impressed me most is how stable these stands remain even at their maximum height. The tripod leg design with the connecting center brace distributes weight evenly across three points, which eliminates the wobble you sometimes get with single-column floor stands. At 4.7 stars with over 2,600 reviews, the user feedback strongly supports my findings.
The telescoping center column adjusts smoothly, and the safety support pin gives you extra confidence that your monitors will not slip. The anti-slip rubber grip pads on the platform keep your speakers from walking around, even during heavy bass playback. I also like that these stands are collapsible, making them easy to pack up and move between rooms or take to live gigs.
The 8.9-inch square platform is adequate for most monitors up to about 7 inches, but larger 8-inch monitors will overhang the edges slightly. This is not a dealbreaker since the rubber pads still grip the bottom of the speaker well, but it is worth noting if you are running bigger monitors like Yamaha HS8s or Adam A7Xs.
Who Should Buy the Pyle Tripod Stands
These stands are ideal for anyone who needs floor-standing monitor placement without spending a fortune. They are a great match for home studio owners who do not have a large desk or who prefer to position their monitors away from the desk for mid-field listening. DJs and live sound engineers will also appreciate the collapsible design for transport.
If you are running heavier monitors above 15 pounds per speaker, the 90-pound capacity of these Pyle stands gives you serious headroom. They handle the weight without breaking a sweat, and the tripod design means you never have to worry about a stand tipping over.
Floor Placement and Room Considerations
When setting up these stands, keep in mind that the tripod legs spread out about 18 inches at the base. You will need clear floor space around each stand, so they are not the best choice for extremely cramped rooms. I found that positioning them about 3 to 4 feet behind my desk gave me an excellent near-field listening triangle.
For carpeted floors, the included rubber feet work fine. If you have hard flooring, consider adding foam pads under the feet for extra decoupling. The stands do not include built-in cable management, so you may want to use cable ties or sleeves to keep your speaker wires tidy running up the center column.
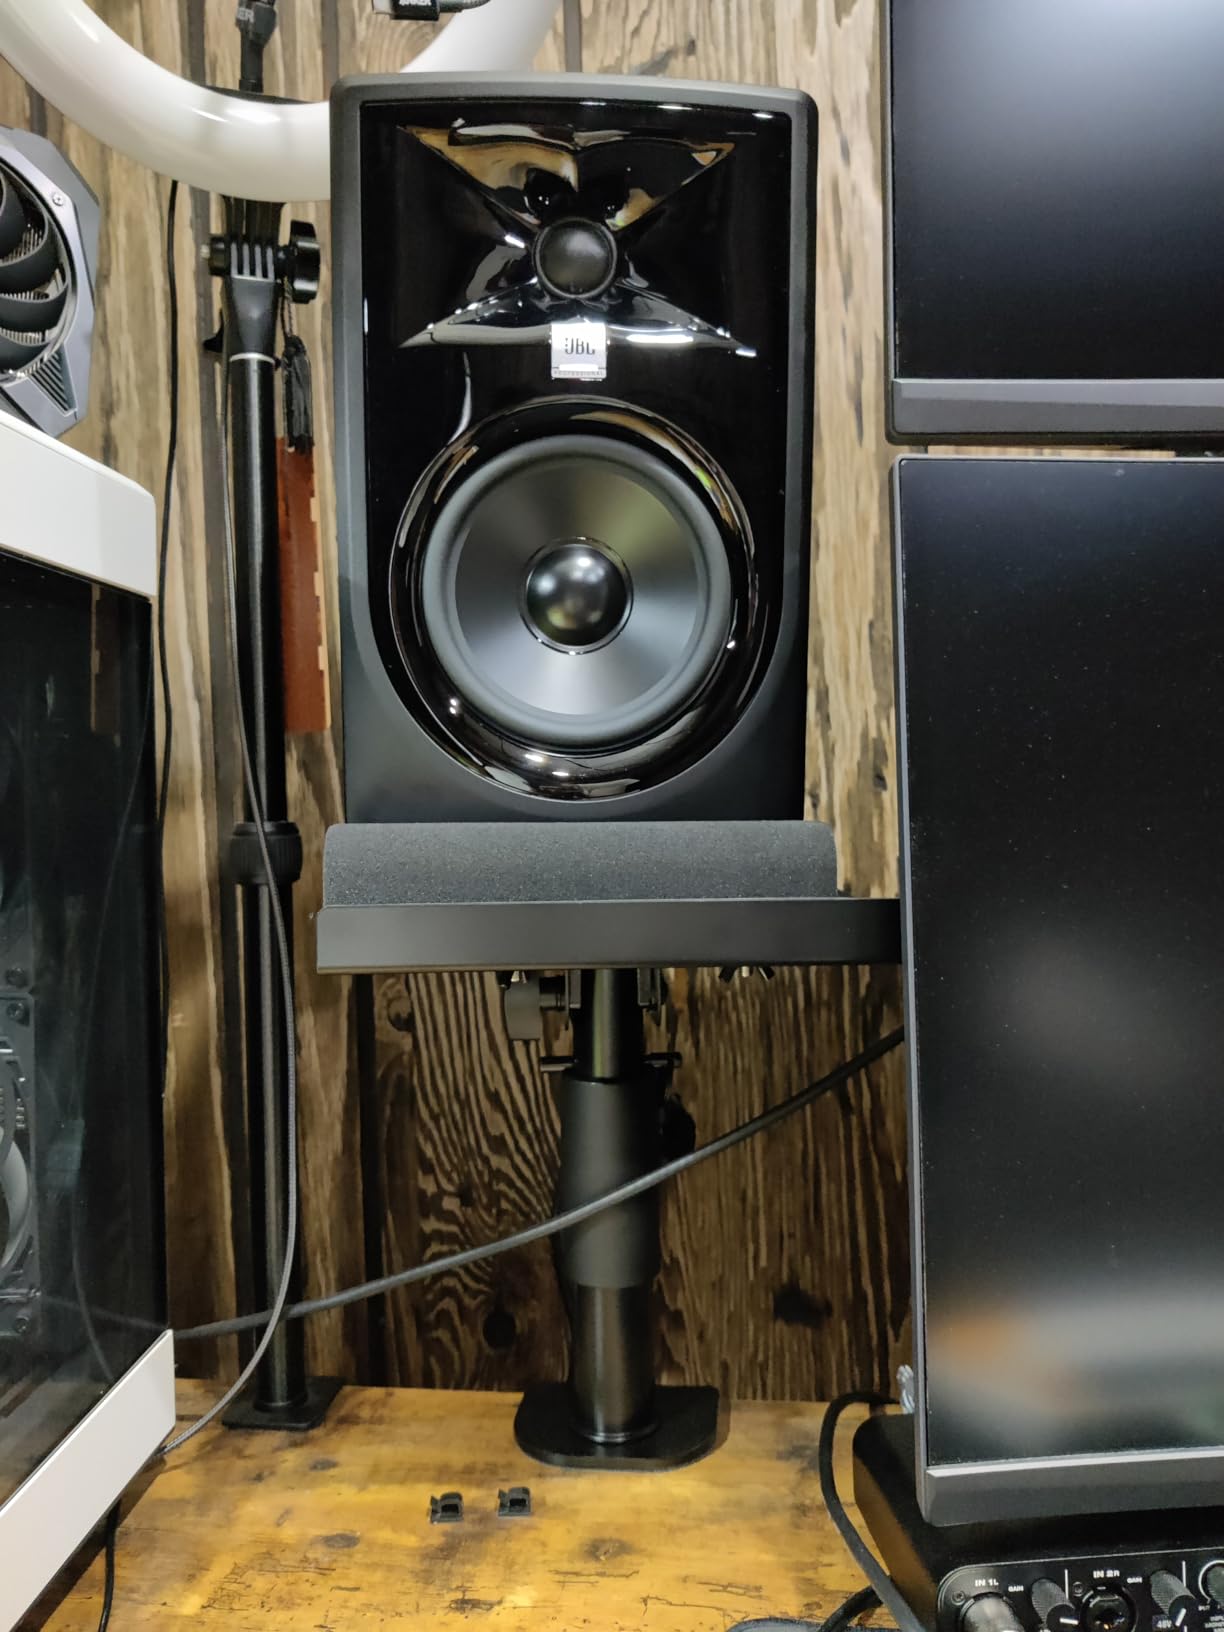
3. Vondynote Tilt Clamp Stands – Adjustable Angle Desktop Pair
Vondynote Studio Monitor Stands Pair Heavy Duty Desk Clamp Speaker Stands with Adjustable Tilt Angle Tray of 0-12 °
Clamp-On Desktop Stands
60lb Load Capacity
Height 10.4-15.4 In
Tilt 0-12 Deg
Platform 9x12 In
Pros
- Adjustable tilt angle from 0 to 12 degrees for precise aiming
- Sturdy construction with locking knob and security pin
- Professional powder-coated finish
- Versatile height range with 4 drill hole positions
Cons
- May wiggle slightly with very large monitors
- Desk clamp may not fit in tight desk configurations
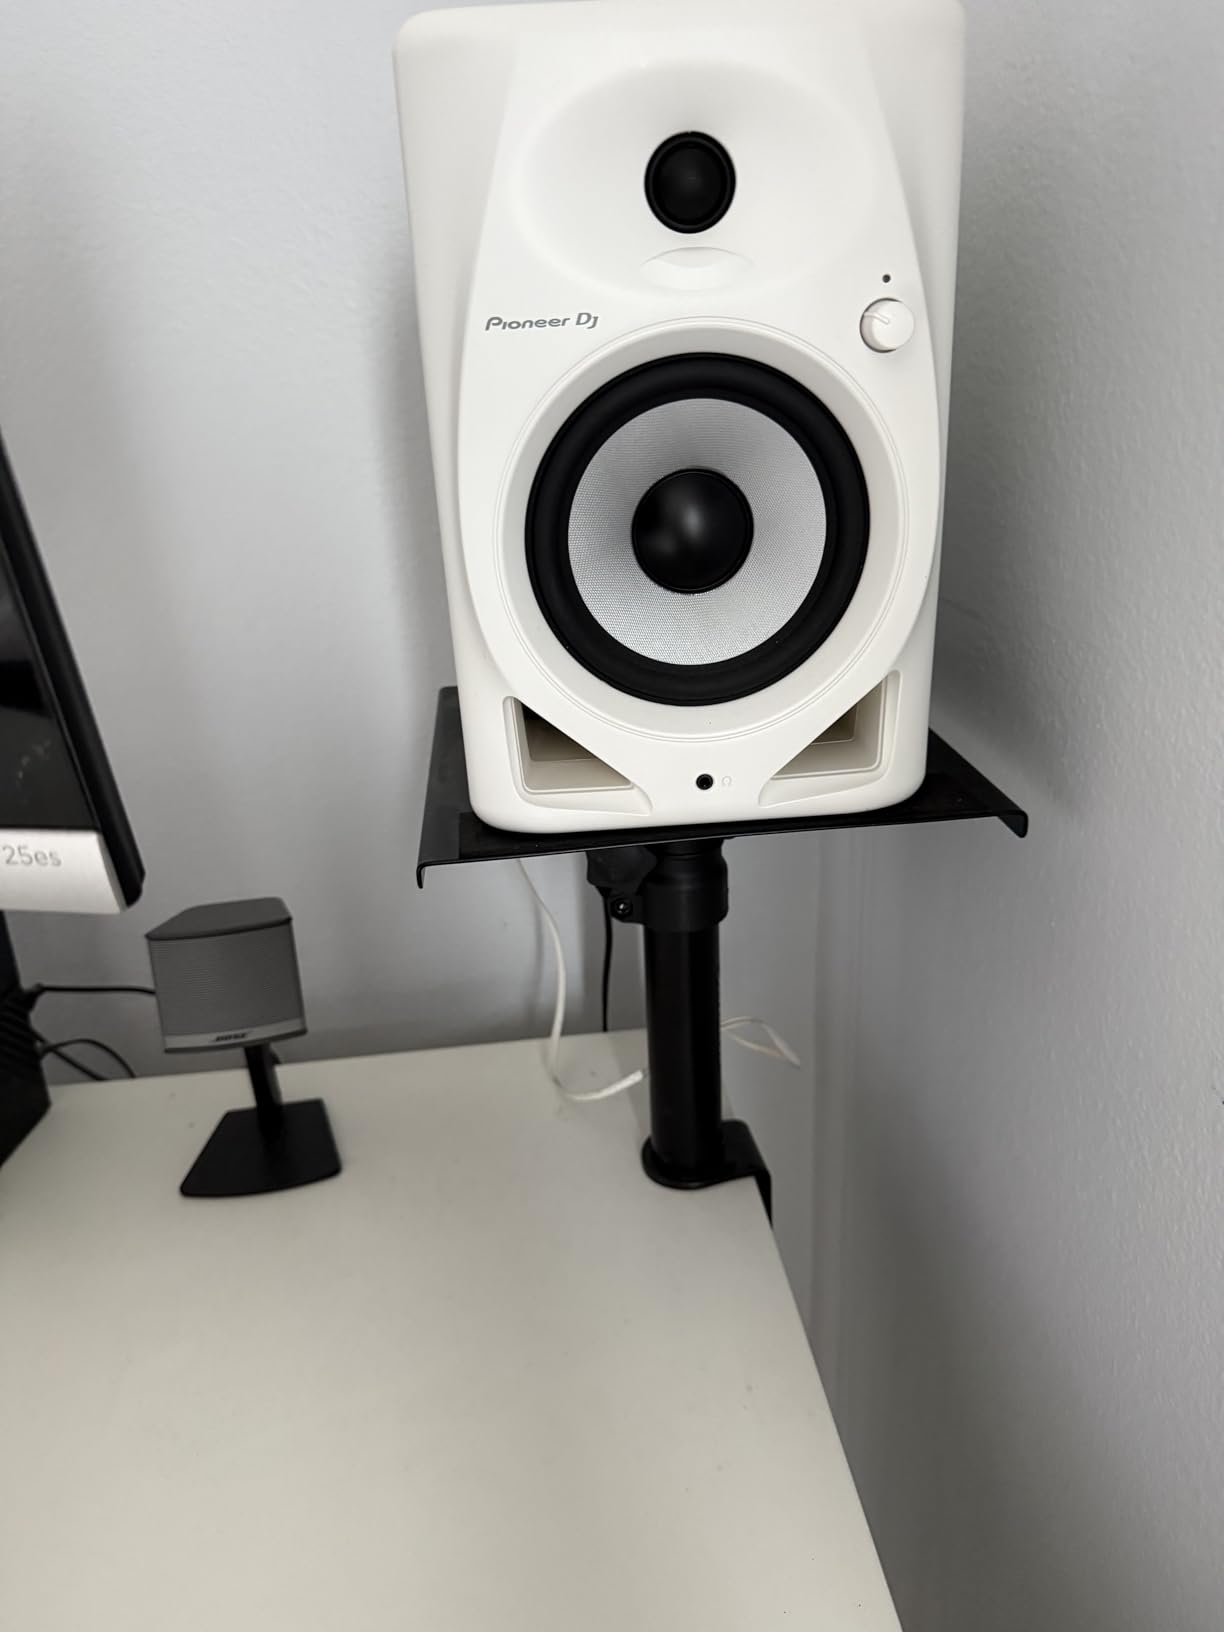
The Vondynote Tilt Clamp Stands fill an important gap between basic fixed-angle stands and expensive professional options. The standout feature here is the adjustable tilt angle from 0 to 12 degrees, which lets you point your monitors exactly where you need them without propping up the front with random objects. I found this especially useful when my monitors were positioned slightly above ear level on a deeper desk.
With a 60-pound weight capacity and a 9-by-12-inch platform, these stands accommodated my 6.5-inch monitors with room to spare. The 3mm EVA anti-skid pad on the top plate kept everything firmly in place, even when I was pushing some serious volume through the speakers. The powder-coated finish gives them a clean, professional look that fits right into any studio environment.
Height adjustment uses four drill holes at 10.4, 12, 13.7, and 15.4 inches. The locking knob and security pin combination means your chosen height stays locked in place without any drifting over time. I tested this by loading the stands with 25-pound monitors and leaving them for two weeks, and the height did not budge.
The clamp mechanism includes a 3mm EVA pad that protects your desk surface from scratches or dents. The clamp opens up to 2.6 inches, which fit my standard studio desk with no issues. Assembly was straightforward with the included hardware and took about 15 minutes per stand.
Who Should Buy the Vondynote Tilt Clamp Stands
These are the right choice if you need tilt adjustability on a desktop clamp-on stand without paying for a premium model. They work well for home studio producers who want to fine-tune their monitor angle for the best possible sweet spot. If you are mixing on 5-inch to 7-inch monitors, the platform size and 60-pound capacity are more than sufficient.
The tilt feature is particularly valuable if your desk setup puts your monitors at a different height than your seated ear position. Instead of craning your neck or stacking things under your monitors, you just dial in the angle and your tweeters point directly at your ears.
Tilt Angle Benefits for Near-Field Mixing
In a near-field monitoring setup, even a few degrees of tilt can change what you hear at the mix position. Pointing your monitors too high means you hear more ceiling reflections. Too low and the high frequencies from the tweeters miss your ears entirely. The 0 to 12 degree range on these Vondynote stands covers the practical range most producers need.
I recommend starting with a slight downward tilt of about 5 degrees if your monitors are slightly above ear level, then adjusting by ear while playing a familiar reference track. You will know you have the angle right when the stereo image feels focused and centered, and the high frequencies sound clear without being harsh.
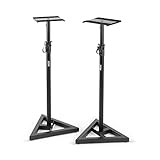
4. OnStage SMS6000 – Professional Floor-Standing Monitor Stands
OnStage On Stage SMS6000 Adjustable Monitor Stands (Pair)
Floor Standing Stands
90lb Load Capacity
Height 36.5-54 In
18-Inch Triangular Base
Platform Padding
Pros
- Industry standard trusted by professionals for decades
- Wide 18-inch triangular base for unmatched stability
- Excellent height range from 36.5 to 54 inches
- Vibration-reducing platform padding included
Cons
- Higher price point than most floor-standing alternatives
- Some reports of shipping damage from Amazon packaging
- Minimum height may be too tall for very small rooms
The OnStage SMS6000 is the pair of stands that seems to show up in every professional studio I have visited. They have been an industry standard for years, and for good reason. The wide 18-inch triangular base provides stability that single-column and tripod designs simply cannot match. Once you set these up and load your monitors, they feel like they are bolted to the floor.
With a 90-pound weight capacity and a height range of 36.5 to 54 inches, these stands can handle any studio monitor on the market. I used them with a pair of 8-inch monitors weighing about 22 pounds each, and the stands barely noticed the load. The height adjustment uses a tightening knob paired with a locking pin, so once you set your preferred height, it stays put permanently.

The platform padding is a thoughtful touch that reduces vibration transmission between the speaker cabinet and the stand itself. Combined with the non-slip rubber feet on the base, this creates a decent decoupling effect even without dedicated isolation pads. OnStage also includes optional base spikes if you are setting up on carpet, which dig in and provide extra stability.
At 1,244 reviews and 4.6 stars, the user feedback is consistently positive. The most common praise is about the stability and the professional-grade build quality. The most common complaint relates to shipping damage, so I recommend inspecting your package carefully upon delivery and contacting the seller immediately if any parts arrive bent.
Who Should Buy the OnStage SMS6000
These stands are for serious studio owners who want the most stable, professional floor-standing option available. If you are running heavy monitors, mixing at high volumes, or working in a commercial studio environment, the OnStage SMS6000 gives you the confidence that your monitors will not vibrate, wobble, or shift during a session.
They are also a great long-term investment. The alloy steel construction and simple mechanical design mean there is very little that can break or wear out over time. Many users report owning their OnStage stands for over a decade with zero issues.
Professional Studio Integration
In a professional studio, monitor placement is critical and often permanent. The wide triangular base of the SMS6000 means you need about 18 inches of floor space per stand, so plan your room layout accordingly. Position the stands so your monitors form an equilateral triangle with your listening position, with the tweeters at ear height.
For studios with acoustic treatment, you may want to position the stands away from wall corners to avoid bass buildup. The included rubber feet work well on hard floors, but you can also place the stands on isolation pads for additional decoupling. The stands do not include cable management, so plan your cable routing before finalizing placement.
5. PERLESMITH Floor Speaker Stands – Budget Floor-Standing with Cable Management
PERLESMITH Universal Speaker Stands for Surround Sound -Height Adjustable Extend 33.3”to 45.1”, Floor Speaker Stand for Satellite & Studio & Bookshelf Speakers up to 11LBS,1 Pair Black, PSSS2
Floor Standing Stands
11lb Load Capacity
Height 33.3-45.1 In
Adjustable Width 4.5-9 In
Cable Management
Pros
- Amazon Best Seller with over 10
- 300 reviews
- Built-in cable management with hidden routing
- Easy twist-lock height adjustment system
- Includes base spikes for carpet and rubber feet for hard floors
Cons
- Weight limit of 11 pounds is too low for most studio monitors
- Some concerns about long-term durability with regular use
The PERLESMITH floor stands are the Amazon Best Seller in the speaker stand category with over 10,300 reviews. They are primarily designed for home theater surround speakers, but they can work for lighter studio monitors in a pinch. The built-in cable management with hidden routing is a feature I wish more studio-specific stands included.
Height adjusts from 33.3 to 45.1 inches using a twist-lock mechanism that is quick and easy to operate. The adjustable top plate width from 4.5 to 9 inches means you can accommodate various speaker sizes. I tested these with a pair of lightweight 5-inch monitors weighing about 7 pounds each, and they held them securely at the mid-height setting.

The cable management system routes your speaker wire through the center of the stand and out through the base, keeping your studio looking clean and professional. PERLESMITH also includes hook-and-loop straps for external cable routing if you prefer that approach. The stands come with both rubber feet and base spikes, so you are covered whether your studio has carpet or hard flooring.
However, the 11-pound weight limit is a significant constraint. Most serious studio monitors weigh between 10 and 30 pounds each, so you need to check your monitor weight before considering these stands. They are best suited for compact 5-inch monitors or lightweight satellite speakers rather than the 8-inch monitors that are common in project studios.
Who Should Buy the PERLESMITH Floor Stands
These stands make sense if you are running lighter monitors and want an affordable floor-standing option with integrated cable management. They are a good match for compact studio setups with 5-inch monitors like the Yamaha HS5, KRK Rokit 5, or similar lightweight models. If cable management and clean aesthetics matter to you, these deliver at a reasonable price.
They are also worth considering for podcast studios or voiceover booths where you might be using smaller reference monitors at moderate volumes. The twist-lock height adjustment makes it easy to share the studio space between people of different heights.
Weight Limitations and Speaker Compatibility
Before purchasing, weigh your monitors and compare them to the 11-pound limit. Remember that the weight limit is per stand, so each monitor needs to be under 11 pounds. Most 5-inch monitors fall within this range, but 6.5-inch and 8-inch models almost always exceed it.
If your monitors are close to the weight limit, I recommend against extending these stands to their maximum height. Keeping them at a lower setting reduces the lever effect and keeps everything more stable. Also be aware that these stands use a single center column rather than a tripod base, so they are inherently less stable than the Pyle or OnStage options.
6. Vondynote Basic Clamp Stands – Compact Desktop Pair
Vondynote Set of 2 Desktop Clamp Speaker Stands Short Studio Monitor Stands Height Adjustable
Clamp-On Desktop Stands
50lb Load Capacity
Height 9-14 In
Platform 9x9 In
Alloy Steel
Pros
- Most affordable option in the roundup
- Solid construction once properly installed
- Compact design saves valuable desk space
- Lifetime warranty included
Cons
- No tilt angle adjustment available
- Small platform may not suit larger monitors
The Vondynote Basic Clamp Stands are the most affordable pair in this roundup, but they do not feel cheap once you get them mounted. At 4.6 stars with over 1,300 reviews, they have earned solid marks from users who need a no-frills desktop solution. I found them to be surprisingly sturdy for the price, with thick 5mm clamps and grade 8.8 reinforced steel screws holding everything tight.
The height range of 9 to 14 inches puts these in the compact category, which is exactly what many home studio owners need. If you are sitting at a standard desk and want your monitors raised just enough to get the tweeters to ear level, this range covers the most common scenarios. The 9-by-9-inch metal top plate includes a 2mm EVA anti-skid pad that keeps your monitors from sliding around.

Installation was the simplest of all the clamp-on stands I tested. The included Allen key and M8 bolts made the process straightforward, and I had both stands mounted and ready to use in under 20 minutes. The 3mm EVA pad on the clamp protected my desk surface, and the clamp opened wide enough to fit my 1.5-inch thick desktop with room to spare.
The main trade-off with this budget option is the lack of tilt adjustment. Your monitors will sit perfectly flat, which works fine if your desk height naturally puts your ears at the right level. If you need to angle your monitors, you will have to use isolation pads or shims under the front of the speakers to achieve the right tilt.
Who Should Buy the Vondynote Basic Clamp Stands
These are the right pick for budget-conscious producers who need reliable desktop monitor stands without paying for features they will not use. If you have a small studio with limited desk space and your monitors are in the 5-inch to 7-inch range, these will do the job well. The lifetime warranty adds extra value to an already affordable package.
They are also a smart choice if you are just starting to build your studio and want to allocate more of your budget toward your monitors, audio interface, or acoustic treatment rather than stands. You can always upgrade later, but these provide a solid foundation from day one.
Space-Saving Benefits for Small Studios
One of the biggest advantages of clamp-on stands is that they free up desk space that would otherwise be occupied by your monitors. The Vondynote Basic clamps attach to the edge of your desk, keeping the footprint to a minimum. In my small studio room, this freed up enough space for a small MIDI controller and a microphone that I previously had to store elsewhere.
For really tight spaces, you can mount the clamps on the back edge of your desk and position the stands so your monitors float behind your workspace. Just make sure the clamp can reach your desk edge, as the maximum clamp opening is 2.6 inches. The compact height range also means these stands work well under lofted shelves or wall-mounted storage.
Buying Guide: How to Choose Studio Monitor Stands
Choosing the right studio monitor stands comes down to understanding your room, your monitors, and your workflow. I have broken down the most important factors below to help you make the right decision on the first try.
Types of Studio Monitor Stands
There are four main types of studio monitor stands, and each one serves a different purpose. Floor-standing stands like the Pyle PSTND32 and OnStage SMS6000 are the most stable option and work well in rooms where you can position monitors away from your desk. They are ideal for mid-field monitoring setups or larger studios where you have the floor space to spread out.
Desktop clamp-on stands like the Liquid Stands MS112 and Vondynote models attach directly to the edge of your desk. They save floor space and keep your monitors close, which is perfect for near-field monitoring in small rooms. The trade-off is that they rely on your desk for support, so vibrations can still transfer through the desk surface.
Isolation pads and desktop platforms sit on top of your desk and use foam or rubber to decouple your monitors. These are the most affordable option but they do not offer height adjustment. They are best used as a supplement to stands rather than a replacement.
Wall-mounted brackets are another option for extremely tight spaces, but they require drilling and permanent installation. They are less common in studios because most engineers prefer the flexibility of adjustable stands.
Key Features to Consider
Height adjustability should be your top priority. Your monitors need to be positioned so the tweeters are at ear level when you are in your normal mixing position. If the stands cannot reach the right height, you will end up compensating with books or foam blocks, which defeats the purpose of buying stands in the first place.
Tilt adjustment is the second most important feature. If your monitors are above or below ear level, being able to tilt them ensures the high frequencies reach your ears accurately. A tilt range of 5 to 20 degrees covers most studio setups.
Load capacity matters more than many people realize. Check the weight of your monitors and make sure the stands can handle at least 50% more. This headroom ensures the stands remain stable and the height adjustment mechanism does not slip under load.
Cable management is a nice-to-have feature that keeps your studio looking organized. The PERLESMITH stands are the only pair in this roundup with built-in cable routing, but you can always add your own cable ties or sleeves to any stand.
Monitor Size Compatibility
Not all stands work with all monitor sizes. The platform dimensions matter more than you might think. A 9-by-9-inch platform works fine for 5-inch and most 6.5-inch monitors, but 8-inch monitors like the Yamaha HS8 or KRK Rokit 8 need at least a 9-by-12-inch surface for full support.
Weight is the other compatibility factor. Most 5-inch monitors weigh between 6 and 10 pounds, 6.5-inch monitors range from 10 to 18 pounds, and 8-inch monitors typically weigh 20 to 30 pounds. Match your monitor weight to the stand capacity with plenty of margin.
Desktop vs Floor-Standing: Which Is Right for You
Desktop clamp-on stands are the better choice if you work in a small room, mix in a near-field position, or need to keep your monitors close to your workspace. They save floor space and are generally more affordable. The downside is that they transfer some vibration through your desk.
Floor-standing stands provide better isolation and stability. They are the right choice for larger rooms, mid-field monitoring, or situations where you want maximum decoupling from your desk. The trade-off is that they take up floor space and are less portable than clamp-on options.
Positioning Tips for Your Sweet Spot
Once you have your stands set up, take the time to position them correctly. Form an equilateral triangle between your two monitors and your listening position. Each monitor should be the same distance from your ears as they are from each other. Point the monitors so they aim directly at your head, not past it.
Keep your monitors at least 12 inches away from any wall to prevent early reflections from coloring your sound. If you must place them near a wall, angle them slightly inward so the sound projects into the room rather than bouncing off the wall behind them. Test your positioning with a familiar reference track and adjust until the stereo image feels tight and focused.
Frequently Asked Questions About Studio Monitor Stands
What are studio monitor stands?
Studio monitor stands are specialized supports designed to hold studio reference monitors at the correct height and angle for accurate listening. Unlike regular speaker stands, they focus on decoupling the monitors from surfaces to prevent acoustic coupling, which causes bass frequencies to be colored by vibrations traveling through desks and floors. They come in floor-standing, desktop clamp-on, and isolation platform varieties.
Do studio monitor stands affect sound quality?
Yes, studio monitor stands have a measurable impact on sound quality. By decoupling your monitors from your desk or floor, they reduce acoustic coupling that causes bass frequencies to sound bloated and inaccurate. Users commonly report tighter low-end response, clearer midrange detail, and improved stereo imaging after switching from desktop placement to dedicated stands. The improvement is most noticeable in the bass frequencies below 200 Hz.
How high should studio monitor stands be?
Studio monitor stands should position your monitors so the tweeters are at ear level when you are seated in your normal mixing position. For most people seated at a desk, this means the tweeters should be between 47 and 50 inches from the floor. If your monitors are above ear level, tilt them downward slightly. If they are below, tilt them upward. The goal is always to have the high-frequency driver pointing directly at your ears.
Are isolation stands worth it?
Isolation stands are worth the investment if you are currently hearing your desk vibrate along with your monitors. The acoustic decoupling they provide tightens bass response and reduces sympathetic vibrations that mask details in your mix. Based on forum discussions on Reddit and Gearspace, many engineers report that isolation stands like the IsoAcoustics models made a more noticeable difference than upgrading cables or DACs. The improvement is especially apparent in rooms with lightweight desks or hollow surfaces.
What are the types of studio monitor stands?
There are four main types of studio monitor stands. Floor-standing stands use a tripod or single-column base and are the most stable option for mid-field monitoring. Desktop clamp-on stands attach to the edge of your desk and are ideal for near-field setups in small rooms. Isolation pads and platforms sit on your desk and provide decoupling without height adjustment. Wall-mounted brackets offer a permanent solution for extremely tight spaces but require drilling and limit your positioning flexibility.
Final Thoughts on Studio Monitor Stands
Finding the best studio monitor stands for your setup does not have to be complicated. If you want the highest quality desktop option with full adjustability, the Liquid Stands MS112 is our top recommendation. For a stable floor-standing solution that handles heavy monitors, the Pyle PSTND32 tripod stands offer tremendous value. And if you are on a tight budget, the Vondynote Basic Clamp Stands deliver solid performance at an entry-level price point.
Remember that the goal is to get your tweeters at ear level and decouple your monitors from whatever surface they rest on. Even the most affordable pair of stands on this list will improve your monitoring accuracy compared to setting your monitors directly on a desk. Take the time to position your stands correctly, and you will hear the difference in every mix you make.