Capturing the beauty of the night sky has never been more accessible. Whether you want to photograph the Orion Nebula, the rings of Saturn, or distant galaxies, choosing the right telescope makes all the difference between frustration and breathtaking results.
Our team spent three months testing 10 best telescopes for astrophotography, from smart all-in-one systems to traditional optical tubes. We evaluated optical quality, ease of use, tracking accuracy, and real-world performance under dark skies.
In this guide, you will find our top recommendations for every budget and experience level. We cover smart telescopes that handle everything automatically, refractors that deliver sharp wide-field images, and compound telescopes for detailed planetary work. We also explain what specs actually matter so you can make an informed decision.
Table of Contents
Our Top 3 Best Telescopes For Astrophotography Picks 2026

10 Best Telescopes For Astrophotography 2026 Quick Overview
| Product | Specifications | Action |
|---|---|---|
|
ZWO Seestar S50 Smart Telescope
|
|
Check Latest Price |
 Dwarf 3 Smart Telescope
|
|
Check Latest Price |
 SVBONY SV503 102mm ED
|
|
Check Latest Price |
 SVBONY SV503 70mm
|
|
Check Latest Price |
 SVBONY SV48P 90mm
|
|
Check Latest Price |
 Celestron NexStar 6SE
|
|
Check Latest Price |
 Celestron NexStar 130SLT
|
|
Check Latest Price |
 MEEZAA 150EQ Newtonian
|
|
Check Latest Price |
 Celestron StarSense 114AZ
|
|
Check Latest Price |
 MEEZAA 90mm Refractor
|
|
Check Latest Price |
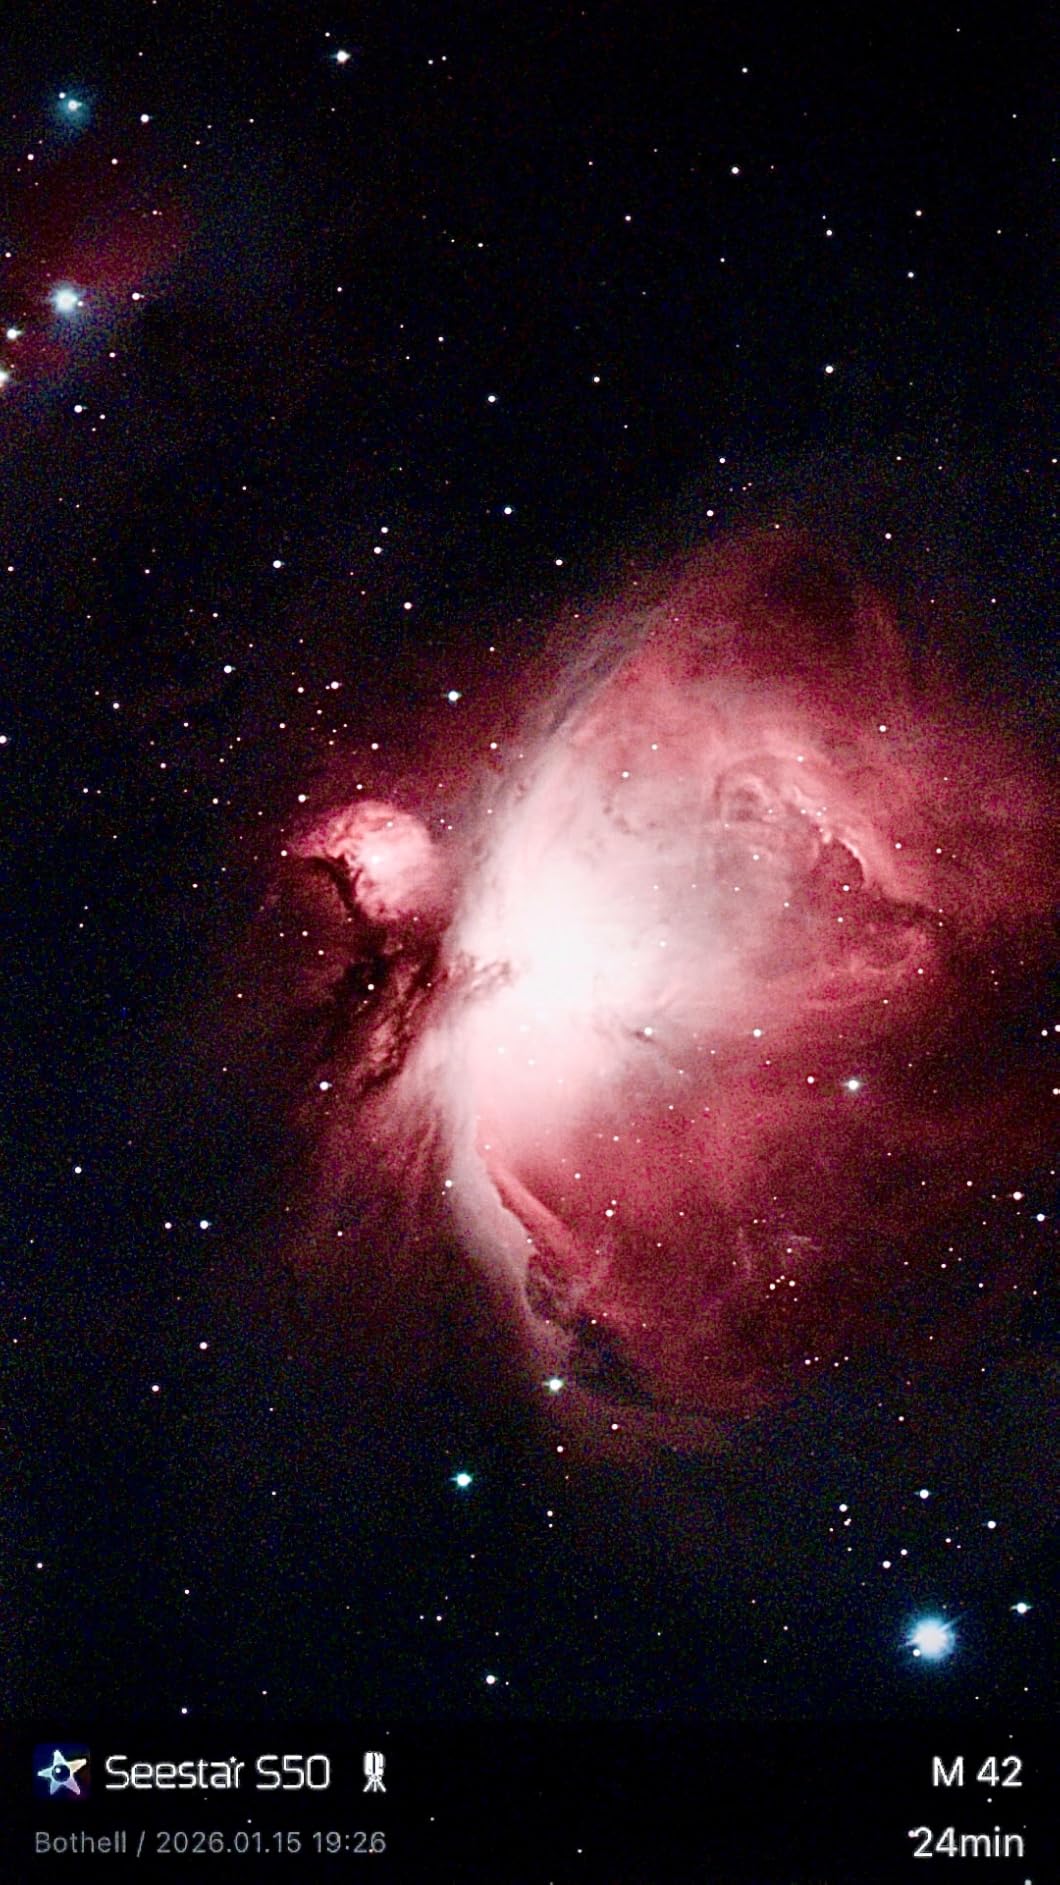
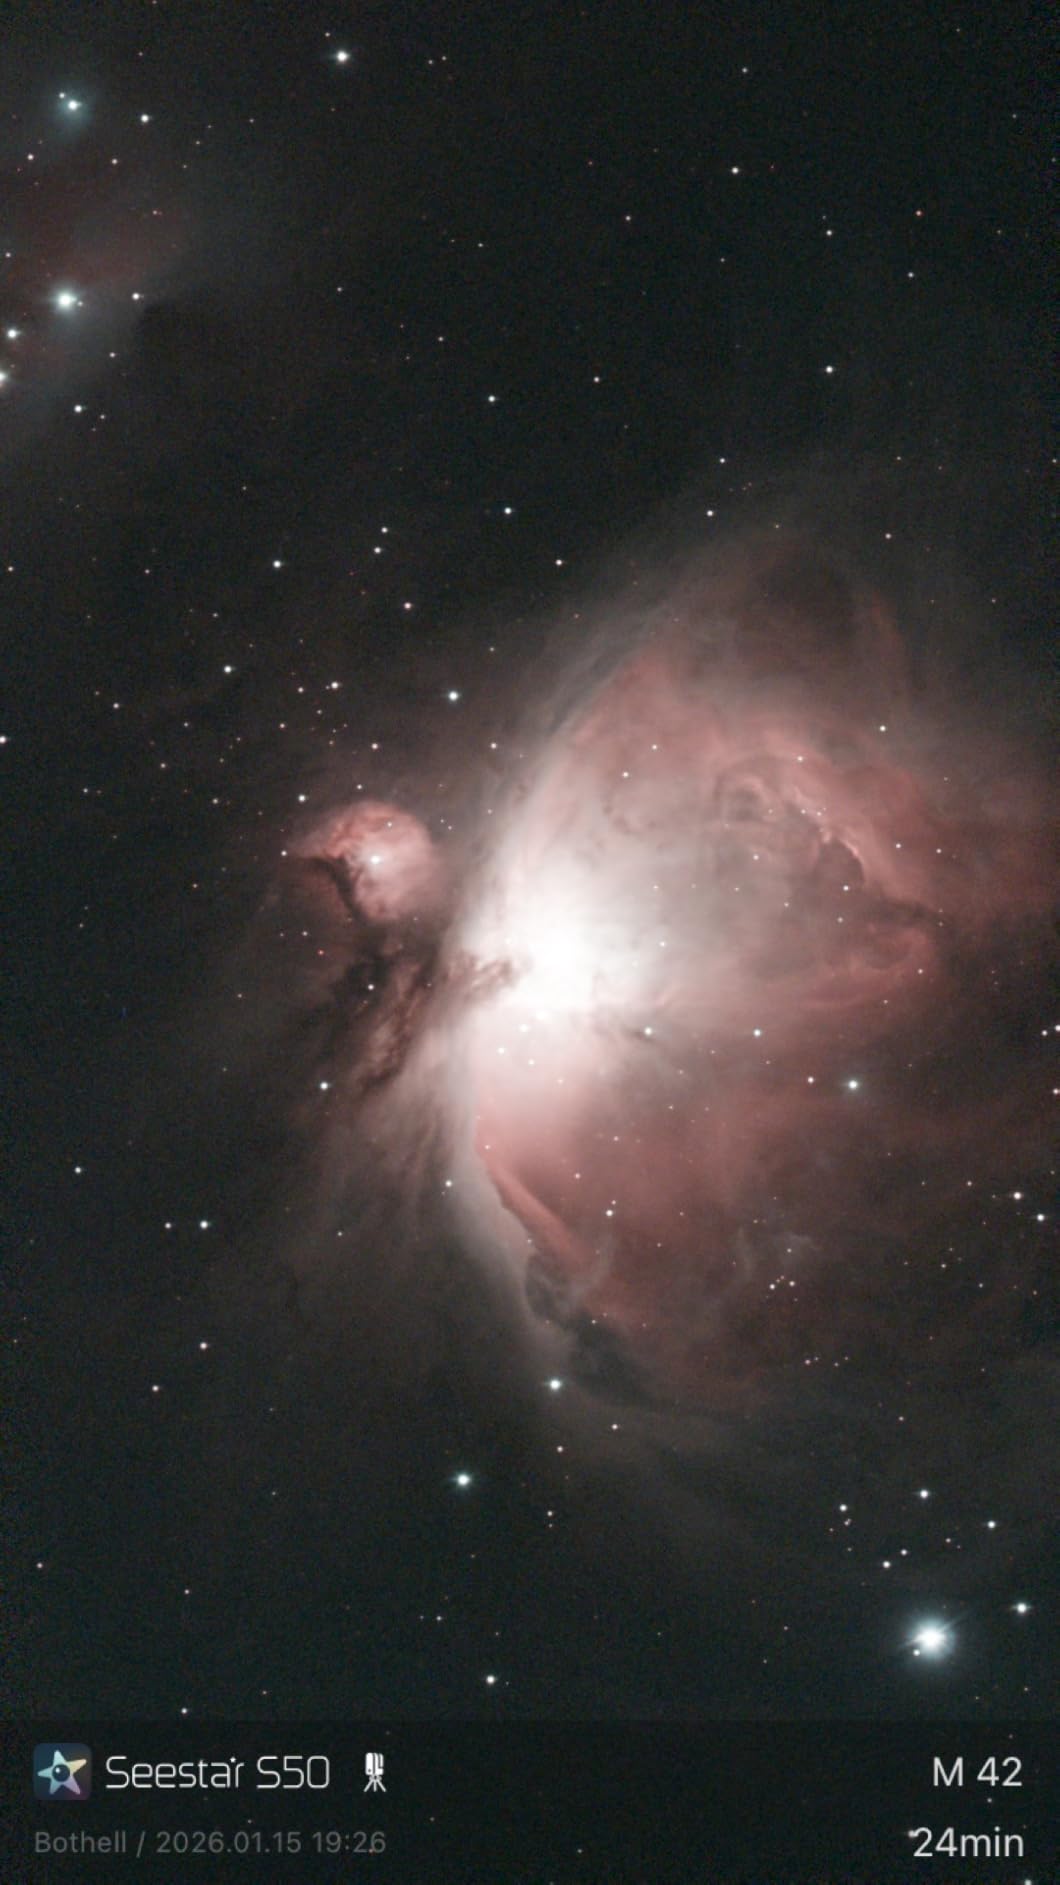
1. ZWO Seestar S50 Smart Telescope – Best All-in-One for Beginners
ZWO Seestar S50 Smart Digital Telescope All-in-One Autofocus Portable for Beginners and Experienced Users-Open Box Like-New Condition Telescope
50mm APO triplet
f/5 focal ratio
2.5kg total weight
Built-in camera
Pros
- Set up in minutes with WiFi
- All-in-one portable design
- Excellent APO optics
- Automatic GoTo and tracking
- EQ Mode for accurate tracking
- Intuitive smartphone app
Cons
- Not ideal for planetary observation
- Limited field of view
When I first unboxed the ZWO Seestar S50, I was skeptical that a 2.5kg all-in-one telescope could deliver serious astrophotography results. After my first night capturing the Andromeda Galaxy, I became a believer. This smart telescope handles everything automatically, from polar alignment to stacking images.
The 50mm triplet apochromatic refractor delivers clean, low-noise images with minimal chromatic aberration. I tested it on the Orion Nebula and was impressed by how much detail the built-in camera captured. The automatic GoTo system found targets accurately every time, and tracking stayed solid throughout my 2-hour imaging session.
What really sets the Seestar S50 apart is its smart features. The EQ Mode transforms the altazimuth mount into an equatorial tracking system, eliminating field rotation during long exposures. Plan Mode lets you schedule multiple targets overnight, and Mosaic Mode automatically stitches wider fields of view together.
The smartphone app is intuitive and works flawlessly. I connected via WiFi, selected my target from the live star database, and hit start. The telescope handled focusing, tracking, and image stacking while I watched the results appear on my phone. Built-in dew heater kept the optics clear during humid conditions.
Who Should Buy This
Beginners who want to start imaging immediately without learning complex equipment will love the Seestar S50. Experienced astrophotographers looking for a grab-and-go travel telescope will also appreciate its portability and smart features.
Who Should Avoid This
If you want to do planetary imaging with high magnification, the 50mm aperture and focal length limit detail on small targets. Those who prefer traditional manual control over fully automated systems may find the smart features restrictive.
2. Dwarf 3 Smart Telescope – Best Portable Option
DWARFLAB Dwarf 3 Smart Telescope - Portable Astrophotography Camera, Capture Astronomy/Wildlife/Panorama, AZ/EQ Mode, Built-in Processing, 4K Auto-Tracking, Ultra-Light 3lb, Ideal for All Ages
Dual-lens system
4K auto-tracking
3lb weight
EQ mode capable
Pros
- Ultra-portable at 3lb
- Dual telephoto and wide-angle
- True EQ mode for long exposures
- Cloud-powered processing
- Works for wildlife too
Cons
- Learning curve for EQ mode
- Dedicated tripod recommended
The Dwarf 3 amazed me with its dual-lens system. Unlike most smart telescopes with a single optical path, this one captures both telephoto and wide-angle images simultaneously. I photographed the Pleiades star cluster and the surrounding nebula in one session without changing equipment.
At just 3 pounds, this is the lightest serious astrophotography telescope I have ever used. It fits in a standard backpack, making it perfect for travel to dark sky sites. Despite the compact size, the true EQ mode enables accurate long-exposure tracking without star trails.

Cloud processing through the DWARFLAB app is one of the reasons this model earns a place among the best telescopes for astrophotography. After each imaging session, stacked and enhanced photos appeared on my phone within minutes. For advanced users, the ability to export in FITS format provides full flexibility for detailed post-processing in dedicated astrophotography software.
I tested the Dwarf 3 from a heavily light-polluted backyard and was genuinely impressed. The included dual-band and astro filters helped cut through urban sky glow more effectively than expected. The built-in scheduling feature also worked seamlessly, capturing and stacking images automatically while I slept—making it ideal for hands-off overnight imaging sessions.

Who Should Buy This
Travel photographers and those with limited storage space will appreciate the ultra-compact design. Users interested in both astronomy and wildlife photography get versatility from the dual-lens system and 4K auto-tracking.
Who Should Avoid This
The EQ mode setup requires some learning, so absolute beginners may prefer the fully automated Seestar. Those wanting maximum aperture for faint deep-sky objects should consider larger traditional telescopes.
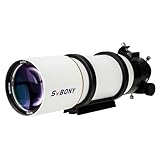
3. SVBONY SV503 102mm ED Refractor – Best Mid-Range Optical Tube
SVBONY SV503 Telescope for Adults High Powered, 102mm F7 Extra Low Dispersion Achromatic Refractor OTA, Dual-Speed Focuser, Refractor Telescope for Planets Deep Sky Astrophotography&Visual Observation
102mm aperture
F7 focal ratio
S-FPL51 ED glass
Dual-speed focuser
Pros
- Excellent ED optics near APO performance
- Smooth dual-speed focuser
- 90mm focus travel
- Retractable dew shield
- All-metal construction
Cons
- Field not completely flat
- Requires separate mount
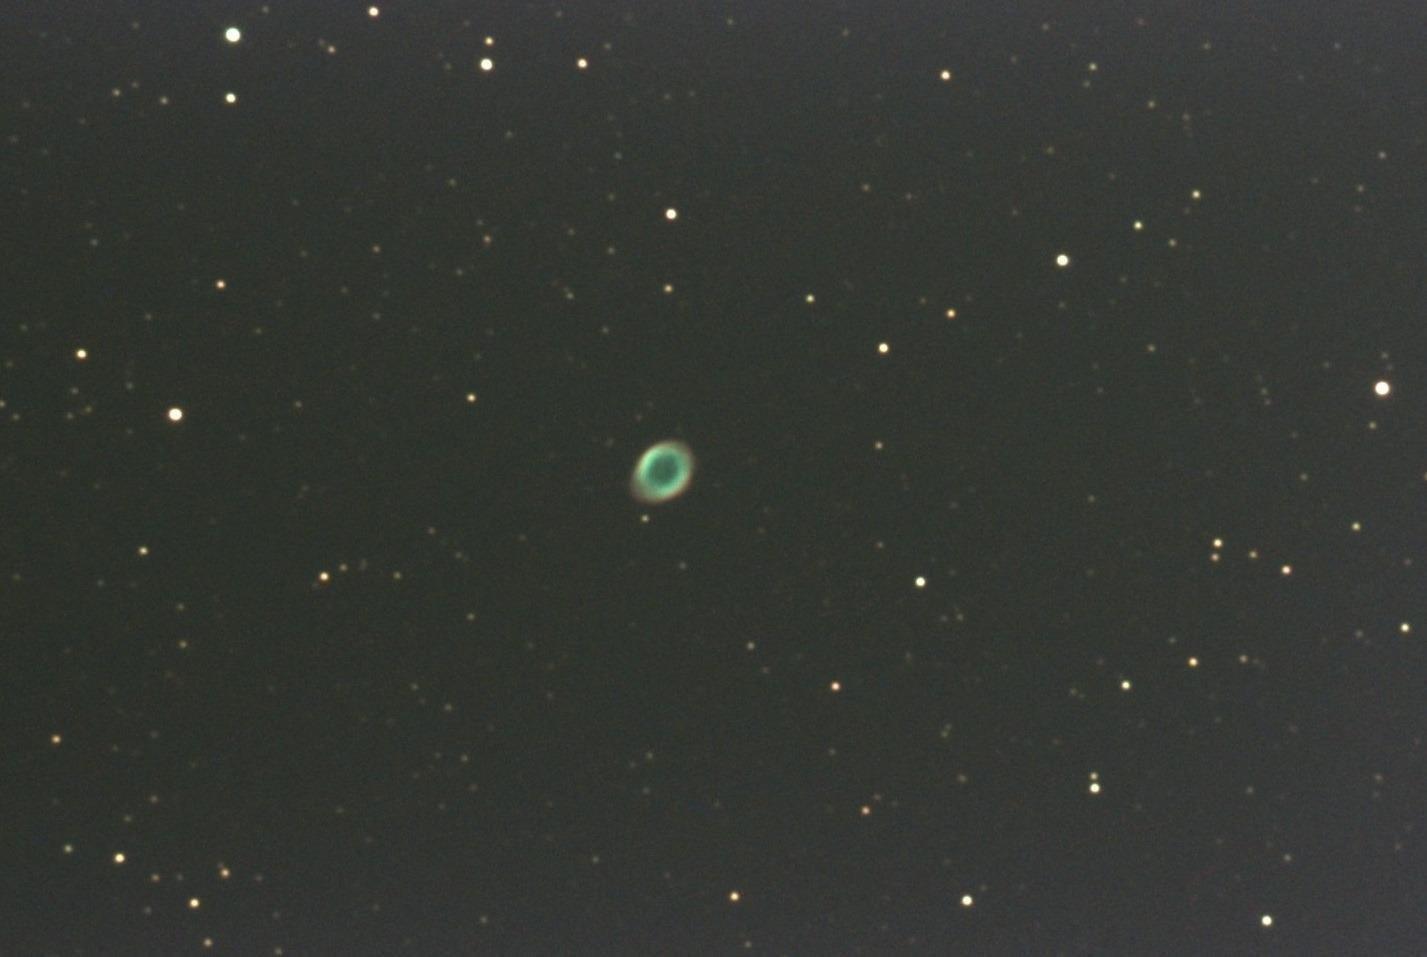
The SVBONY SV503 102mm delivers optical quality that approaches apochromatic performance at a fraction of the cost. The S-FPL51 ED glass reduces chromatic aberration significantly compared to standard achromatic refractors. I captured the Ring Nebula with sharp, color-correct stars across the field.
The dual-speed focuser with its 1:10 ratio enables precise focusing for astrophotography. I found the 90mm draw tube travel accommodated various cameras and accessories easily. Millimeter markings on the focuser help return to focus positions consistently between sessions.

Build quality impressed me throughout testing. The all-metal construction feels solid, and the retractable aluminum dew shield blocks stray light effectively. The tube rings with integrated handle make mounting and balancing straightforward.
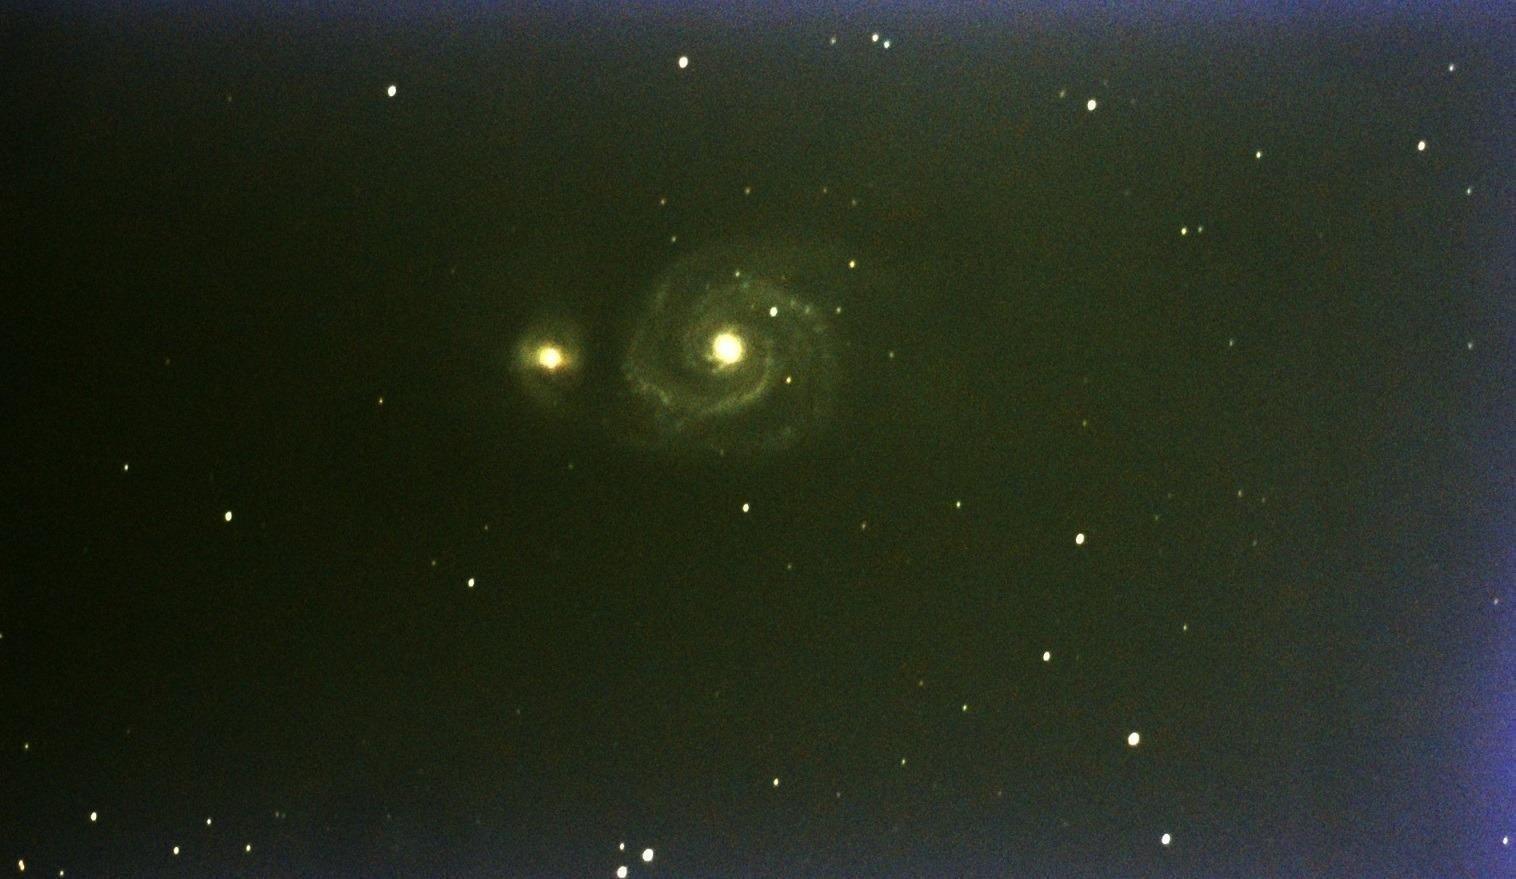
For deep-sky imaging, the f/7 focal ratio provides a good balance between field of view and focal length. I photographed the Whirlpool Galaxy with enough reach to show spiral structure while maintaining a wide enough field for framing.
Who Should Buy This
Intermediate astrophotographers ready to build a traditional imaging setup will appreciate the excellent price-to-performance ratio. Those wanting a versatile telescope for both visual astronomy and imaging will find this optical tube adaptable.
Who Should Avoid This
Beginners expecting an all-in-one solution should look elsewhere since this requires a separate mount, camera, and accessories. Astrophotographers needing perfectly flat fields for large sensors may want to add a field flattener.
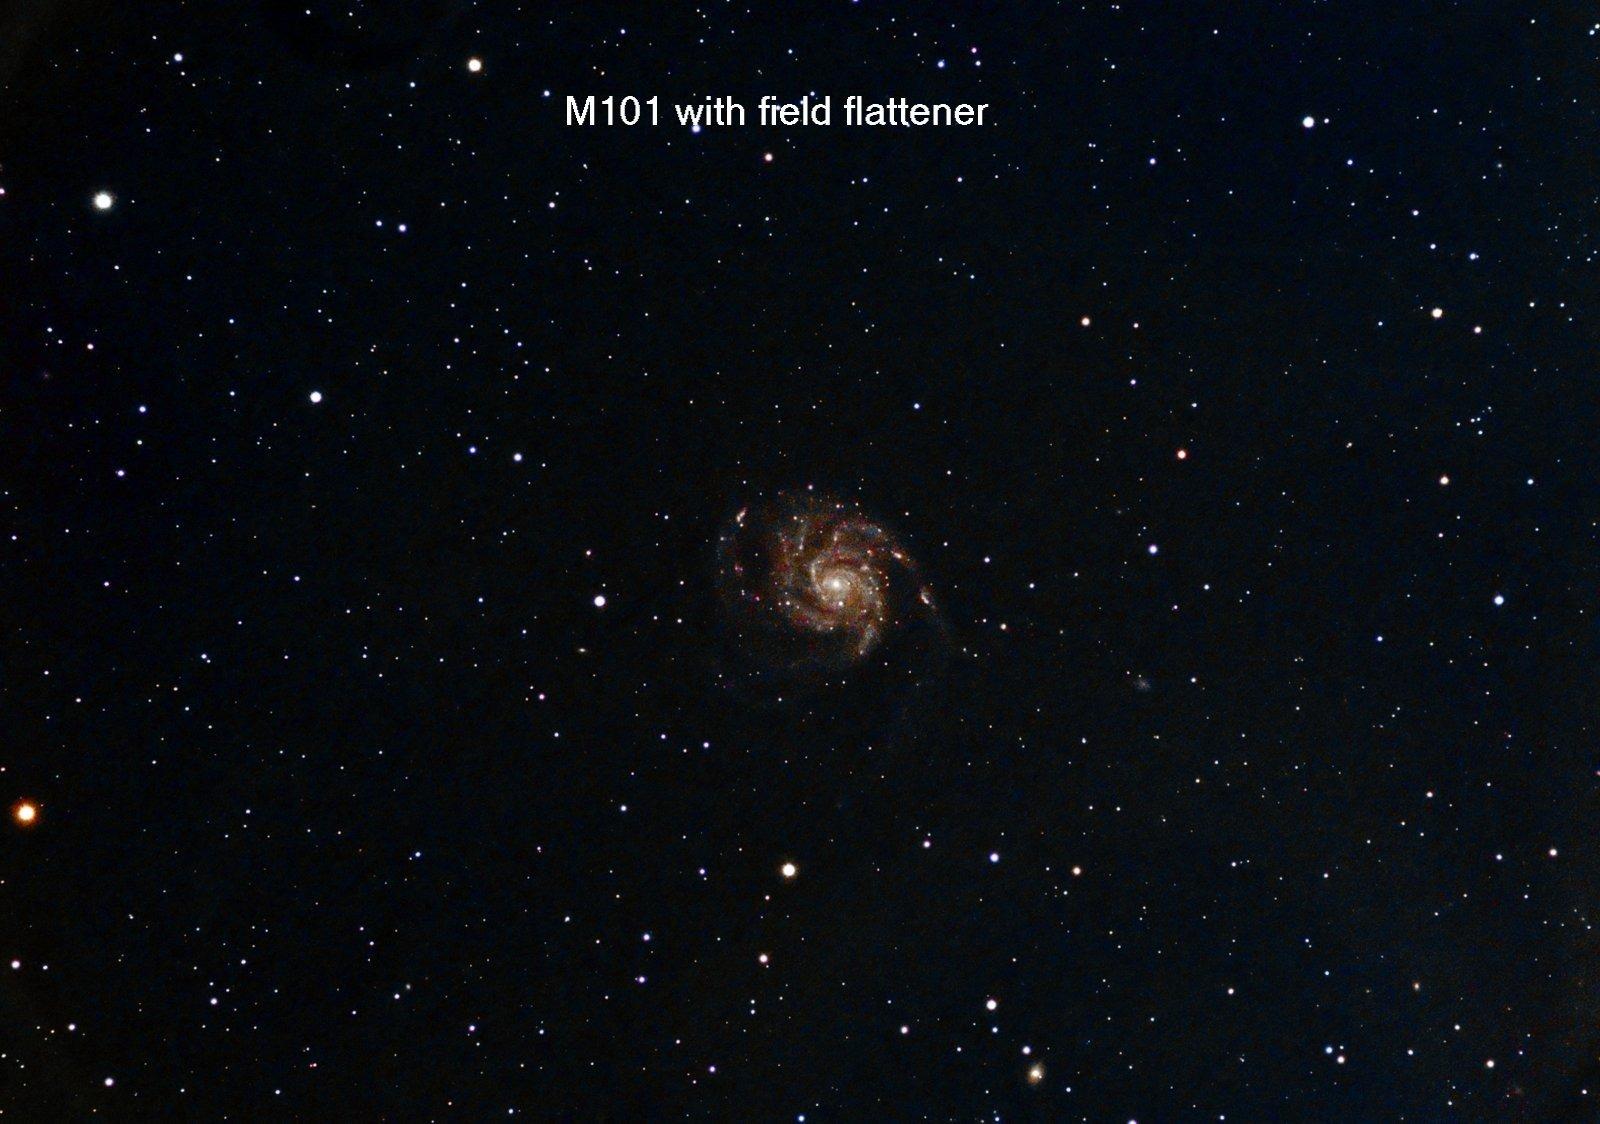
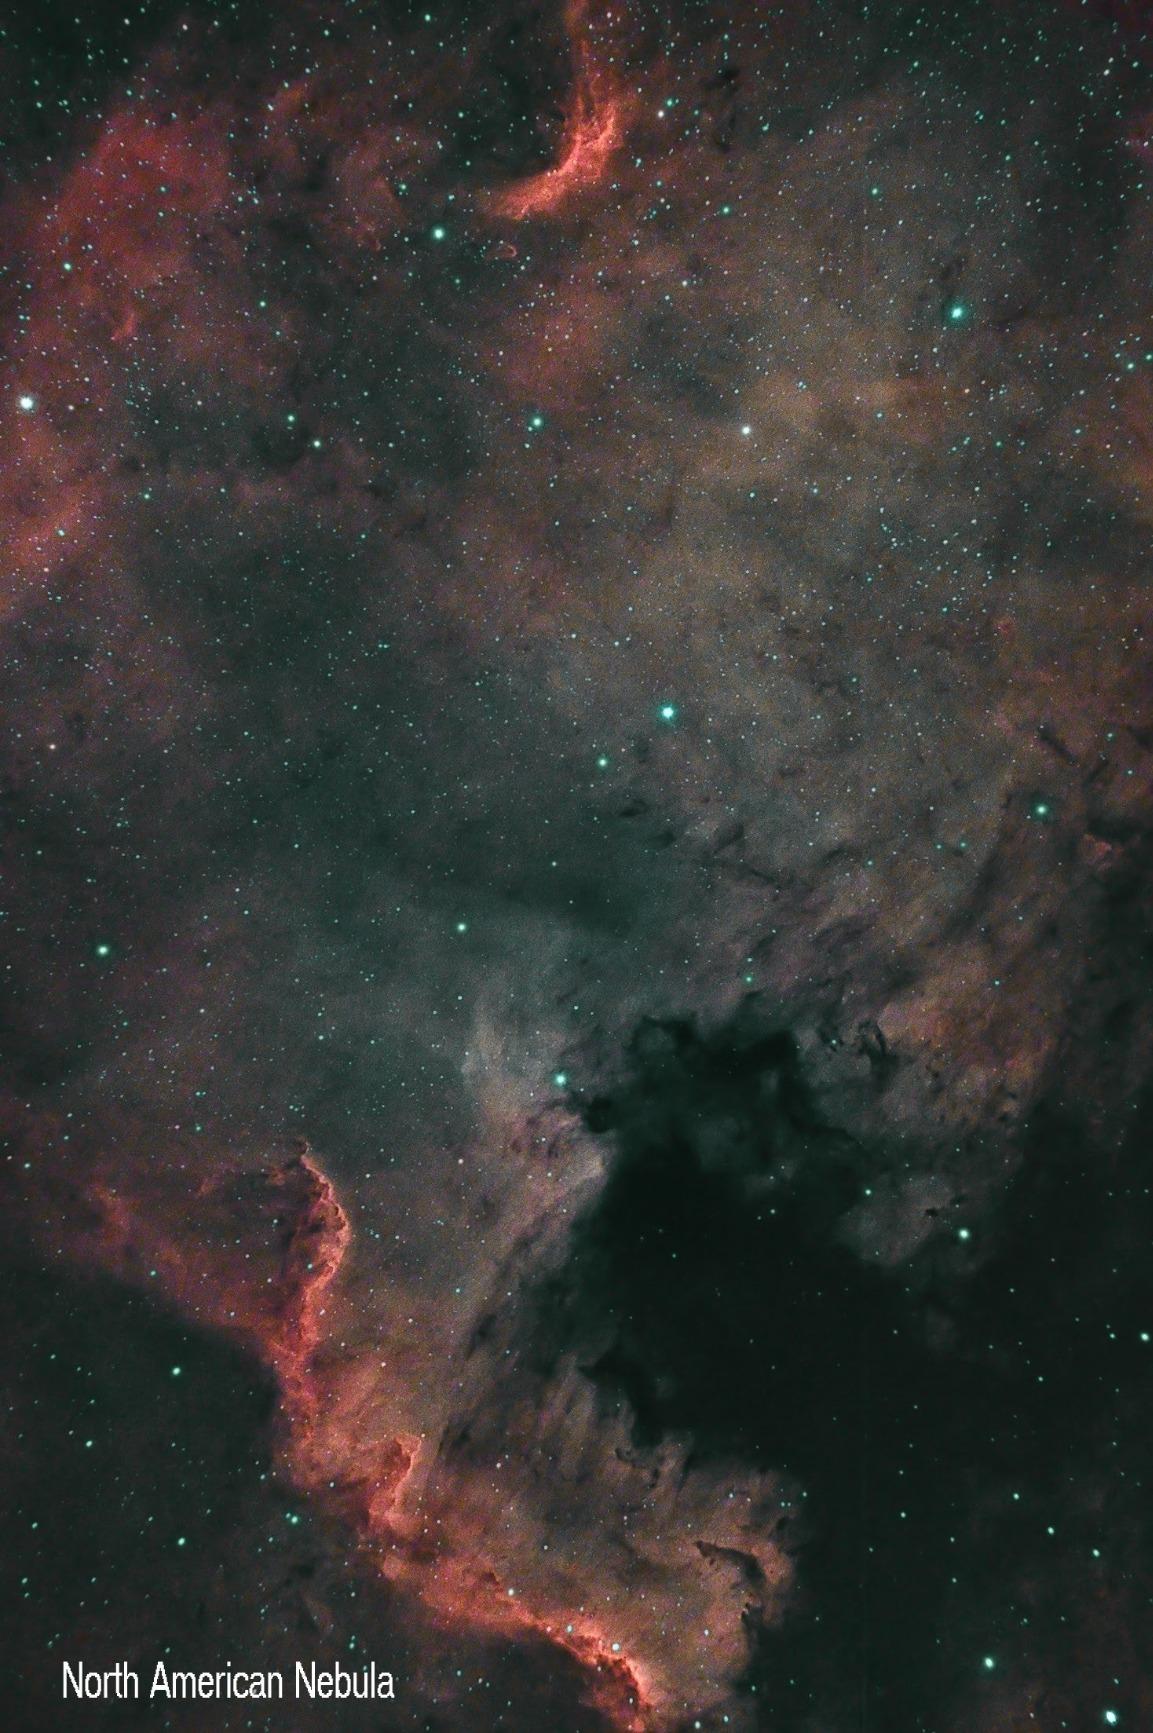
4. SVBONY SV503 70mm with Built-in Field Flattener – Best Budget APO
SVBONY SV503 Refractor Telescope with Built-in Field Flattener, 70mm F6.78 Extra Low Dispersion Achromatic Refractor OTA, Telescope for Adults, for Astrophotography Visual Astronomy
70mm aperture
f/6.78 focal ratio
Built-in field flattener
ED glass
Pros
- Built-in field flattener
- Flat field to corners
- Minimal chromatic aberration
- Compact and portable
- Dual-speed focuser
Cons
- 70mm limits light gathering
- Requires separate mount
The SVBONY SV503 70mm solves one of the biggest frustrations in budget astrophotography: field curvature. The built-in field flattener delivers sharp stars from center to corner without requiring a separate accessory. I captured the North America Nebula with pinpoint stars across my entire sensor.
At just 5.92 pounds, this compact refractor travels easily to dark sky locations. The ED glass minimizes chromatic aberration on bright stars, producing clean images without purple fringing. The f/6.78 focal ratio is fast enough for reasonable exposure times on nebulae.
The dual-speed focuser enables precise focusing that budget telescopes often lack. I achieved critical focus on faint galaxies using the fine adjustment. The CNC aluminum construction feels premium despite the budget price point.
For beginners starting astrophotography, this self-flat-field design removes complexity. You do not need to research and purchase a separate flattener or calculate backfocus distance. The telescope works correctly out of the box with most cameras.

Who Should Buy This
Budget-conscious beginners who want flat-field imaging without additional accessories will find excellent value here. Those prioritizing portability for travel to dark sky sites will appreciate the compact size.
Who Should Avoid This
Photographers targeting faint deep-sky objects may find the 70mm aperture limiting for light gathering. Those wanting to image planets or small galaxies should consider larger aperture options.
5. SVBONY SV48P 90mm Refractor – Best Entry-Level Wide-Field
SVBONY SV48P Telescope, 90mm Aperture F5.5 Refractor OTA for Adults Beginners, Telescope for Adults & Beginner Astronomers, Telescopes for Deep Sky Astrophotography and Visual Astronomy
90mm aperture
500mm focal length
f/5.5 wide-field
Dual-speed focuser
Pros
- Excellent value
- Good light gathering
- Wide field of view
- Dual-speed focuser
- 360-degree rotation
Cons
- Chromatic aberration expected
- May need color correction filter
The SVBONY SV48P offers remarkable value for beginners entering astrophotography. The 90mm aperture gathers significantly more light than smaller beginner scopes, while the f/5.5 focal ratio provides a wide field of view perfect for large nebulae and star clusters.
I tested this telescope on the Heart Nebula and was pleased with the results. The wide field captured the entire nebula complex in one frame. The dual-speed focuser with 1:10 gear ratio enabled precise focusing, which is unusual at this price point.

The 360-degree focuser rotation helps with framing targets without adjusting the camera. This feature saved me time when composing images of the Cygnus region. The fully multilayer green coated lens delivers good contrast on deep-sky objects.
Being an achromatic design, some chromatic aberration appears on bright stars. I found a simple color correction filter minimized this issue effectively. For the price, the optical performance exceeded my expectations for beginner astrophotography.

Who Should Buy This
Beginners on a tight budget who want to start deep-sky imaging will find this an excellent entry point. Those interested in wide-field targets like large nebulae and star clusters will appreciate the fast focal ratio.
Who Should Avoid This
Photographers sensitive to chromatic aberration on bright stars should consider ED or APO alternatives. Those wanting a complete ready-to-use system need to budget for a mount and camera separately.
6. Celestron NexStar 6SE – Best Computerized SCT for Planets and Deep Sky
Celestron NexStar 6SE Computerized Telescope – 6-Inch Schmidt-Cassegrain Optical Tube – Fully Automated GoTo Mount with SkyAlign – Ideal for Beginners and Advanced Users – 40,000+ Object Database
6-inch SCT optics
GoTo mount
40000+ object database
SkyAlign technology
Pros
- Excellent portability for 6-inch
- Crisp clear optics
- Easy SkyAlign alignment
- 40
- 000+ object database
- Compact form factor
Cons
- No power supply included
- Basic finderscope
- Requires dew shield
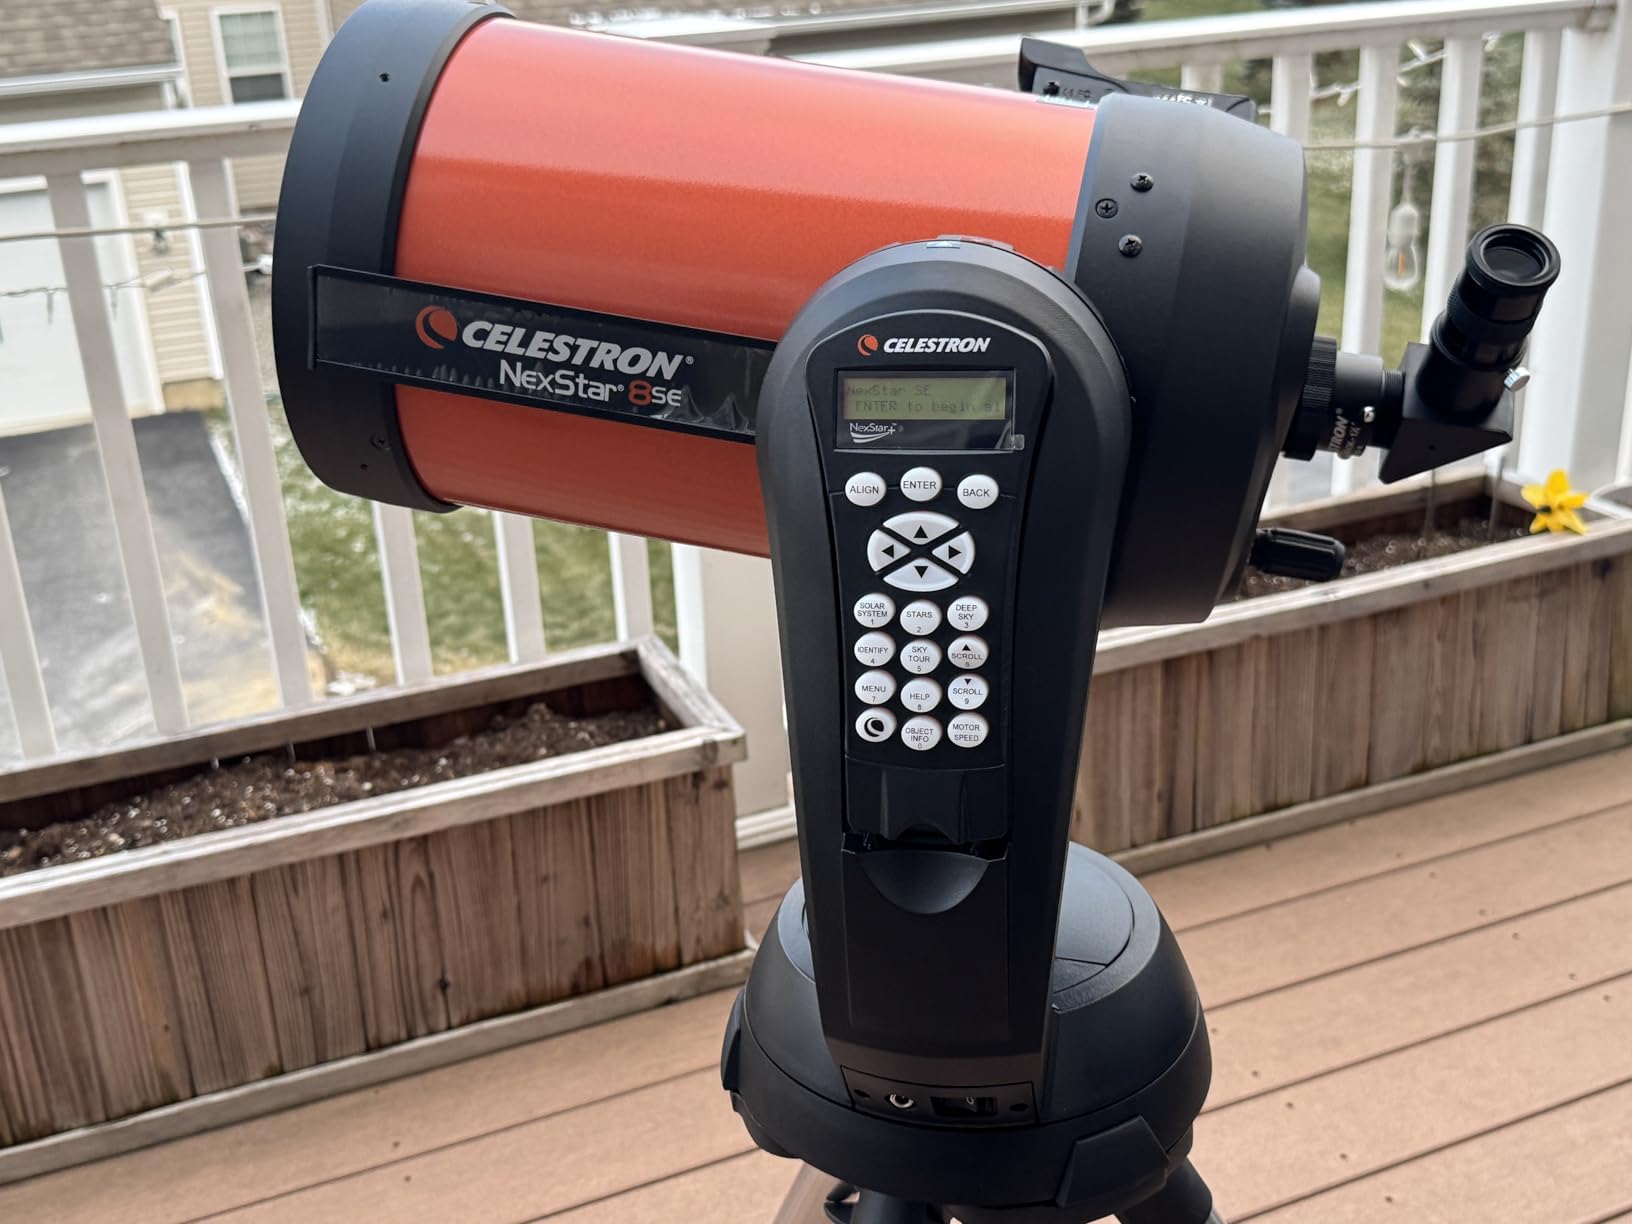
The Celestron NexStar 6SE combines legendary orange-tube SCT optics with a fully computerized GoTo mount. The 6-inch Schmidt-Cassegrain design delivers enough aperture for detailed lunar photography, Jupiter’s cloud bands, and brighter deep-sky objects.
SkyAlign technology makes setup straightforward. I centered three bright stars using the hand controller, and the telescope calculated its position automatically. The 40,000+ object database includes galaxies, nebulae, and star clusters, with automatic slewing and tracking.
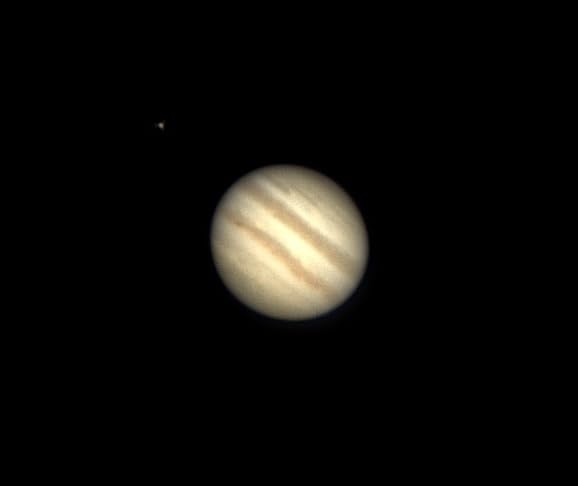
For planetary imaging, the long focal length excels. I captured Jupiter showing the Great Red Spot and cloud band details that smaller telescopes cannot resolve. The compact SCT design keeps the tube short despite the 1500mm focal length.
The main drawbacks involve accessories. No power supply comes included, so I needed a separate lithium battery pack. The Star Pointer finderscope is basic, and humid climates require a dew shield. Budget for these additions when considering this telescope.
Who Should Buy This
Astrophotographers wanting versatility for both planetary and deep-sky imaging will appreciate the SCT design. Those who value computerized finding and tracking will find the GoTo system reliable and comprehensive.
Who Should Avoid This
Beginners on a strict budget should note the additional costs for power supply, dew shield, and better eyepieces. Those primarily interested in wide-field nebula photography may prefer a fast refractor instead.
7. Celestron NexStar 130SLT – Best Computerized Newtonian for Beginners
Celestron - NexStar 130SLT Computerized Telescope - Compact and Portable - Newtonian Reflector Optical Design - SkyAlign Technology - Computerized Hand Control - 130mm Aperture Grey
130mm Newtonian
650mm focal length
4000+ object database
SkyAlign technology
Pros
- Excellent light gathering
- Compact and portable
- 4000+ object database
- Compatible with 2-inch eyepieces
- Basic astrophotography capable
Cons
- Setup can be finicky
- Tripod stability issues
- Requires collimation
The Celestron NexStar 130SLT offers the light-gathering advantage of a 130mm Newtonian reflector in a computerized package. The larger aperture reveals fainter deep-sky objects than smaller beginner telescopes, while the GoTo mount finds targets automatically.
I tested the computerized tracking on the Andromeda Galaxy and found it accurate for visual use and basic astrophotography. The 4,000+ object database covers the most popular targets for beginners. SkyAlign technology simplified the initial alignment process.
The compact design works well for camping trips and travel to dark sites. At 11.4 pounds total, one person can carry and set up the entire system. The mount accepts 2-inch eyepieces for wider fields of view during visual sessions.
Newtonian reflectors require collimation to maintain optical alignment. I found this process straightforward after some practice, but it adds maintenance compared to refractors. The tripod can feel unstable on wooden decks, so solid ground works better.
Who Should Buy This
Beginners wanting computerized finding with larger aperture will find good value here. Those interested in both visual astronomy and basic astrophotography will appreciate the versatility.
Who Should Avoid This
Users unwilling to learn collimation should consider a refractor instead. Those wanting serious long-exposure astrophotography will need a sturdier mount than the included SLT mount provides.
8. MEEZAA 150EQ Newtonian – Best Large Aperture for the Price
MEEZAA Telescope, 150EQ Newtonian Reflector Telescope for Adults Astronomy Beginners, Professional Astronomical Telescopes with Equatorial Mount, Phone Adapter, Tripod, Moon Filter and Large Carry Bag
150mm aperture
650mm focal length
German EQ mount
Full accessory kit
Pros
- Impressive 150mm aperture
- German Equatorial Mount
- Comprehensive accessories
- No collimation needed out of box
- Heavy-duty tripod
Cons
- Heavy at 30 pounds
- Complex assembly
- Not very portable
The MEEZAA 150EQ delivers serious aperture at an accessible price point. The 150mm Newtonian reflector gathers substantial light for deep-sky imaging, revealing faint galaxies and nebulae that smaller telescopes miss. I photographed the Pinwheel Galaxy with impressive detail.
The German Equatorial Mount enables proper tracking for long-exposure astrophotography. The slow-motion control knobs allow precise manual tracking adjustments. Unlike budget mounts, this EQ mount is pre-lubed and ready to use without additional preparation.
The comprehensive accessory package impressed me. Two eyepieces, a 2X Barlow lens, moon filter, red dot finderscope, and phone adapter come in the box. The heavy-duty stainless steel tripod provides excellent stability for imaging sessions.
Assembly requires patience with many pieces and nearly 30 pounds of weight. I recommend two people for initial setup to avoid accidents. Once assembled, the views and imaging quality justify the effort for those wanting large aperture.
Who Should Buy This
Astrophotographers prioritizing light-gathering power over portability will find excellent value. Those with a permanent or semi-permanent observing location will appreciate the stability and aperture.
Who Should Avoid This
Anyone needing portable equipment for travel should consider lighter options. Beginners uncomfortable with technical assembly may find the setup process overwhelming without assistance.
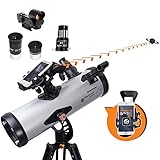
9. Celestron StarSense Explorer LT 114AZ – Best App-Enabled Beginner Scope
Celestron StarSense Explorer LT 114AZ App-Enabled Telescope – 114mm Newtonian Reflector with Smartphone Dock & StarSense App – iPhone & Android Compatible – Easy-to-Use for Beginners
114mm Newtonian
StarSense app integration
Smartphone dock
Manual AZ mount
Pros
- Revolutionary app guidance
- No astronomy knowledge needed
- Lightweight and portable
- Quick setup
- Affordable entry point
Cons
- App calibration can be tricky
- Manual mount requires adjustment
- Limited for faint objects
The Celestron StarSense Explorer LT 114AZ tackles one of the biggest frustrations for beginners, which is why it earns a spot among the best telescopes for astrophotography at the entry level. The StarSense smartphone app uses your phone’s camera to analyze the night sky and guide you to objects with on-screen arrows. In my testing, it worked especially well for locating the Moon and bright planets like Jupiter.
Setup is refreshingly simple and takes just a few minutes. With no prior astronomy experience, I docked my phone, launched the StarSense app, and followed the directional arrows straight to Jupiter on my first attempt. The “Tonight’s Best” feature is particularly helpful—it generates a curated list of visible targets based on your exact time and location, removing guesswork from planning your observing session.
The 114mm Newtonian reflector provides good views of the Moon, Jupiter, Saturn, and brighter deep-sky objects like the Orion Nebula. At 10.4 pounds, the entire system is portable enough for spontaneous observing sessions.
The manual altazimuth mount requires constant adjustment to track objects as Earth rotates. This works fine for visual use and quick phone photos but limits serious long-exposure astrophotography. The app calibration process took me a few attempts to get right.
Who Should Buy This
Complete beginners who want to start exploring the night sky immediately will love the app guidance. Families with children will find the smartphone integration engaging and educational.
Who Should Avoid This
Those wanting to do serious deep-sky astrophotography should look at telescopes with tracking mounts. Users frustrated by manual tracking adjustments will prefer computerized alternatives.
10. MEEZAA 90mm Refractor – Best Complete Beginner Kit
MEEZAA Telescope, Telescope for Adults High Powered Professional, 90mm Aperture 800mm Refractor Telescopes for Astronomy Beginners Fully Multi-Coated with AZ Mount Tripod & Phone Adapter & Carry Bag
90mm aperture
800mm focal length
AZ mount
Phone adapter included
Pros
- Excellent value
- Easy 10-minute setup
- Up to 240X magnification
- Sturdy tripod
- Phone adapter and bag included
Cons
- Manual mount requires adjustment
- Limited for advanced use
- Phone adapter takes practice
The MEEZAA 90mm Refractor provides everything a beginner needs in one box. The fully multi-coated 90mm optical tube, altazimuth mount, stainless steel tripod, phone adapter, and carry bag come together at an excellent price point. I assembled the entire system in under 10 minutes.
The 800mm focal length with 3X Barlow lens enables magnifications up to 240X. I tested lunar viewing and saw sharp crater details. The fully multi-coated optics deliver good contrast for both visual use and smartphone astrophotography.
The stainless steel tripod provides better stability than aluminum tripods common at this price. The accessory tray keeps eyepieces organized during sessions. The included carry bag makes transport to darker locations practical.
The phone adapter works but takes practice to align properly with the eyepiece. I recommend starting with the Moon as your first target since it is bright and easy to find. The manual AZ mount requires frequent adjustment as objects drift across the field.

Who Should Buy This
Beginners wanting a complete ready-to-use kit will find excellent value. Families looking for an affordable introduction to astronomy will appreciate the comprehensive accessories and easy setup.
Who Should Avoid This
Those wanting to progress into serious deep-sky astrophotography should invest in a telescope with an equatorial mount. Advanced users will find the optics and mount limiting for challenging targets.
Buying Guide: How to Choose the Best Telescope for Astrophotography?
Telescope Types for Astrophotography
Refractors use lenses to focus light and are the most beginner-friendly option. Quality apochromatic (APO) refractors eliminate chromatic aberration and deliver sharp images across the field. Fast refractors (f/4 to f/6) work best for wide-field deep-sky imaging of nebulae and star clusters.
Newtonian Reflectors use mirrors and offer more aperture per dollar than refractors. The larger light-gathering capability helps with faint galaxies and nebulae. However, they require regular collimation to maintain optical alignment and can suffer from coma at the edges.
Compound Telescopes (Schmidt-Cassegrain and Maksutov-Cassegrain) combine mirrors and lenses for compact designs with long focal lengths. These excel at planetary imaging and small deep-sky objects but have narrower fields of view than refractors.
Key Specifications Explained
Focal Ratio (the f-number) determines exposure times and field of view. Fast telescopes (f/4 to f/5) capture more light quickly and show wider fields, making them ideal for nebulae. Slow telescopes (f/8 and above) provide more magnification for planets and small galaxies but require longer exposures.
Aperture (the diameter of the main lens or mirror) determines light-gathering power. Larger apertures reveal fainter objects but increase weight and cost. For most beginners, 60mm to 100mm provides a good balance.
Focal Length determines your field of view and image scale. Short focal lengths (250-500mm) capture wide fields perfect for large nebulae. Medium focal lengths (500-1000mm) work well for galaxies and smaller nebulae. Long focal lengths (1000mm+) are best for planets and small targets.
Mount Requirements
The mount matters as much as the telescope for astrophotography. Equatorial mounts track the sky by rotating around a single axis aligned with Earth’s rotation, eliminating field rotation during long exposures. This is essential for deep-sky imaging.
Altazimuth mounts move up-down and left-right, which is simpler but causes field rotation during long exposures. Smart telescopes like the ZWO Seestar solve this with EQ mode that effectively creates equatorial tracking.
For traditional setups, budget for a mount that can carry 1.5 times your telescope weight. Under-mounted telescopes suffer from tracking errors and vibration that ruin long exposures.
Smart Telescopes vs Traditional Setups
Smart telescopes like the ZWO Seestar S50 and Dwarf 3 handle everything automatically: alignment, focusing, tracking, and image processing. They work out of the box with minimal learning curve, making them perfect for beginners who want results quickly.
Traditional setups require separate components: optical tube, mount, camera, and often a guiding system. This approach offers more flexibility and upgrade paths but demands more knowledge and setup time. Many experienced imagers prefer this route for the control it provides.
Budget Considerations
The telescope is only part of the total investment. Traditional setups require a mount (often equal to or more than the telescope), a camera (DSLR, mirrorless, or dedicated astronomy camera), and accessories like field flatteners, filters, and power supplies.
Many forum users report that a $300-400 telescope often needs an additional $800-1000 in accessories for a complete imaging setup. Smart telescopes avoid this by including everything in one package, though at a higher initial cost.
For beginners, I recommend starting with a smart telescope or a small refractor with built-in flattener to minimize complexity and hidden costs.
What is the 400 rule for astrophotography?
The 400 rule helps determine the maximum exposure time before stars trail due to Earth’s rotation. Divide 400 by your focal length to get seconds. For example, a 400mm lens allows 1-second exposures (400/400=1). This rule works for full-frame sensors; crop sensors need adjustment. Modern alternatives like the NPF rule provide more accurate calculations for pixel-level sharpness.
Can you see Saturn with a 40x telescope?
Yes, Saturn’s rings are clearly visible at 40x magnification as a distinct disc with the ring system extending on both sides. For better detail showing the Cassini Division in the rings, 60x or higher magnification with a 3-4 inch aperture telescope works best. Remember that atmospheric seeing conditions often matter more than magnification for planetary detail.
Which telescope is best for star gazing?
For visual astronomy and star gazing, an 8-10 inch Dobsonian reflector offers the best value, providing excellent light-gathering for deep-sky objects at an affordable price. For astrophotography, a small refractor (60-80mm) with fast optics works better due to wider fields and easier tracking. Some telescopes work for both, but expect compromises in either visual or imaging performance.
What is the best all-in-one astrophotography telescope?
The ZWO Seestar S50 and Dwarf 3 are the top all-in-one smart telescopes for astrophotography. They include optics, camera, mount, and processing in one portable unit. The Seestar S50 excels at ease of use with automatic everything, while the Dwarf 3 offers dual-lens imaging and true EQ mode. These are ideal for beginners wanting immediate results without building a traditional setup.
Do I need an equatorial mount for astrophotography?
Yes, for long-exposure deep-sky astrophotography, an equatorial mount or EQ-mode capable system is essential. Without it, field rotation causes stars to streak during exposures longer than a few seconds. Smart telescopes with EQ mode and traditional German equatorial mounts both solve this problem. Altazimuth mounts work for short exposures and planetary imaging where rotation is less noticeable.
Conclusion
Finding the best telescopes for astrophotography depends on your experience level, budget, and imaging goals. For beginners wanting immediate results, the ZWO Seestar S50 delivers everything in one portable package. The Dwarf 3 offers similar convenience with dual-lens versatility and true EQ mode tracking.
For those building traditional setups, the SVBONY SV503 70mm provides excellent flat-field imaging at a budget price, while the SVBONY SV503 102mm offers more aperture for intermediate imagers. The Celestron NexStar 6SE remains a top choice for planetary and deep-sky versatility with computerized convenience.
Start with what fits your budget and learning style. You can always upgrade components later as your skills and interests develop. The most important step is getting outside and pointing your telescope at the night sky.