Every recording journey hits the same frustrating roadblocks. You invest time, energy, and often money into creating audio, only to listen back and wonder why it doesn’t sound professional. I’ve been there – staring at my DAW, frustrated that my vocals sound muddy, guitars lack clarity, or the entire recording feels like it’s underwater. After working with hundreds of home recordists and spending countless hours troubleshooting these exact issues, I can tell you that most recording problems stem from a handful of common mistakes that are surprisingly easy to fix once you understand them.
Common recording problems are technical and acoustic issues that degrade audio quality, including room echo, incorrect microphone placement, improper gain staging, and poor signal chain setup. These problems affect everyone from bedroom producers to podcasters, and the good news? They’re all solvable without breaking the bank. In fact, after helping dozens of clients transform their recordings, I’ve found that proper technique matters more than expensive gear.
In this comprehensive guide, I’ll walk you through the 10 most common recording problems I encounter daily, explain why they happen in simple terms, and provide both immediate fixes and long-term solutions. We’ll cover everything from room acoustics to psychological barriers that can sabotage your sessions. By the end, you’ll have a practical toolkit to identify and solve these issues before they ruin your recordings.
Whether you’re setting up your first home recording studio or looking to improve your existing workflow, understanding these fundamental problems will save you hours of frustration and help you achieve professional-quality sound on a budget. Let’s dive into these issues and their solutions.
Table of Contents
Understanding Why Recordings Sound Bad
Before we tackle specific problems, it’s important to understand that recording issues typically fall into four main categories: acoustic problems, technical errors, equipment mistakes, and performance-related issues. Acoustic problems involve how sound interacts with your recording space, causing echo, reflections, and frequency imbalances. Technical errors occur in your signal chain and digital workflow, leading to distortion, latency, and other digital artifacts. Equipment mistakes happen when using the wrong tools or incorrect settings, while performance-related issues involve both psychological factors and technique problems.
What makes these problems particularly frustrating is that many recording mistakes compound on each other. A poorly treated room combined with incorrect microphone placement and improper gain staging can create a perfect storm of audio problems. The good news is that fixing even one issue in this chain can dramatically improve your overall recording quality. I’ve seen clients transform their sound simply by addressing one fundamental problem, which then makes other issues easier to identify and solve.
Understanding and fixing recording problems is crucial because poor recordings cannot be fully corrected in mixing, and starting with clean audio saves time and produces better results. As we explore each problem in detail, remember that prevention is always better than correction, and most of these issues can be avoided with proper setup and technique.
The 10 Most Common Recording Problems (July 2026)
1. Room Noise and Poor Acoustics
Room noise and poor acoustics are the single biggest problem I encounter in home recordings. Your recording environment has more impact on sound quality than almost any other factor. When sound waves leave your source (voice or instrument), they interact with room surfaces, creating reflections that the microphone captures along with the direct sound. These reflections manifest as echo, reverb, and frequency buildup, making recordings sound distant, muddy, or harsh.
⚠️ Important: No amount of processing can fully fix room problems. A recording with poor acoustics will always sound like a recording with poor acoustics, even with extensive EQ and reverb.
Why this happens: Most home recording spaces aren’t designed for audio. Parallel walls create standing waves and room modes that amplify certain frequencies. Hard surfaces reflect sound rather than absorbing it. Outside noise enters through windows, doors, and even walls. Your room’s natural frequency response can make some notes louder than others, especially in the low-mid range where many instruments live.
How to identify it: Listen for excessive echo or “room sound” in your recordings. Clap your hands in your recording position – if you hear distinct echoes or a ringing sound, you have acoustic problems. Check for background noise by recording silence and listening closely – you might hear HVAC systems, traffic, computer fans, or electrical hum. Frequencies around 200-400Hz often sound muddy in untreated rooms, while higher frequencies can sound harsh or metallic.
Quick fix: Record in a closet full of clothes. The hanging fabric acts as natural acoustic treatment, absorbing reflections and reducing echo. Move away from walls to minimize boundary effects. Use thick blankets, comforters, or even mattresses to create temporary absorption panels around your recording area. This isn’t a perfect solution but can make a dramatic improvement for vocals.
Better solution: Install proper acoustic treatment. Start with bass traps in room corners (they don’t need to be expensive – DIY options work well). Add absorption panels at first reflection points on walls and ceiling. Create a vocal booth using portable acoustic panels or build one using absorption material. Remember that treatment is about absorption, not just covering surfaces – dense, porous material works best.
✅ Pro Tip: The “cloud” (absorption panel) directly above your recording position can make a bigger difference than wall treatment. It reduces vertical reflections that many engineers overlook. For under $50, you can build an effective cloud using rigid fiberglass and simple fabric.
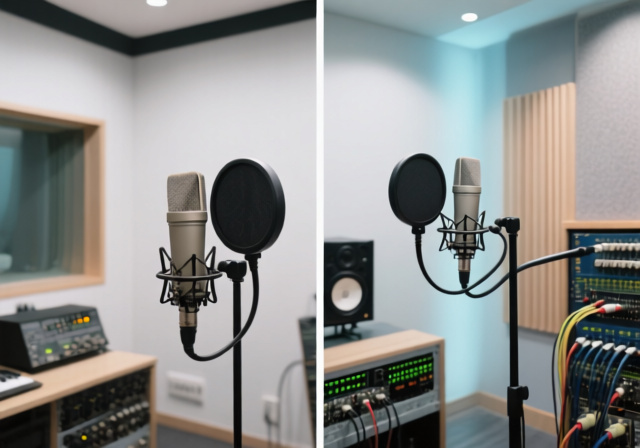
2. Incorrect Microphone Placement
Microphone placement is arguably the most critical skill in recording, yet it’s one of the most misunderstood aspects. I’ve seen clients with expensive microphones getting terrible sound simply because they don’t understand proper positioning. The distance, angle, and placement of your microphone relative to the sound source dramatically affects the captured tone.
Why this happens: Most beginners place microphones incorrectly because they focus on capturing as much sound as possible rather than the right sound. Different microphones respond differently to distance and angle. The proximity effect (increased bass response in directional microphones when close to the source) can make recordings boomy. Off-axis coloration can make sounds thin or harsh when recording from the wrong angle.
How to identify it: Recordings sound either too thin and distant or overly bass-heavy and boomy. Plosive sounds (P’s and B’s) cause popping in the microphone. Sibilance (S sounds) is harsh or piercing. Instruments lack clarity or presence. The microphone captures too much room sound along with the source. You might also notice inconsistent levels when the source moves slightly.
Quick fix: For vocals, start 6-8 inches from the microphone and slightly off-axis (not singing directly into the capsule). Use a pop filter placed 2-3 inches from the microphone. For acoustic guitar, try placing the mic at the 12th fret, pointing toward the soundhole. For amplifiers, start with the mic centered on the speaker cone, then experiment with moving it off-center for different tones.
Better solution: Learn the 3-to-1 rule: place the microphone three times farther from the sound source than the source is from the nearest reflective surface. For vocals, this might mean moving away from walls or using reflection filters. Experiment with different distances and angles – small changes can make big differences. Consider using multiple microphones for different sources and blending them.
Understanding microphone fundamentals is crucial here. Different microphone types have different optimal placement strategies. Dynamic microphones typically handle close placement well, while condenser microphones often sound best with more distance. Remember that mic placement is EQ – the position and angle of your microphone have a huge impact on the frequency response.
3. Gain Staging Problems
Gain staging might sound technical, but it’s simply about setting proper recording levels. This is one of the most common and damaging mistakes I see in home recordings. I’ve worked with clients who have recorded entire albums with levels that are either too hot (causing distortion) or too quiet (bringing up noise), and neither can be fully fixed in mixing.
Why this happens: In the analog days, recording “hot” (close to 0dB) was necessary to overcome tape noise. Many still follow this practice with digital recording, where it’s not only unnecessary but harmful. Digital clipping is harsh and unrecoverable, unlike the subtle saturation of analog tape. At the same time, recording too quietly means you need to boost levels later, which brings up noise floor and reduces bit depth.
How to identify it: Your recording meters frequently hit red or show clipping indicators. The audio sounds distorted, harsh, or crunchy even at low volumes. Conversely, if you need to apply significant gain just to hear the recording properly, levels are too low. Look at your waveforms – they should have healthy peaks but not be slammed against the top of the track.
Quick fix: Aim for peaks around -12dB to -6dBFS (decibels relative to full scale). This gives you plenty of headroom while maintaining a strong signal. Don’t worry about “making it loud” – that’s what mastering is for. If you’re clipping, simply turn down the gain on your audio interface or preamp. If recording too quietly, increase the gain at the source, not in software.
Better solution: Implement proper gain staging throughout your entire signal chain. Start with the source (singer’s volume, instrument output), then set preamp gain, then adjust input level on your audio interface. Each stage should be optimized for the next. Consistent gain staging across all tracks makes mixing easier and results in better overall sound quality.
Headroom: The amount of available signal level before clipping occurs. In digital recording, proper headroom (typically 6-12dB) prevents distortion and maintains audio quality.
4. Monitoring Issues
What you hear during recording dramatically affects what you capture. Monitoring problems lead to poor performance decisions, incorrect processing, and ultimately disappointing recordings. I’ve seen clients add excessive EQ or compression during recording because they couldn’t accurately hear what they were doing.
Why this happens: Most home studios use headphones for monitoring, which can create an unnatural listening experience. Headphones provide perfect stereo separation and eliminate room acoustics, which doesn’t translate to how the recording will sound on speakers. Poor quality headphones or earbuds don’t accurately represent frequency response, leading to poor EQ decisions. Volume levels that are too high cause ear fatigue and poor judgment.
How to identify it: Your recordings sound different when played on other systems. You find yourself adding excessive processing to “fix” problems during recording. You experience ear fatigue after short recording sessions. The headphone mix doesn’t give you a clear sense of the recorded sound. You might notice that instruments sound fine in isolation but don’t fit together in the mix.
Quick fix: Use direct monitoring if your audio interface supports it – this routes the input directly to your headphones without latency through the computer. Keep monitoring levels at conversational volume to avoid ear fatigue. Take regular breaks to give your ears a rest. Use reference tracks you know well to check your monitoring accuracy.
Better solution: Invest in quality monitoring headphones or studio monitors. For headphones, choose open-back models for mixing (though closed-back is better for recording to prevent bleed). Set up a proper monitoring environment with good speaker placement if using monitors. Learn your monitoring system’s characteristics and compensate accordingly. Remember that you can’t make good recording decisions if you can’t accurately hear what you’re recording.
5. Phase Cancellation
Phase cancellation is one of those technical issues that sounds complicated but has simple solutions. It occurs when multiple microphones capture the same sound source at slightly different times, causing certain frequencies to cancel out. The result can be thin, hollow, or weak recordings that seem to lack body and impact.
Why this happens: Sound waves take time to travel, and when you use multiple microphones, they capture the same sound at different moments. When these signals are combined, frequencies that are out of phase (opposite polarity) cancel each other out. This is particularly problematic with stereo recording techniques, multiple microphone setups for instruments, or when combining direct signals with microphones.
How to identify it: Your stereo recording sounds weak or mono when summed to mono. Bass frequencies disappear or sound thin. Certain frequencies seem to vanish entirely. The recording lacks punch and impact. You might notice that the problem changes when you move microphones or change their relative positions.
Quick fix: Check your polarity. Most audio interfaces and DAWs have a phase invert button – flip it on one channel and see if the sound improves. For stereo recordings, try the 3:1 rule (mic spacing 3 times the distance from source). For multiple microphones, ensure they’re equidistant from the source or use time alignment tools.
Better solution: Understand and apply proper stereo miking techniques like X-Y, ORTF, or spaced pair methods. For eliminating phase cancellation in multi-mic setups, measure distances carefully and use delay compensation to align tracks. Remember to check your mix in mono regularly – phase issues often become more apparent when channels are summed.
⏰ Time Saver: Use a phase correlation meter (available in most DAWs) to quickly identify phase issues. A reading close to +1 indicates good phase relationship, while readings near 0 or -1 signal problems.
6. Excessive Processing During Recording
The temptation to process audio during recording is strong, but it often leads to irreversible mistakes. I’ve seen clients commit to EQ settings, compression, and effects during recording, only to realize later that these choices don’t work in the mix context. Recording with processing is like editing while writing – it limits your options and often leads to poor decisions.
Why this happens: We want our recordings to sound “finished” immediately. The sound we hear through headphones with processing might sound better than the raw signal, leading us to commit to these settings. Some recording systems don’t have enough processing power for real-time effects, so users record with effects printed to the track. The convenience of getting the sound “right” during recording outweighs the flexibility of keeping options open.
How to identify it: You find yourself adding significant EQ, compression, or effects before recording. The recorded sound already has reverb, delay, or other time-based effects. You can’t “turn off” processing after recording – it’s permanently printed to the track. You might notice that the recording doesn’t sit well in a mix or lacks flexibility for different mixing approaches.
Quick fix: Record dry (without effects). Use minimal processing only if absolutely necessary for the performer’s comfort. For example, light compression might help a vocalist hear themselves better, but heavy processing should be avoided. Remember that you can always add processing later, but you can’t remove what’s been recorded.
Better solution: Focus on capturing the best possible raw sound. Use processing only for monitoring purposes if needed (most DAWs allow processing on the input channel without printing to the recorded track). Keep detailed notes about what processing you think you’ll need during mixing. Trust that proper recording technique matters more than processing choices.
7. Timing and Rhythm Problems
Timing issues can turn a great performance into a frustrating mess. Whether it’s a drummer who can’t stay in the pocket, a guitarist with inconsistent strumming, or a vocalist who can’t find the groove, timing problems are some of the most difficult issues to fix after recording. Even with modern editing tools, perfecting poor timing is time-consuming and often sounds unnatural.
Why this happens: Poor monitoring, lack of reference, performance anxiety, and insufficient preparation all contribute to timing problems. Many home recordists don’t use click tracks or reference instruments. Inadequate headphone mixes make it difficult to hear the rhythm clearly. Performance pressure and lack of experience with recording environments can throw off even skilled musicians.
How to identify it: Performances drift in and out of time with the beat. Inconsistent tempos or rushed/dragged passages. Lack of “pocket” or groove in rhythmic performances. Multiple instruments don’t lock together rhythmically. You might notice that certain sections feel rushed while others drag, even within the same take.
Quick fix: Use a click track for recording. Provide a clear reference mix in headphones. Record to a guide track if available. Practice with headphones before recording to get used to monitoring. Start with simpler parts and build up complexity as comfort increases.
Better solution: Develop good recording preparation habits. Have performers practice with headphones and click tracks before the session. Create a comfortable recording environment that minimizes performance anxiety. Consider recording to a full mix or drum track rather than just a click for better groove reference. Remember that great timing comes from comfort and confidence, not just technical precision.
8. Poor Signal Chain Setup
Your signal chain – the path your audio takes from source to recording device – needs to be clean, optimized, and properly configured. I’ve seen clients spend hours trying to fix problems that were simply caused by incorrect signal routing or poor connections. A weak link anywhere in this chain will compromise your entire recording.
Why this happens: Confusion about how audio should flow from source to computer. Using inappropriate adapters or poor quality recording studio cables. Incorrect settings on audio interfaces or preamps. Multiple gain stages that aren’t properly optimized. Many beginners don’t understand the difference between line-level and instrument-level signals, or when to use DI boxes.
How to identify it: Weak or noisy signal levels. Inconsistent volume or tone. Digital artifacts or glitches. Ground hum or electrical noise. You might notice that some frequencies are missing or that the signal sounds thin or distorted despite proper gain staging.
Quick fix: Check all connections and ensure they’re secure. Use appropriate cables and adapters (avoid using guitar cables for microphones or vice versa). Set your audio interface to the correct input type (instrument, line, or mic). Make sure phantom power is on for condenser microphones. Keep cable runs as short as possible.
Better solution: Map out your signal chain and optimize each stage. Use quality cables and connections. Consider the entire path: source → microphone/DI → preamp → audio interface → computer. Each stage should be optimized for the next. Learn when to use DI boxes, preamps, or direct inputs. Remember that your signal chain is only as strong as its weakest link.
9. Plosives and Sibilance
Vocal recordings often suffer from plosives (harsh P and B sounds) and sibilance (exaggerated S sounds). These issues can make vocals sound unprofessional and are difficult to fix completely after recording. I’ve worked with countless vocalists who were frustrated by these problems, not realizing they could largely be prevented with proper technique and equipment.
Why this happens: Plosives occur when bursts of air from certain consonants hit the microphone capsule directly. Sibilance happens when high-frequency consonant sounds are exaggerated by microphone characteristics or recording technique. Both issues are worsened by close microphone placement and certain microphone types. Some vocalists naturally produce more plosives or sibilance based on their voice characteristics.
How to identify it: Popping sounds on P and B consonants that cause the meter to spike. Harsh, piercing S sounds that distract from the vocal performance. Inconsistent vocal levels caused by plosives. Listeners complain about harsh vocals or difficulty understanding lyrics.
Quick fix: Use a pop filter placed 2-3 inches from the microphone. Position the microphone slightly off-axis (above or below the mouth rather than directly in front). Ask the vocalist to adjust their technique – slightly angle away from the microphone on plosive sounds or increase distance slightly.
Better solution: Combine proper technique with the right equipment. Fixing sibilance and plosives often requires multiple approaches: use both pop filters and proper microphone placement, adjust vocal technique, and apply appropriate processing during mixing. Consider microphone selection – some microphones are less prone to these issues than others.
10. Performance-Related Issues
Even with perfect technical setup, performance problems can ruin recordings. Performance anxiety, fatigue, and poor preparation are some of the most challenging issues because they’re psychological rather than technical. I’ve seen technically perfect recordings fail because the performance lacked energy, emotion, or precision.
Why this happens: The pressure of recording can cause even experienced musicians to perform poorly. The “red light syndrome” (performance anxiety when recording) affects many artists. Physical and mental fatigue leads to inconsistent takes. Lack of warm-up or preparation means performers aren’t at their best. The sterile recording environment might not inspire the same performance as a live setting.
How to identify it: Performances sound stiff, cautious, or lack energy. Inconsistent takes with noticeable mistakes or variations. Vocal strain or fatigue. Musicians rushing or dragging despite good technical setup. You might notice that the performance sounds better during rehearsal than during actual recording.
Quick fix: Create multiple takes and comp the best parts. Take breaks between takes to maintain freshness. Use reference tracks to maintain consistent performance levels. Consider recording a “warm-up” take that doesn’t count, just to get comfortable.
Better solution: Create a comfortable recording environment that minimizes pressure. Adequate preparation and warm-up before recording. Develop recording routines that feel natural and familiar. Consider the psychological aspects – sometimes recording multiple takes without the pressure of “getting it right” can produce better results. Remember that recording is a skill separate from performing, and both require practice.
Quick Reference: Problem-Solution Matrix (July 2026)
To help you quickly identify and solve recording problems, I’ve created this reference table. Use it to diagnose issues and find immediate solutions during your recording sessions.
| Problem | Quick Fix | Better Solution | Prevention |
|---|---|---|---|
| Room Noise & Poor Acoustics | Record in closet with clothes | Install acoustic treatment (bass traps, panels) | Treat room before recording starts |
| Incorrect Mic Placement | 6-8 inches distance, slight off-axis | Learn 3-to-1 rule, experiment with positions | Mark optimal positions, document settings |
| Gain Staging Problems | Aim for -12dB to -6dB peaks | Proper gain staging through entire chain | Create gain staging checklist |
| Monitoring Issues | Use direct monitoring, moderate volume | Quality monitoring system, learn its characteristics | Regular ear breaks, reference tracks |
| Phase Cancellation | Check phase invert, check mono compatibility | Proper stereo techniques, time alignment | Measure mic distances carefully |
| Excessive Processing | Record dry, minimal monitoring effects only | Capture best raw sound, process later | Focus on source and placement |
| Timing Problems | Use click track, clear headphone mix | Preparation, comfortable environment | Practice with headphones before recording |
| Poor Signal Chain | Check connections, correct input types | Optimize each stage of signal path | Map signal chain, use quality components |
| Plosives & Sibilance | Use pop filter, off-axis placement | Technique + equipment + processing combination | Proper mic selection and technique training |
| Performance Issues | Multiple takes, breaks between recordings | Comfortable environment, adequate preparation | Regular recording practice, develop routines |
Preventing Recording Problems Before They Happen
While fixing problems is important, preventing them is even better. After years of troubleshooting recording issues, I’ve developed a systematic approach that helps avoid most common problems before they happen.
Setup Checklist
Create a pre-recording checklist and use it every session. Mine includes:
- Room preparation (close windows, turn off noisy equipment)
- Acoustic treatment setup (panels in position, reflection filter ready)
- Equipment warm-up (microphones, preamps, interfaces)
- Signal chain testing (test recording, check for noise or distortion)
- Monitoring setup (headphone level, reference track ready)
- Gain staging setup (set levels for each source)
This routine takes about 10 minutes but saves hours of troubleshooting later.
Regular Maintenance
Maintain your equipment and space regularly. Clean your connectors and cables monthly. Check acoustic treatment for damage or wear. Update your software and drivers. Document your preferred settings for different recording situations. Regular maintenance prevents many technical problems before they occur.
Reference Practices
Always record with reference tracks. Choose 2-3 professionally recorded songs in similar styles and keep them handy. Compare your recordings to these references throughout the session. This helps identify problems early and maintains consistent quality. I’ve found that reference recording is more valuable than any single piece of equipment.
Frequently Asked Questions
What are the common microphone issues?
Common microphone issues include incorrect placement, wrong microphone type for the source, proximity effect (excessive bass), plosives and sibilance, and poor signal connections. These problems can cause thin sound, boominess, popping noises, and harsh frequencies in recordings.
What are the recording mistakes?
The most common recording mistakes include recording too hot (causing digital clipping), poor room acoustics, incorrect microphone placement, excessive processing during recording, improper gain staging, inadequate monitoring, and poor signal chain setup. These mistakes can significantly degrade audio quality.
How do I fix my audio recording problem?
First, identify the specific problem: check for clipping (red meters), excessive room sound, or noise issues. Then apply the appropriate solution: adjust gain levels, improve microphone placement, add acoustic treatment, or fix signal connections. Always record a test take and listen critically before proceeding with the full session.
Why is my recording glitching?
Recording glitches typically occur due to buffer underrun issues, CPU overload, or improper audio interface settings. Try increasing the buffer size in your DAW, closing unnecessary applications, updating your audio drivers, and ensuring your audio interface is properly connected and configured.
Why do I sound so weird on recording?
Your voice sounds different on recordings due to bone conduction (how you hear yourself internally), microphone characteristics, room acoustics, and psychological factors. This is completely normal. Focus on proper microphone technique, good room acoustics, and remember that recording always sounds different than what we hear internally.
What causes audio distortion in recordings?
Audio distortion in recordings is caused by clipping (signal exceeding digital maximum), improper gain staging, poor microphone technique, or signal chain issues. The most common cause is recording levels that are too hot. Always aim for peaks around -12dB to -6dB to maintain clean recordings.
Final Thoughts: Building Better Recording Habits
Understanding these common recording problems is just the first step – building good habits is what leads to consistently better recordings. After working with hundreds of home recordists, I’ve found that the best recordings come from a combination of proper preparation, good technique, and patience.
Remember that every recording problem has a solution, and most are preventable with proper setup and technique. Don’t be discouraged if your early recordings don’t sound professional – even the most experienced engineers continuously learn and improve their techniques. The key is to approach each recording session with curiosity and a willingness to experiment.
For those looking to dive deeper into specific topics, VintageVinylNews offers detailed guides on studio recording and podcasting, choosing the right microphone, and more advanced recording techniques. Each problem we’ve covered today has dedicated solutions and in-depth tutorials available.
Happy recording, and remember that great recordings come from great performances captured well, not from expensive equipment or complex processing. Focus on the fundamentals we’ve covered today, and you’ll see dramatic improvements in your audio quality.