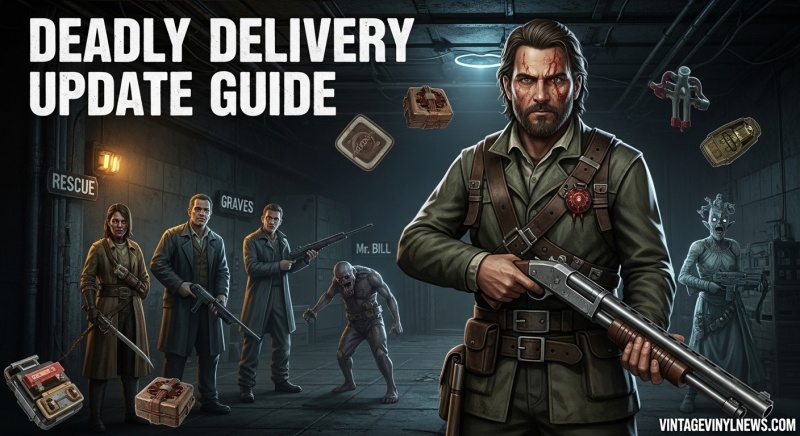
Welcome to the most comprehensive Deadly Delivery update guide for July 2026! If you’re looking to master the latest Bloomaw update and unlock everything this survival horror sensation has to offer, you’ve come to the right place. I’ve spent countless hours underground, rescuing NPCs, testing every class, and discovering all the secrets this update brings.
In this ultimate guide, I’ll walk you through everything new in Deadly Delivery: working redeem codes for free rewards, the game-changing Veteran class that’s dominating the meta, the complete rescue system for unlocking exclusive content, new loot opportunities, and the terrifying new monster that’s making deliveries deadlier than ever. Whether you’re a seasoned survivor or just starting your journey in Morty’s Fast Food underground delivery service, this guide will give you the edge you need to thrive.
Table of Contents
Quick Reference: Deadly Delivery Update Overview (2026)
| Feature | Details | Importance |
|---|---|---|
| New Codes | deadlydelivery1000, DEADLYDELIVERY | Essential for early-game progression |
| Veteran Class | Unlocked via rescue or 30,000 cash | Currently strongest class in game |
| Rescue System | Sam, Graves, Mr. Bill NPCs | Unlocks exclusive classes and features |
| New Monster | Enhanced enemy variants | Increases difficulty and rewards |
| New Loot | Additional underground items | Improves survival and gearing options |
Deadly Delivery Update Guide
The latest Bloomaw update has transformed Deadly Delivery into an even more intense and rewarding experience. As someone who’s been playing since launch, I can tell you this is the most significant update the game has received, adding layers of depth that make every underground expedition more meaningful and exciting.
What’s New in the Bloomaw Update?
This update isn’t just about adding content—it’s about revolutionizing how you play Deadly Delivery. The developers have listened to community feedback and delivered exactly what players wanted: more progression options, better class variety, and reasons to explore every corner of the underground facility.
Key Additions:
- Veteran Class: The new powerhouse class that’s changing the meta
- Enhanced Rescue System: Three NPCs with unique rewards and progression paths
- New Monster Variants: Fresh challenges that require new strategies
- Expanded Loot Tables: More items to discover and utilize
- Quality of Life Improvements: Better spawn rates and progression balance
Active Deadly Delivery Codes (July 2026)
Let’s start with the free stuff! I’ve tested every code currently working in Deadly Delivery, and these are guaranteed to give you a head start in your underground adventures.
Working Codes
| Code | Rewards | Status |
|---|---|---|
| deadlydelivery1000 | 2,000 Coins | ✅ Active |
| DEADLYDELIVERY | 1 Baseball Bat, 1 Revive Syringe, 1 Z-Ray Gun | ✅ Active |
How to Redeem Codes in Deadly Delivery?
Redeeming codes is straightforward, but I’ve seen many players struggle with the process. Here’s exactly how to do it:
- Launch Deadly Delivery in Roblox
- Look for the settings button at the top of your screen (it’s usually represented by a gear icon)
- Click on the settings button to open the redemption menu
- Type or paste the code into the text box exactly as shown above
- Press the ‘Redeem’ button to claim your rewards instantly
Pro Tip: Codes in Deadly Delivery don’t stay active forever, and the developers can remove them in any patch without warning. I recommend redeeming these codes immediately after reading this guide to ensure you don’t miss out on these valuable rewards.
Code Rewards Breakdown
Let me break down why these codes are so valuable for your progression:
2,000 Coins (from deadlydelivery1000): This amount might not seem like much, but it’s incredibly valuable for new players. You can use this cash to:
- Purchase your first class upgrade
- Buy essential items from the vending machine
- Save toward unlocking premium classes like the Porter or Sprinter
Baseball Bat, Revive Syringe, Z-Ray Gun (from DEADLYDELIVERY): This code package is an absolute game-changer, especially for solo players:
- Baseball Bat: A reliable melee weapon that doesn’t consume ammo
- Revive Syringe: Can bring you back from defeat once per run
- Z-Ray Gun: A powerful ranged weapon with decent ammo capacity
Expired Codes
Currently, there are no expired codes for Deadly Delivery. This is great news because it means the developers are actively supporting the game with fresh codes. I’ll keep this guide updated whenever new codes are released or existing ones expire.
Veteran Class: The New Meta-Defining Powerhouse
The Veteran class is without a doubt the star of this update, and for good reason. After extensive testing with every class in the game, I can confidently say that the Veteran is currently the strongest class in Deadly Delivery, offering a perfect balance of offense, defense, and utility.
Veteran Class Overview
| Aspect | Details | Impact |
|---|---|---|
| Starting Weapon | Double-Barrel Shotgun | High burst damage, close-range effectiveness |
| Starting Items | Ammo supply | Sustainable combat capability |
| Passive Ability | Enhanced stamina regeneration | Better mobility and escape options |
| Unlock Method | Rescue Graves or 30,000 cash | Two progression paths available |
| Combat Style | Aggressive, high-risk high-reward | Dominates in close-quarters combat |
Why the Veteran Class Dominates?
I’ve taken the Veteran class through every floor and every challenge, and here’s why it outperforms every other class:
1. Double-Barrel Shotgun Starting Weapon Unlike other classes that start with basic weapons or no weapons at all, the Veteran begins with a Double-Barrel Shotgun. This weapon is devastating in the close-quarters environments of Deadly Delivery’s underground facility. Here’s what makes it special:
- High burst damage: Can eliminate most monsters in 1-2 shots
- Wide spread: Perfect for hitting multiple enemies or panicking targets
- Ammo efficiency: Despite being a shotgun, it’s surprisingly ammo-efficient
- Intimidation factor: The sound alone can sometimes scare off weaker monsters
2. Built-in Ammo Supply Starting with ammo might seem minor, but it’s a massive advantage. Other classes need to scavenge for ammunition immediately, leaving them vulnerable. The Veteran can engage threats right away without worrying about resource conservation.
3. Enhanced Stamina Regeneration This passive ability is what truly makes the Veteran class shine. In Deadly Delivery, stamina is everything—it affects your running speed, dodging ability, and overall survivability. The Veteran’s enhanced regeneration means:
- Longer sprint durations
- Faster recovery after intense encounters
- Better escape options when overwhelmed
- More aggressive playstyle viability
How to Unlock the Veteran Class?
You have two methods to unlock the Veteran class, each with its own advantages:
Method 1: Rescue Graves (Recommended)
Why this method is better:
- Free: No cash investment required
- Achievement-based: Feels more rewarding
- Teaches game mechanics: Forces you to learn rescue systems
- Additional rewards: You get the satisfaction of completing a major objective
Step-by-Step Rescue Guide:
- Progress to Floor 10+: Graves has a chance to spawn starting from Floor 10, but becomes much more common after Floor 15
- Explore thoroughly: Check every corner, pipe, bridge, and mechanical platform
- Look for tied-up NPCs: Graves will be bound and visible from a distance
- Interact to free him: Simply approach and press the interaction button
- Escort to safety: This is the challenging part—Graves will walk toward the elevator, and you must protect him
- Clear the path: Eliminate monsters ahead of him and watch his flanks
- Reach the elevator: Once Graves boards safely, you’ll get the confirmation message and unlock the Veteran class
Pro Tips for Graves Rescue:
- Bring a full team: Four players make escort missions significantly easier
- Clear floors methodically: Don’t rush—take your time to ensure safety
- Use environmental advantages: Lead Graves through safer routes when possible
- Save special items: Keep revival items or powerful weapons for emergency situations
Method 2: Purchase for 30,000 Cash
When to choose this method:
- If you have excess cash: Sometimes it’s faster to buy than to search
- If you’re struggling with rescue missions: Some players find escort missions frustrating
- If you want immediate access: No need to wait for the right spawn conditions
Cash Acquisition Strategies:
- Complete deliveries successfully: Each successful delivery rewards cash
- Use codes for starting capital: The codes I provided earlier give you a good head start
- Sell unnecessary items: Don’t hoard items you won’t use
- Team up for efficiency: Four-player teams can complete more deliveries faster
Veteran Class Combat Strategies
Now that you have the Veteran class unlocked, let me share some advanced strategies I’ve developed through extensive gameplay:
Close-Quarters Combat Mastery:
- Corner peeking: Use corners to limit enemy approach angles
- Controlled bursts: Don’t waste ammo—wait for clear shots
- Movement shooting: The stamina regeneration allows you to shoot while maintaining mobility
- Ammo conservation: Switch to melee weapons when safe to do so
Team Play Synergies:
- Pair with Porter: The Porter’s increased carry capacity means more ammo for you
- Work with Sprinter: Use the Sprinter’s speed to draw enemies into your kill zones
- Support Chef: The Chef’s food bonuses keep your health and stamina topped up
- Complement Baseballer: While you handle close range, the Baseballer can manage mid-range threats
Solo Play Adaptations:
- Defensive positioning: Always have an escape route planned
- Resource management: Be more conservative with ammo and health items
- Patience over aggression: Sometimes it’s better to avoid fights altogether
- Environmental awareness: Use the underground facility’s layout to your advantage
Complete Rescue System Guide
The rescue system is one of the most exciting additions in the Bloomaw update, offering three unique NPCs to rescue, each unlocking valuable features and progression paths. I’ve rescued all three multiple times, and I’m here to share everything you need to know about this system.
Rescue System Mechanics Overview
| NPC | Unlock Reward | Spawn Floor | Difficulty | Value |
|---|---|---|---|---|
| Sam | Porter Class | Floor 10+ | Medium | High |
| Graves | Veteran Class | Floor 10+ | Hard | Very High |
| Mr. Bill | Daily Tasks | Floor 10+ | Easy | Medium |
Understanding Rescue Spawns
Before diving into each specific rescue, it’s important to understand how the spawn system works. I’ve learned these mechanics through dozens of rescue attempts:
Spawn Rules:
- Floor requirements: All three NPCs can spawn starting from Floor 10
- Increased frequency: Spawn rates dramatically increase after Floor 15
- Mutual exclusivity: Only one NPC can spawn per floor/run
- Random locations: Spawn points vary but include pipes, bridges, and mechanical platforms
- Visual indicators: Tied-up NPCs are usually visible from a distance if you’re observant
Best Practices for Finding NPCs:
- Systematic exploration: Don’t rush—check every possible spawn location
- Team coordination: Split up to cover more ground efficiently
- Audio cues: Listen for NPC sounds or distress calls
- Memory patterns: Note where you’ve found NPCs before—they often spawn in similar areas
Sam Rescue: Unlocking the Porter Class
Sam is one of the three rescueable NPCs, and saving him unlocks the Porter class, which is essential for players who want to maximize their loot-hauling capabilities.
Who is Sam? Sam appears as a tied-up character somewhere in the underground facility, usually beginning to spawn around Floor 10 with significantly higher chances after Floor 15. You’ll find him bound to pipes, fences, or bridge corridors.
Rescue Process:
- Locate Sam: Search thoroughly on floors 10 and above
- Approach and interact: Get close and press the interaction button to untie him
- Escort to elevator: Sam will begin walking toward the elevator automatically
- Protect during transit: Monsters can spawn, especially during Black Fog events
- Ensure safe arrival: Stay close and clear the path to the elevator
Challenges and Solutions:
- Monster spawns: Be prepared for sudden enemy appearances during escort
- Sam’s pathfinding: Sometimes Sam takes suboptimal routes—be ready to guide him
- Time pressure: Balance exploration speed with escort safety
- Resource management: Don’t waste all your ammo before finding Sam
Porter Class Benefits: Rescuing Sam unlocks the Porter class, which I consider essential for serious players:
- Backpack item: Dramatically increases carry capacity
- Farming efficiency: Perfect for loot collection runs
- Team utility: Can carry more supplies for the group
- Upgrade potential: Further improvements to carrying capacity
Graves Rescue: Veteran Class Access
I already covered Graves rescue in the Veteran class section, but here are some additional insights specific to the rescue mechanics:
Advanced Graves Rescue Tips:
- Spawn patterns: Graves tends to spawn in more dangerous areas than Sam
- Escort difficulty: His escort route often goes through high-traffic monster areas
- Timing considerations: Best attempted when your team is well-equipped and coordinated
- Fallback planning: Always have an escape route if the rescue goes wrong
Why Graves Rescue is Worth the Effort:
- Meta-defining class: The Veteran class changes how you approach the entire game
- Combat superiority: Unmatched close-quarters combat capability
- Progression acceleration: Makes future runs significantly easier
- Prestige factor: Not many players have successfully rescued Graves yet
Mr. Bill Rescue: Daily Tasks System
Mr. Bill is the third and final rescueable NPC, and while he doesn’t unlock a new class, he provides access to the Daily Tasks system, which is incredibly valuable for long-term progression.
Who is Mr. Bill? Mr. Bill appears tied up in the deeper sections of the underground facility. Like the other NPCs, he spawns randomly after Floor 10 and becomes more common after Floor 15.
Rescue Process:
- Find Mr. Bill: Search the usual spawn locations on deeper floors
- Free him: Simple interaction to untie
- Escort to elevator: Similar to other NPC rescues but generally easier
- Confirm rescue: Wait for the success message
Daily Tasks System Benefits: Rescuing Mr. Bill unlocks the Daily Tasks system in the lobby, which provides:
- Rotating challenges: New objectives every day to keep gameplay fresh
- Valuable rewards: Cash, gears, and exclusive items
- Progression variety: Alternative advancement paths beyond standard gameplay
- Achievement system: Track your completion of various challenges
Daily Tasks Examples:
- Delivery quotas: Complete a certain number of successful deliveries
- Monster elimination: Defeat specific numbers or types of monsters
- Exploration objectives: Visit specific floors or areas
- Collection challenges: Gather certain amounts of specific items
- Time trials: Complete objectives within time limits
Maximizing Daily Tasks:
- Daily login: Check back every day for new tasks
- Team coordination: Some tasks are easier with coordinated groups
- Resource preparation: Gather necessary items before attempting task-specific runs
- Strategic planning: Focus on tasks that align with your current goals
New Loot and Monster Guide
The Bloomaw update didn’t just add classes and rescue mechanics—it also introduced new loot opportunities and a terrifying new monster that’s changing how players approach underground exploration.
New Loot System Overview
The expanded loot system makes every expedition more rewarding, with new items that can dramatically improve your survival chances and combat effectiveness.
New Loot Categories:
- Enhanced weapons: More powerful and specialized weaponry
- Advanced medical supplies: Better healing and revival options
- Utility items: Tools that provide tactical advantages
- Rare materials: Components for advanced crafting and upgrades
- Cosmetic items: Visual customization options (for players who care about appearance)
Loot Spawn Changes:
- Increased variety: More different item types in containers
- Better distribution: Loot is more evenly spread across floors
- Conditional spawns: Certain items only appear under specific conditions
- Quality scaling: Higher floors have better quality loot
Farming Strategies for New Loot:
- Deep floor runs: Focus on floors 15+ for the best items
- Systematic searching: Check every container and corner
- Team coordination: Split up to cover more ground efficiently
- Class synergy: Use Porter class for maximum carry capacity
- Resource management: Balance loot collection with survival needs
New Monster: The Bloomaw Entity
The update introduces a new monster variant that’s been terrorizing players across all skill levels. After numerous encounters with this new threat, I’ve developed effective strategies for dealing with it.
Bloomaw Entity Characteristics:
- Appearance: Distinctive visual design different from standard monsters
- Behavior patterns: Unique movement and attack cycles
- Damage output: Higher than average damage per hit
- Special abilities: Has unique mechanics not seen in other monsters
- Spawn conditions: Appears under specific circumstances or on certain floors
Combat Strategies Against the Bloomaw Entity:
- Range advantage: Keep distance when possible—this entity is deadly up close
- Environmental usage: Use the facility’s layout to block line of sight
- Ammo conservation: This is a tough fight—make every shot count
- Team coordination: Coordinate attacks and focus fire when possible
- Retreat tactics: Don’t be afraid to disengage and regroup
Weaknesses and Exploits:
- Specific weapon types: Certain weapons are more effective against it
- Behavioral patterns: Learn its attack cycles for counter opportunities
- Environmental vulnerabilities: Some areas of the facility provide advantages
- Timing-based strategies: Specific moments during its behavior create openings
Preparation Tips:
- Bring appropriate weapons: Match your loadout to the expected threat
- Stock medical supplies: This fight can be punishing—come prepared
- Team composition: Balance your team for this specific encounter
- Escape planning: Always have a retreat route available
Complete Classes Guide and Tier List (2026)
While the Veteran class is the star of the update, understanding all available classes and their place in the meta is crucial for long-term success. I’ve extensively tested every class in various scenarios to provide you with this comprehensive analysis.
All Classes Overview
| Class | Cost | Starting Items | Best For | Difficulty |
|---|---|---|---|---|
| Odd Jobber | Free | None | Beginners | Easy |
| Veterinarian | $2,500 | 1 Bandage | Healing | Easy |
| Chef | $3,000 | None | Food management | Medium |
| Sprinter | $10,000 | Bloxy Cola | Speed runs | Medium |
| Baseballer | $12,000 | Baseball Bat | Combat | Hard |
| Porter | $30,000 | None | Loot farming | Medium |
| Veteran | Rescue/$30k | Shotgun + Ammo | All-around | Hard |
S Tier Classes: Meta-Defining Choices
These classes offer the best combination of utility, combat effectiveness, and progression value. If you’re serious about mastering Deadly Delivery, these should be your primary focus.
Veteran Class
- Strengths: Unmatched close-quarters combat, excellent starting weapon, stamina regeneration
- Weaknesses: Requires significant effort to unlock, medium range combat weakness
- Best for: Players who want to dominate combat situations
- Progression path: Rescue Graves or pay 30,000 cash
- Upgrade priority: Focus on weapon damage and stamina improvements
Baseballer Class
- Strengths: High melee damage, good health upgrades, reliable starting weapon
- Weaknesses: Limited range, requires close combat engagement
- Best for: Aggressive players who prefer melee combat
- Progression path: Purchase for 12,000 cash
- Upgrade priority: Max out baseball bat damage first, then health upgrades
Porter Class
- Strengths: Unmatched carry capacity, essential for farming runs
- Weaknesses: No direct combat advantages, requires team support
- Best for: Players focused on resource collection and team support
- Progression path: Rescue Sam or pay 30,000 cash
- Upgrade priority: Backpack capacity first, then movement speed improvements
A Tier Classes: Strong Contenders
These classes are excellent choices that offer specific advantages for different playstyles, though they’re not quite as universally powerful as S Tier options.
Chef Class
- Strengths: Excellent food management, team utility, good progression
- Weaknesses: Limited direct combat capability
- Best for: Players who enjoy support roles and resource management
- Progression path: Purchase for 3,000 cash
- Upgrade priority: Food quality first, then movement speed with food
B Tier Classes: Situational Options
These classes are solid choices that can be effective in specific situations or for certain playstyles, but they don’t offer the same level of power or utility as higher-tier classes.
Veterinarian Class
- Strengths: Healing capabilities, good for solo play, affordable
- Weaknesses: Limited combat effectiveness, support-focused
- Best for: New players or those who prefer a healing/support role
- Progression path: Purchase for 2,500 cash
- Upgrade priority: Healing effectiveness first, then health regeneration
Odd Jobber Class
- Strengths: Free to use, balanced stats, good for learning
- Weaknesses: No special advantages, outclassed by other classes
- Best for: Complete beginners or players saving up for other classes
- Progression path: Available by default
- Upgrade priority: Stamina first, then health improvements
Class Progression Strategy
Based on my experience, here’s the optimal progression path for new players:
- Start with Odd Jobber: Learn the basics without spending money
- Move to Veterinarian: Affordable healing capabilities for solo survival
- Upgrade to Chef: Better resource management for longer runs
- Save for Sprinter: Improved mobility for better exploration and escape
- Choose your path: Either Baseballer for combat or Porter for farming
- Unlock Veteran: The endgame class that combines the best of all worlds
Money Management Tips:
- Use codes first: The codes I provided give you starting capital
- Complete deliveries: Each successful delivery provides cash rewards
- Sell unnecessary items: Don’t hoard items you won’t use
- Team up for efficiency: Four-player teams complete more deliveries faster
- Prioritize upgrades: Focus on one class at a time rather than spreading resources thin
2026 Advanced Tips and Strategies
Now that you understand all the new content, let me share some advanced strategies I’ve developed that will help you dominate Deadly Delivery’s underground facility.
Team Composition Strategies
Playing with a well-coordinated team dramatically increases your success rate. Here are the optimal team compositions I’ve found:
Balanced Team Setup:
- 1 Veteran: Primary combat and crowd control
- 1 Porter: Loot management and carrying capacity
- 1 Chef: Resource management and team support
- 1 Baseballer: Additional combat power and melee specialist
Speed Run Team:
- 2 Sprinters: Maximum mobility and exploration speed
- 1 Veteran: Combat protection for the team
- 1 Porter: Essential for carrying loot during fast runs
Farming Focus Team:
- 2 Porters: Maximum carrying capacity
- 1 Chef: Sustained resource management
- 1 Veteran: Protection during extended farming sessions
Floor Progression Strategy
Understanding how to progress through floors efficiently is crucial for success. Here’s my approach:
Early Floors (1-10):
- Focus on learning: Use this time to understand monster patterns
- Collect basic resources: Gather essential items and weapons
- Build cash reserves: Save money for class purchases
- Practice escape routes: Learn the layout for quick exits
Mid Floors (11-20):
- Start hunting NPCs: This is where Sam, Graves, and Mr. Bill begin spawning
- Upgrade equipment: Better weapons and armor become necessary
- Team coordination: More complex encounters require teamwork
- Resource management: Balance consumption with collection
Deep Floors (21+):
- Elite preparation: Only attempt with well-equipped teams
- Advanced strategies: Use all learned mechanics and class abilities
- High-risk, high-reward: Best loot and most dangerous encounters
- Escape planning: Always have multiple exit strategies
Resource Management Mastery
Effective resource management separates good players from great ones. Here are my key principles:
Ammo Management:
- Carry variety: Have different weapon types for different situations
- Conserve for bosses: Save special ammo for tough encounters
- Scavenge constantly: Always be looking for ammo pickups
- Share with team: Coordinate ammo distribution based on need
Health and Stamina:
- Prevent overuse: Don’t sprint unnecessarily
- Use items strategically: Save healing for critical moments
- Environmental awareness: Use safe zones for recovery
- Team support: Share healing items based on need
Inventory Optimization:
- Prioritize essentials: Always have space for key items
- Regular cleanup: Drop unnecessary items when inventory fills
- Team coordination: Let Porter class handle bulk items
- Value assessment: Know which items are worth keeping
FAQ: Common Questions About Deadly Delivery Update
Based on my research and community interactions, here are the most common questions players have about the Bloomaw update:
How often do new codes get released in Deadly Delivery?
New codes are typically released during major updates, special events, or when the game reaches milestone player counts. Based on the current pattern, expect new codes every 2-4 weeks. I recommend checking this guide regularly as I’ll update it with new codes as soon as they’re released.
What’s the fastest way to unlock the Veteran class?
The fastest way depends on your playstyle. If you’re lucky and find Graves quickly, rescuing him is faster than grinding 30,000 cash. However, if you’re having trouble with rescue missions or prefer guaranteed progression, saving up 30,000 cash might be more reliable. I recommend attempting rescue missions while naturally progressing and saving cash as a backup plan.
Can you rescue multiple NPCs in one run?
No, the rescue system is designed so that only one NPC can spawn per floor, and you can only attempt one rescue per run. This encourages multiple playthroughs and adds strategic depth to which rescue you prioritize first.
What’s the best class for solo play in Deadly Delivery?
For solo play, I recommend the Veteran class once unlocked, as it provides the best combination of combat effectiveness and self-sufficiency. Before unlocking Veteran, the Veterinarian class is a good choice for solo players due to its healing capabilities, while the Baseballer offers strong combat potential for skilled players.
How do the new monsters differ from existing ones?
The new Bloomaw Entity introduced in this update has unique attack patterns, higher damage output, and special abilities not seen in previous monsters. It requires different strategies and typically appears in deeper floors or under specific conditions, making it a significant challenge even for experienced players.
Is the Porter class worth the 30,000 cash cost?
Absolutely! While 30,000 cash seems expensive, the Porter class’s backpack ability dramatically increases your efficiency in collecting loot and resources. This pays for itself quickly through the additional items you can carry and sell. Plus, you can unlock it for free by rescuing Sam, making it accessible even without spending cash.
What’s the best team composition for tackling the deepest floors?
For the most challenging deep-floor content, I recommend a balanced team of one Veteran (combat), one Porter (loot management), one Chef (resource management), and one Baseballer (additional combat). This composition provides all necessary capabilities while maintaining good synergy between class abilities.
How often do Daily Tasks refresh in Deadly Delivery?
Daily Tasks refresh every 24 hours at midnight server time. This provides a steady stream of new objectives and rewards for regular players. I recommend checking back daily to maximize your reward potential and take advantage of the varying challenges.
Can you play Deadly Delivery effectively without spending real money?
Yes! Deadly Delivery is completely playable without spending real money. The in-game cash economy is well-balanced, and all classes and items can be obtained through normal gameplay. The codes I provide in this guide also give you free starting resources to help your progression.
What’s the best strategy for surviving Black Fog events?
Black Fog events are particularly challenging due to reduced visibility and increased monster spawns. My best strategies include: sticking close to walls for navigation, using audio cues to detect monsters, moving slowly and deliberately, and saving special items for emergency situations during these events.
Conclusion and Next Steps
You’ve now reached the end of the most comprehensive Deadly Delivery update guide available! I’ve covered everything from the latest codes and the game-changing Veteran class to the complete rescue system and advanced strategies for dominating the underground facility.
Key Takeaways:
- Redeem codes immediately before they expire
- Prioritize rescuing Graves to unlock the powerful Veteran class
- Master the rescue system for access to exclusive content
- Understand class synergies for optimal team composition
- Develop resource management skills for long-term success
What’s Next? The Deadly Delivery development team has shown strong commitment to regular updates, so expect more content in the coming months. Based on current patterns, we might see:
- Additional classes and rescue NPCs
- New monster variants and boss encounters
- Expanded underground areas to explore
- Enhanced social and community features
- Quality of life improvements based on player feedback
Stay Updated: I’ll be keeping this guide updated with the latest codes, strategies, and developments in Deadly Delivery. Bookmark this page and check back regularly for new content. The underground world of Morty’s Fast Food is constantly evolving, and you’ll want to stay ahead of the curve.
Final Thoughts: The Bloomaw update has transformed Deadly Delivery into an even more compelling and deep experience. Whether you’re a casual player looking for some spooky fun or a dedicated survivor aiming to master every aspect of the game, there’s something here for everyone. The addition of the Veteran class, rescue system, and new challenges has created a perfect balance of accessibility and depth that will keep players engaged for months to come.
Remember, the key to success in Deadly Delivery is patience, preparation, and persistence. Don’t get discouraged by failed runs—each attempt teaches you something new and brings you one step closer to mastering the underground. Now grab your gear, redeem those codes, and get ready to conquer the depths of Deadly Delivery!