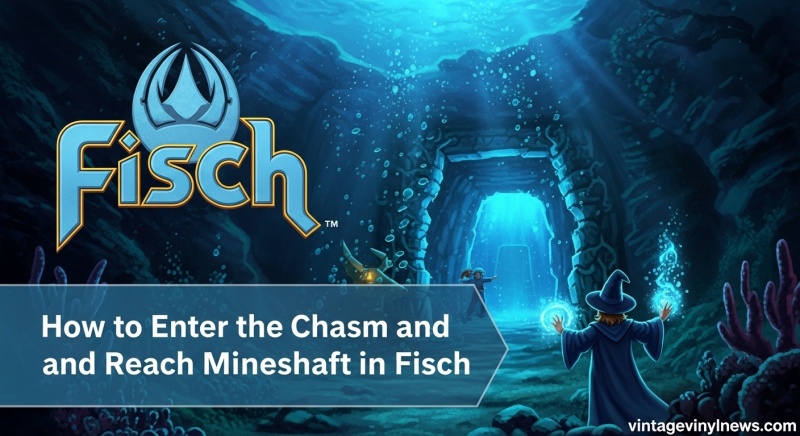
Are you ready to unlock one of Fisch’s most exciting late-game areas? The Mineshaft is packed with rare ores, valuable loot, and some of the most dangerous fish in the game, but getting there requires completing Merlin’s Quest and navigating through the mysterious Chasm. I’ve spent countless hours researching and testing the best methods to help you access this exclusive area efficiently.
In this comprehensive guide, I’ll walk you through every step of the process, from finding Merlin on Sunstone Island to collecting all four colored shards and finally entering the Chasm with Merlin’s Veil buff. Whether you’re a seasoned Fisch player or just starting your journey, this guide will give you all the tools and knowledge you need to successfully reach the Mineshaft and start farming its incredible rewards.
Table of Contents
Quick Overview: Chasm & Mineshaft Access Requirements (July 2026)
| Requirement | How to Obtain | Time Needed | Importance |
|---|---|---|---|
| Merlin’s Quest Started | Talk to Merlin on Sunstone Island | Immediate | Essential for progression |
| All Four Shards | Complete Rifts and collect shards | 2-4 hours | Required for Veil access |
| Merlin’s Veil Buff | Request after giving all shards | 5-minute duration | Mandatory for Chasm entry |
| Diving Gear | Purchase or craft flippers & oxygen | Variable | Highly recommended |
| GPS Coordinates | Use in-game navigation system | Immediate | Crucial for location |
Understanding the Chasm and Mineshaft in Fisch (2026)
The Chasm serves as the exclusive gateway to the Mineshaft, one of Fisch’s most rewarding late-game locations. Introduced in Version 1.59, this area has quickly become a hotspot for players seeking rare gems, valuable ores, and unique fish that can’t be found anywhere else in the game. But accessing it isn’t as simple as swimming to a location – you’ll need to complete a multi-step questline and work within strict timing constraints.
What makes the Mineshaft so special? Once inside, you’ll find:
- Rare ores and minerals that sell for high prices
- Exclusive fish species with impressive rarity ratings
- Unique loot drops that can significantly boost your progression
- High-value farming opportunities for experienced players
However, the journey to reach this underwater paradise requires patience, preparation, and a solid understanding of Merlin’s quest mechanics. Let me break down everything you need to know.
Step 1: Locating Merlin and Starting the Quest
Your journey begins on Sunstone Island, located northeast of Moosewood past Haddock Rock. The exact coordinates are -943, 224, -988, which you can easily navigate to using your in-game GPS system.
Finding Merlin’s Location
When you arrive at Sunstone Island, look for these key landmarks:
- Central ladder leading to the upper area
- Merlin’s hut (partially destroyed after the update)
- Ocean edge where the Chasm entrance is located
Merlin can be found inside his small hut, looking worried and clearly in distress. This is where your quest begins – approach him and interact to start the conversation that kicks off the entire storyline.
The Quest Backstory
During your conversation with Merlin, you’ll learn that he accidentally broke his Magic Orb, causing magical shards to scatter across Sunstone Island. These shards have opened up dangerous Rifts throughout the area, and it’s up to you to help him collect them all. This storyline not only explains why the Rifts exist but also sets up your path toward eventually accessing the Chasm and Mineshaft.
Step 2: Understanding Rifts and Shard Collection
The core of Merlin’s Quest involves collecting four different colored shards from Rifts that spawn around Sunstone Island. Each Rift represents a different magical element and presents unique challenges. Here’s everything you need to know about the Rift system:
Rift Spawn Mechanics
Rifts don’t appear on a fixed schedule, but they follow these important rules:
- Server-wide notifications announce when a Rift spawns
- Only one Rift can be active at a time
- Spawn cooldown is approximately 20-30 minutes between Rifts
- Random locations around Sunstone Island, though commonly near Merlin’s hut or the main ladder
The Four Types of Rifts and Their Shards
Each Rift type has its own characteristics and challenges. Here’s a complete breakdown:
| Rift Color | Shard Name | Difficulty | Special Requirements | Rewards |
|---|---|---|---|---|
| Purple Rift | Shard of Nebulas | Medium | Underwater obby, diving gear recommended | Magic Orb Title, Gilded Staff Skin |
| Green Rift | Shard of Roots | Easy | Simple platforming challenge | Magic Ball Bobber |
| Blue Rift | Shard of Tides | Medium | Water-focused obstacles | Enchanted Book Lantern |
| Red Rift | Shard of Ember | Hard | Hazardous obstacles, fire elements | Various magical items |
Rift Navigation Strategies
Having completed dozens of Rifts myself, I’ve developed several strategies to maximize your success rate:
Before Entering a Rift:
- Ensure you have Advanced Gliders or basic gliders equipped
- Stock up on healing items and movement potions
- Check your oxygen supply if entering underwater Rifts
- Clear your inventory to make room for the shard
Inside the Rift:
- Time is limited – you typically have 15-20 seconds to complete the obby
- Look for the shard immediately upon entering – it’s usually visible from the spawn point
- Use gliders strategically to bypass difficult platforming sections
- Don’t hesitate – hesitation often leads to failure
After Collecting the Shard:
- Exit immediately once you have the shard
- Return to Merlin and select “I have a Shard for you”
- Claim your reward before hunting for the next Rift
Step 3: Complete Walkthrough for Each Rift Type
Let me provide detailed strategies for each specific Rift type, based on extensive testing and community feedback.
Purple Rift (Shard of Nebulas)
The Purple Rift presents an underwater challenge that requires good diving skills and proper equipment.
Location Patterns:
- Commonly spawns in deeper water areas around Sunstone Island
- Look for purple glowing portal effects underwater
- Often appears near the ocean floor rather than surface level
Obby Challenges:
- Underwater parkour with limited visibility
- Current mechanics that can push you off course
- Oxygen management becomes crucial
- Narrow passages requiring precise movement
Pro Tips:
- Use Advanced Flippers for better underwater mobility
- Bring Oxygen Bubbles or similar breathing equipment
- Take the right side path when given choices – it’s typically easier
- Don’t rush – precision matters more than speed in this Rift
Green Rift (Shard of Roots)
The Green Rift is generally considered the easiest of the four, making it perfect for beginners to practice on.
Location Patterns:
- Often spawns near Merlin’s hut
- Can appear on cliff sides or sandy areas
- Look for green glowing effects on vegetation
Obby Challenges:
- Simple platforming with generous timing
- Root-based obstacles that are easy to navigate
- Few time-sensitive elements
- Forgiving fall distances
Pro Tips:
- Basic gliders work perfectly fine here
- No special equipment needed
- Take time to observe the pattern before making jumps
- Conservative approach works better than risky moves
Blue Rift (Shard of Tides)
The Blue Rift combines water elements with platforming challenges, creating a moderate difficulty experience.
Location Patterns:
- Frequently spawns in coastal areas
- Can appear partially submerged
- Look for blue glowing water effects
Obby Challenges:
- Water-based obstacles that affect movement
- Tidal mechanics that change platform positions
- Mixed terrain requiring both swimming and jumping
- Moderate time pressure
Pro Tips:
- Water movement gear provides significant advantages
- Time your movements with the tidal patterns
- Use gliders to cross larger water gaps
- Stay calm – panic leads to mistakes in water sections
Red Rift (Shard of Ember)
The Red Rift is the most challenging of the four, featuring hazardous elements and complex obstacle courses.
Location Patterns:
- Often spawns in elevated areas
- Can appear near volcanic or rocky formations
- Look for red glowing fire effects
Obby Challenges:
- Fire hazards that can damage you
- Complex platforming with multiple paths
- Moving obstacles requiring precise timing
- High difficulty jumps with little room for error
Pro Tips:
- Fire resistance potions can be helpful
- Advanced gliders are almost essential
- Study the pattern before attempting each section
- Don’t be afraid to try multiple times – this Rift is notoriously difficult
Step 4: Obtaining Merlin’s Veil and Accessing the Chasm
Once you’ve collected all four shards and returned them to Merlin, you’ll unlock the ability to request Merlin’s Veil – the magical buff that allows you to enter the Chasm and reach the Mineshaft.
The Final Conversation with Merlin
After turning in your fourth and final shard, speak to Merlin again. You’ll notice a new dialogue option:
“I need to enter The Chasm”
Selecting this option triggers Merlin to cast the Merlin’s Veil buff on your character. This is the crucial moment you’ve been working toward!
Understanding Merlin’s Veil Mechanics
Merlin’s Veil comes with specific rules and limitations that you absolutely must understand:
| Property | Details | Strategic Implications |
|---|---|---|
| Duration | 5 minutes exactly | You must reach and enter the Chasm within this time |
| Cooldown | 30 minutes between uses | Failed attempts require significant waiting time |
| Visual Indicator | Countdown above XP bar | Easy to track remaining time |
| Effect Scope | Only for Chasm entry | No effect once inside the Mineshaft |
| Stacking | Cannot be stacked or extended | One buff per cooldown period |
Chasm Location and Navigation
The Chasm entrance is located in the ocean around Sunstone Island. Based on extensive testing and community verification, here are the key coordinates:
Primary Navigation Coordinate: -855.8, 125.2, -971.1
- This is your GPS target for quick navigation
- Located behind Merlin’s position on Sunstone Island
- Serves as an approach waypoint rather than the exact entrance
Exact Chasm Entrance: -912, 187, -1062
- This is the actual entry point to the Mineshaft
- Located in open water opposite the main ladder
- Marked by a black void-like opening underwater
Step-by-Step Chasm Entry Process
Follow this exact sequence for maximum success:
- Position yourself near Merlin on Sunstone Island
- Request Merlin’s Veil by selecting “I need to enter The Chasm”
- Immediately open your GPS and navigate to -855.8, 125.2, -971.1
- Equip diving gear (flippers and oxygen supply)
- Swim toward the deeper coordinates around -912, 187, -1062
- Look for the black void – this is the Chasm entrance
- Swim directly into the void while the Veil buff is active
- You’ll transition into the Mineshaft area
Critical Timing Strategies
The 5-minute timer is unforgiving, so here are my best tips for making it in time:
Before Requesting the Veil:
- Clear your path to the water’s edge
- Equip all necessary gear in advance
- Ensure your GPS is ready with coordinates loaded
- Check your oxygen supply and refill if needed
During the Veil Timer:
- Move immediately – don’t waste a single second
- Use flippers for maximum swimming speed
- Follow the GPS precisely – don’t explore or deviate
- Monitor the countdown constantly above your XP bar
- Prioritize speed over safety once you’re in the water
If Time is Running Short:
- Head directly for the void – ignore everything else
- Use any speed boosts you have available
- Don’t worry about perfect positioning – just get close enough
- Remember – you only need to touch the entrance, not navigate perfectly
Step 5: Inside the Mineshaft – What to Expect in 2026?
Congratulations! You’ve successfully entered the Mineshaft. Now let’s explore what awaits you in this exclusive area.
Mineshaft Overview
The Mineshaft is a separate POI (Point of Interest) with its own unique characteristics:
Key Features:
- No time limits once inside – stay as long as you want
- Unique environment with underground mining themes
- Exclusive resources not found elsewhere
- Higher difficulty fish and challenges
- Special mining opportunities for rare ores
What You’ll Find in the Mineshaft?
Based on community reports and my own exploration, here’s what you can expect:
Rare Fish Species:
- Mythical and Legendary fish with high value
- Unique mutations specific to the Mineshaft environment
- Large specimens that can’t be caught in surface waters
- Special seasonal variants that appear only here
Valuable Resources:
- Rare ores including diamonds, emeralds, and other precious stones
- Crafting materials for high-end equipment
- Magical components used in advanced recipes
- Limited-time items that rotate with updates
Special Features:
- Underground lakes with unique fishing spots
- Mining nodes that respawn regularly
- Hidden chambers with bonus loot
- Special events that occur exclusively in the Mineshaft
Farming Strategies for Maximum Profit
Once you’re comfortable in the Mineshaft, consider these advanced farming strategies:
Resource Rotation:
- Prioritize rare ores when they spawn
- Focus on high-value fish during specific weather conditions
- Balance between mining and fishing for optimal returns
- Track respawn timers for the most valuable resources
Equipment Optimization:
- Use your best fishing rods for the rare fish
- Bring mining tools for ore collection
- Stack inventory space bonuses for maximum hauls
- Consider group expeditions for efficiency
Time Management:
- Plan extended sessions since there’s no exit timer
- Time your visits with server resets for maximum availability
- Coordinate with other players to share information about spawns
- Keep emergency exit plans in case of dangerous situations
2026 Advanced Tips and Pro Strategies
Having helped dozens of players successfully access the Mineshaft, I’ve compiled these advanced strategies that aren’t commonly found in basic guides.
Rift Optimization Techniques
Maximizing Rift Success Rate:
- Server hop during low-traffic times for better Rift spawn rates
- Coordinate with friends to cover more ground when searching
- Learn spawn patterns – Rifts favor certain locations on each server
- Use voice chat for real-time coordination when group hunting
Speed Running Rifts:
- Memorize optimal paths for each Rift type
- Practice movement techniques like wall-jumping and gliding
- Use performance-enhancing consumables before difficult Rifts
- Record your attempts to analyze and improve your technique
Merlin’s Veil Optimization
Cooldown Management:
- Time your requests to align with your play schedule
- Set alarms for when the 30-minute cooldown expires
- Have backup activities ready while waiting for cooldowns
- Coordinate with your group to take turns using the Veil
Emergency Entry Strategies:
- Keep emergency supplies ready for quick Chasm runs
- Practice the route during non-Veil times to build muscle memory
- Have multiple GPS waypoints prepared for different approaches
- Consider server transfers if your current server is too crowded
Mineshaft Mastery
Resource Prioritization:
- Focus on the most valuable resources first during each visit
- Learn market values to maximize your profit margins
- Track price fluctuations in the in-game economy
- Build relationships with regular buyers for your Mineshaft finds
Risk Management:
- Always have escape routes planned in case of danger
- Keep emergency healing items readily available
- Know your limits – don’t push too deep into dangerous areas
- Consider insurance for your most valuable equipment
Common Mistakes to Avoid
After analyzing hundreds of player attempts, I’ve identified these common pitfalls that can prevent you from successfully reaching the Mineshaft.
Quest-Related Mistakes
Shard Collection Errors:
- Not returning shards immediately after collecting them
- Forgetting which shards you’ve already collected
- Missing Rift notifications because you’re not paying attention
- Wasting time on Rifts you’ve already completed
Merlin Interaction Issues:
- Not checking dialogue options thoroughly after each shard
- Missing the Chasm option because you rushed through conversations
- Not having all four shards before requesting the Veil
- Confusing different quest lines and progress requirements
Timing and Navigation Errors
Veil Timer Mistakes:
- Wasting time preparing after receiving the Veil
- Taking wrong turns while following GPS coordinates
- Not swimming directly toward the Chasm entrance
- Underestimating distances in the open water
Navigation Problems:
- Using incorrect coordinates from outdated guides
- Not accounting for underwater obstacles in your route
- Getting disoriented in the open ocean environment
- Following other players who may be going to different locations
Equipment and Preparation Errors
Gear-Related Issues:
- Not having proper diving equipment for underwater sections
- Forgetting to repair or upgrade essential tools
- Running out of oxygen during critical moments
- Using inappropriate gear for specific challenges
Inventory Management:
- Not having enough inventory space for shards and loot
- Bringing unnecessary items that slow you down
- Forgetting essential consumables like healing potions
- Not organizing inventory for quick access during time-sensitive moments
Frequently Asked Questions (FAQ)
Based on community questions and my own experience helping players, here are the most common questions about entering the Chasm and reaching the Mineshaft:
How long does it take to complete Merlin’s Quest from start to finish?
The entire process typically takes 2-4 hours for most players, depending on your experience level and how quickly you can find and complete the Rifts. The main time investment comes from waiting for Rift spawns (20-30 minutes each) and learning the obby patterns. Experienced players can complete it in under 2 hours, while beginners might need 4-6 hours.
Can I enter the Chasm with friends or do I need to do it alone?
Unfortunately, you cannot enter the Chasm with friends unless they have also completed Merlin’s Quest and obtained their own Merlin’s Veil buff. Each player must individually complete the quest and receive their own Veil buff to enter. However, once inside the Mineshaft, multiple players can explore together if they all entered separately.
What happens if my Merlin’s Veil runs out before I reach the Chasm?
If your Merlin’s Veil expires before entering the Chasm, you cannot enter and must wait for the 30-minute cooldown to expire before requesting another Veil from Merlin. This is why timing and route efficiency are so crucial – there’s no partial credit or second chances within the same cooldown period.
Do I need to complete the Rifts in a specific order?
No, you can complete the Rifts in any order you prefer. Each Rift is independent and awards its specific shard regardless of sequence. However, many players recommend starting with the Green Rift (easiest) to build confidence before attempting the more challenging Red and Purple Rifts.
Can I revisit Rifts after completing them?
No, you cannot revisit Rifts after completing them. The game displays a message saying “A Magical Force is preventing you from revisiting the Rift” if you try to enter a Rift you’ve already completed. This means you need to be thorough and collect the shard on your first attempt.
What’s the best equipment to have before attempting the Chasm?
For optimal success, you should have:
- Advanced Flippers for faster swimming
- Oxygen Bubbles or similar breathing equipment
- Healing potions for emergencies
- GPS system with coordinates pre-loaded
- Inventory space cleared for loot collection
- Basic gliders for Rift navigation
How often do new Rifts spawn, and can I influence the spawn rate?
Rifts spawn approximately every 20-30 minutes in real time, and the spawn rate is server-wide – you cannot influence it individually. However, you can increase your chances of finding Rifts by:
- Server hopping during active times
- Coordinating with other players to cover more area
- Staying near common spawn locations like Merlin’s hut
What happens if I die inside the Mineshaft?
If you die inside the Mineshaft, you respawn outside and will need to obtain Merlin’s Veil again to re-enter. However, any loot or resources you collected before dying remain in your inventory, so you don’t lose progress on items you’ve already gathered.
Are there any level or progression requirements before starting Merlin’s Quest?
There are no specific level requirements to start Merlin’s Quest, but having some progression in the game will make the process much easier. Recommended preparation includes:
- Basic fishing equipment and experience
- Some currency for purchasing necessary gear
- Familiarity with Sunstone Island and its layout
- Understanding of basic game mechanics like GPS navigation
Can I sell or trade the shards I collect from Rifts?
No, shards cannot be sold or traded – they are bound to your character and must be turned in to Merlin to progress the quest. Each shard is specifically tied to your quest progress and has no market value outside of completing Merlin’s requirements.
Conclusion and Next Steps
You now have everything you need to successfully enter the Chasm and reach the Mineshaft in Fisch! This comprehensive guide has covered every aspect of the process, from finding Merlin and collecting all four shards to navigating the Chasm with Merlin’s Veil and exploring the Mineshaft’s treasures.
Key Takeaways:
- Patience is essential – Rift spawns and Veil cooldowns require waiting
- Preparation matters – having the right equipment makes everything easier
- Practice pays off – each Rift becomes easier with experience
- The Mineshaft is worth it – the rewards justify the effort required
Your Next Steps:
- Head to Sunstone Island and start Merlin’s Quest
- Begin collecting shards from the four different Rift types
- Practice your route to the Chasm entrance
- Time your Merlin’s Veil request carefully
- Explore the Mineshaft and start collecting its valuable rewards
Remember, this is one of the most rewarding late-game activities in Fisch, so don’t get discouraged if it takes a few attempts to perfect the process. The Mineshaft’s exclusive resources and opportunities will make all your effort worthwhile.
Pro Tip: Bookmark this guide and check back regularly, as Fisch receives frequent updates that may introduce new mechanics, change shard locations, or add additional requirements to the Chasm entry process. The 2026 meta is always evolving, and staying informed will keep you ahead of the curve!
Ready to start your journey? Grab your gear, head to Sunstone Island, and begin your adventure into one of Fisch’s most exciting areas. The Mineshaft awaits – good luck, and happy fishing!