The art of sampling in music production, especially the kind demonstrated by the East Coast producers, is much like a culinary recipe – it requires the right ingredients, a dash of creativity, and an eye for detail.
If you’ve ever wondered how to sample like the East Coast producers (think legends like J Dilla, DJ Premiere, or Pete Rock), this piece will guide you through your preparations and share some critical secrets of exemplary sampling.
Sampling is not merely taking chunks of existing records and assembling them into something new; it’s about delving deep into the roots of music, understanding its textures and nuances, and ingeniously working them into a fresh sonic experience.
It’s akin to alchemy – extracting gold from diverse musical elements. To master this specific skill set in production isn’t easy, but with dedicated practice and focus on these tips outlined hereafter, you can get closer to an East Coast producer’s proficiency in manipulation and extrapolation.
Defining Your Creative Objective
Just as an architect wouldn’t begin building without blueprints, a music producer shouldn’t forge ahead without a clear creative objective.
Defining your creative purpose is usually the earliest decision you make in the production process, guiding you in selecting and shaping your samples.
This step is often undervalued but is the cornerstone of successful production.
The Importance of A Creative Objective
A well-defined creative objective provides direction and improves focus. It narrows down your selection for potential tracks to sample and shapes your process of chopping, looping, and rendering the samples. With a clear creative objective,
- You can convey emotions effectively
- Guide listeners through a sonic journey
- Create compelling narratives with your music
Tips For Setting A Creative Objective For Sampling
When determining your creative end goal, consider these tips:
- Define Your Intention:
What’s the central idea or emotion you want to express? Is this project personal or for public consumption? Maybe you’re aiming for a traditional East Coast vibe or want to exhibit contemporary influences within this tradition.
- Envision The End Result:
How should the final track sound? Think about characteristics in terms of rhythm, harmony, and melody.
- Plan Your Tools:
Based on your intentions, decide which tools (synths, drum sets, DAWs) are most appropriate. Do not let tool limitation stifle creativity – often, great innovations come from constraints.
Remember that while artistic intentions should guide you – exploring unfamiliar territories can lead to exciting discoveries.
Sometimes, you might want to deviate from set objectives if creativity pulls strongly in another direction. Stay flexible!
In conclusion, defining a creative objective doesn’t restrain creativity; it gives purpose and makes navigation through the vast world of music sampling more manageable.
Also Read: B Flat Minor Pentatonic Scale [Create Emotive Music In Minutes]
Determining the Mood and Style for the Sampled Track
With its innovative sampling techniques, East coast hip hop has a distinctive mood and style that resonates with music enthusiasts worldwide.
So, how do you emulate this charisma in your productions? Here, we’ll break it down into three steps.
Analyzing East Coast Producer Styles
When you look at East Coast producers like Pete Rock or DJ Premier, their approach towards music sampling is unique – merging soulful, jazzy elements to form punchy beats that often have a deep, retrospective feel.
Analyzing their styles helps you understand the scale of possibilities and illusions their techniques create.
Start by carefully listening to the works of these legends. Identify the pivotal points in their tracks where they’ve employed creative sampling to enhance their sound.
Studying how they treat samples will offer a comprehensive look into their stylistic preferences and nuanced dynamics.
Choosing a Suitable Mood for Your Track
Your track’s mood directly reflects the emotions you wish your audience to feel when listening to your music.
Whether it’s energetic, melancholy, or sad, it’s vital to pinpoint this aspect early because it shapes all decisions.
For instance, if you aim for a nostalgic vibe, consider looking up old soul records or melodious jazz tracks for sampling.
These genres are typically rich with dynamic elements and could effectively deliver your desired mood once sampled right.
Setting the Style Through Sample Selection
Sample selection is an integral part of determining the style of your track. This selection will anchor your track’s identity and help elicit emotional responses from your listeners.
For example, if you’re seeking to deliver an upbeat vibe through your track, contrasting samples – such as pairing vintage jazz riffs complemented by punchy drum grooves – can make for an electrifying experience.
Remember, though, quirks in East Coast production don’t always equate to strictly sampling hip-hop or soul music. Versatility in choice regarding rhythm, instrumentation, and tempo are also influential factors.
Be daring in your decisions, embrace unexpected elements, and amplify your creative prowess.
So, to successfully encapsulate the ever-resounding East Coast Style in your sampling production, analyze revered producer styles, infuse emotion by choosing a suitable mood, and discerningly select samples to accentuate that distinctive style.
By adhering to these strategic steps and continually nurturing your musical aptitude, you’ll create an intriguing sonic tapestry that can rival the suave beats of many East Coast legends.
Also Read: Mixolydian Mode [Add Depth & Richness To Your Music Today]
Creating the Loops: How to Chop Samples
Seeing how a loop in East Coast hip hop can make even the most minimalist track groovy is mesmerizing. An essential part of setting that groove into motion is chopping samples.
Like finely slicing ingredients for an intricate dish, this skill can define your music’s flavor and impact. Let’s delve into how exactly you can create soul-stirring loops from scratch.
Selecting the Perfect Source Material for Sampling
Venturing headfirst into the universe of sound available to us can be daunting, but remember to keep your creative objective clear – whether that be enhancing rhythm, inducing nostalgia, or amplifying mood.
Extracting a snippet from James Brown’s record might lend a funky touch, or perhaps sampling Miles Davis could infuse your track with melodic sophistication!
Consider the following while fishing for unique sounds:
- Quality: Always ensure that your source material possesses high-quality audio. Poor-quality audio will appear in your track and may cause unwanted distractions.
- Versatility: Records that offer varied instrumentation and progressions allow for higher chances of discovering something unique.
- Alignment: The sample must align with your creative objective and mood requirements; otherwise, it won’t resonate with the rest of your track.
This is an invaluable tip for any producer delving into sampling – always stay original!
Techniques for Isolating and Extracting Specific Segments from Samples
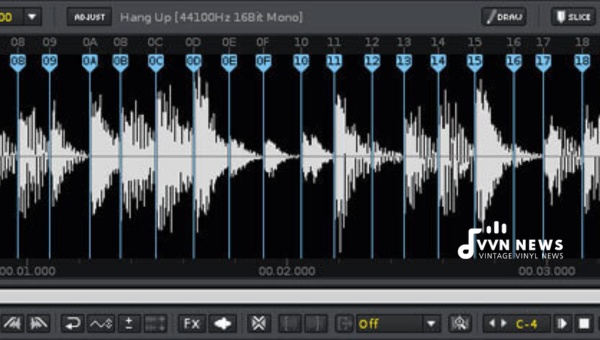
Chopping or cutting samples involves isolating and extracting specific musical segments from an audio file that you find compelling and then weaving them into new rhythms, melodies, or textures within your music.
- Manual Chopping: This method involves physically identifying segments of interest within an audio file, making precise cuts around them using software like Ableton Live or Logic Pro X, and exporting these segments individually to be triggered later.
- Automatic Chopping: Some digital audio workstations allow you to automatically chop samples based on transient detection or beat divisions using built-in tools such as ‘Slicing Mode’ in Ableton Live or ‘Recycle’ in Reason.
Arranging Sample Chops Cohesively
Arranging your chopped samples into a cohesive format can make your track an intriguing musical journey or a chaotic mess.
Hence, understanding the structure of your song and maintaining it is vital.
East Coast producers often used chopped samples as the foundation of their tracks, layering them with other instrumental elements like bass, drums, and vocals.
- Sound arrangement: Achieve a smooth flow by matching sample chops’ tone, rhythm, and harmonic content.
- Layering: Overlaying sounds expands the sonic boundaries of your music, making it sound richer. Experimentation and blending various elements while still maintaining harmony will prove rewarding.
To sample like an East Coast producer: select high-quality source material that aligns with your creative goal; utilize efficient techniques to extract captivating sections from these samples; then skillfully organize these segments into a melodically seamless presentation.
By doing so, you are set to release bold tracks that enchant listeners with their lushly layered musicality.
Also Read: Aeolian Mode [The Secret To Creating Moody & Expressive Music]
Adding Effects and Textures As Desired

The brilliant thing about East Coast Producers is that they don’t simply reuse a sample — they add effects, textures, and layers that transform it into something unique.
Creatively manipulating each model ensures the resultant piece retains an original flavor apart from the bare vintage record.
To recreate this inventive approach, we must explore different effects applicable to samples and experiment with varying textures to create depth in our tracks.
Exploring Different Effects to Enhance Your Samples
Every soundwave interaction with an environment or system creates an effect. Using these varied effects judiciously can add richness, ambient depth, or even a sense of realism to your music.
Reverb: An echo-like effect replicating sound behavior in different spaces or rooms. It adds warmth and depth to your track.
Delay: Each reflecting sound from objects around the room reaches our ears at different times. A delay simulates this phenomenon, creating a repeating echo effect.
Chorus: Multiple sounds, slightly detuned & delayed, create richness like a choir singing together.
Distortion and Saturations: These effects add grit & warmth by deliberately ‘clipping’ audio signals, often used purposefully for creative expression.
Take time to understand these effects when incorporated into your samples — how they are utilized in isolation, and their interplay when combined can enormously impact your sonic messaging.
Experimenting with Textures to Create Depth in Your Track
Texture in music can be thought of as the number of layers or the complexity of the musical arrangement.
Different textures create a more detailed landscape, enhancing listeners’ auditory experience.
Implementing contrasting rhythmic patterns, introducing polyphonic passages (more than one independent melody happening simultaneously), playing with harmonic progressions, or simply layering multiple samples all contribute to a song’s texture and depth.
In essence, your journey through adding effects and experimenting with textures in your samples not only builds depth and brevity into your compositions but also defines your distinctive sound as a producer – an integral step closer to replicating the adept sampling style of the East Coast legends.
Also Read: G Major Scales And Chords [Expand Your Musical Understandings]
Matching the Sample’s Tempo & Pitch
Successfully integrating samples into your projects often requires adjusting their tempo and pitch to align with your track, preserving both musicality and coherence.
Let’s dive into the finer details of how this can be accomplished:
Analyzing the Tempo of Original Samples
Begin by determining your original sample’s tempo (BPM – Beats Per Minute). Most contemporary digital audio workstations (DAWs) come equipped with tools to derive this information automatically but alternatively, online tools like Beat Calculator may also come in handy.
This step is crucial – knowing your sample’s tempo offers a clear starting point for making accurate adjustments later.
Adjusting Tempo to Fit Your Project
Once you know the BPM of your selected sample, the next step is adjusting it to match your project’s tempo.
This ensures your sampled track syncs seamlessly with any pre-existing sections in your composition.
For instance, if the original sample’s tempo is 90 BPM and your project’s assigned BPM is 105, you must speed up or stretch that sample accordingly.
Modern DAWs provide time-stretching features that allow for these adjustments without affecting pitch.
However, bear in mind that drastic stretching may lead to degradation in sound quality.
The golden rule here is always to balance maintaining sonic integrity and achieving musical synchronization.
Modifying Pitch to Achieve Desired Key or Mood
Pitch plays an instrumental role in defining melodic and harmonic elements in a song.
A mismatched pitch between a song and its samples can cause harmonic dissonance.
Therefore, you must manipulate the sample pitch accordingly to align with the key of your song.
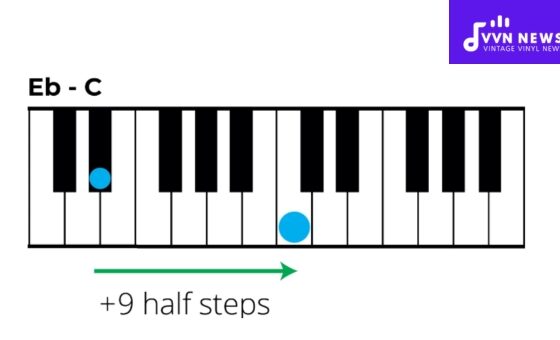
Imagine sampling a guitar riff from a record played in ‘C Major’ while composing a track set in ‘A minor.’
To create harmony here, you must transpose that guitar riff down by three semitones (C-C#-D-D#-E – yes, music theory basics come in handy!)
Furthermore, changing a sample’s pitch can also affect the mood of your track.
A pitch increase often creates a zestier feel, whereas a decrease exudes a mellow, somber tone.
The art of matching tempo and pitch is essential in enhancing the homogeneity of your sampled track. It’s about creating a fluid marriage between old and new, making them sound like they were always meant to be together.
By honing these skills, you will master the art of seamless looping and one day construct beats like an East Coast producer.
Also Read: D Major: The Scales And Chords [Broaden Your Musical Vocabulary]
Mixing the Sample: Unveiling the Artistry

Once you’ve stylized a unique sonic palette and have your samples looped in fascinating arrangements, it’s time for what many consider the crux of music production—the mix.
You ensure your samples find their perfect space in your track by implementing mixing techniques, such as Equalization, Enhancement of Stereo Width, Positioning, and Dynamic Processing. Let’s explore each technique in detail.
Equalizing for Tonal Balance
Equalization (EQ) is all about perfecting the frequency spectrum of your track by boosting or cutting specific frequencies.
It plays a critical role in shaping each sample’s tonal balance, making them sound harmonious when mixed.
Here’s a simplified way to approach EQ:
- Identify Problematic Frequencies – Listening carefully will help you identify whether specific frequencies are too harsh or dull.
- Adjust Frequencies – Boost or cut these frequencies using an EQ plugin.
- A/B Comparison – Frequently switch between the unprocessed (A) and processed (B) sounds to ensure your adjustments improve the overall sound.
Remember that moderation is key when it comes to EQ. Overdoing it can result in an unnatural sound and may cause phase issues that compromise clarity.
Enhancing Stereo Width
Enhancing your stereo width introduces a sense of spatial depth to your sample, thus providing an immersive listening experience. Consider these key steps:
- Panning: Place different elements across the stereo field by adjusting their left-right positions based on their frequency content and importance in mix.
- Stereo Imaging Plugins: Use these plugins judiciously to widen (or narrow down) subtly specific tracks, creating an illusion of space.
- Mid-side EQ: Tweak the sides’ higher frequencies more than mids for a crispier wide image while maintaining a clearer mono picture – an essential trick in East Coast production.
Positioning Samples for Clarity and Impact
Positioning implies deciding where to place your samples within the mix (aside from left-right decisions). Some tips:
- Balance: Achieve balance by appropriately adjusting the volume level of each sample depending on its role in the mix.
- Space: Use reverb, delay, or other spatial effects to situate samples, either in the forefront, middle, or more recessed.
Dynamic Processing for Level Control
Dynamic processors like compressors and limiters prove vital for controlling the dynamics of your track at both micro (short-term loudness changes) and macro (overall perceived loudness) levels. The trick is:
- Compression: Use to tame loud peaks; apply carefully to avoid squashing your track.
- Limiting: Apply subtly on the master bus for overall level control, keeping in check excessive peaks without compromising dynamics.
To achieve stellar mixes that could give top East Coast Producers a run for their money, manicure tonal balance through equalization, create a vibrant sonic picture via stereo width enhancement, strategically position samples, and regulate levels using dynamic processing.
By mastering these elements, you’re not just mixing but crafting compelling sonic narratives that truly strike a chord with listeners.
Also Read: A Major Scale [The Key To Bright, Cheerful Musical Pieces]
FAQs About sampling
What is the significance of a creative objective in sampling?
The creative objective is a roadmap that guides you toward the desired outcome. It helps focus creativity and ensures coherence in the final track.
How can I boost the mood of my sampled track?
To enhance your track’s mood, select a sample with emotional elements reflecting what you want to convey. Pair it with specific pitches and tempos to enhance this effect.
What is ‘sample chopping’?
‘Sample chopping’ involves isolating and extracting precise segments from a source material (sample) and arranging these chops into a new composition.
How can I modify a sample’s tempo to fit my project?
Modern digital audio workstations (DAWs) feature tools where you can adjust the sample’s speed without changing its pitch, ultimately helping it fit the project’s tempo.
Why are stereo width and positioning important when mixing samples?
Stereo width and positioning contribute to a rich, dynamic sound; they help differentiate various sounds across the sonic field, enhancing the listener experience.
Conclusion
Mastering the art of sampling like an East Coast producer doesn’t happen overnight; it isn’t just about mimicking someone’s style.
It’s about understanding and interpreting the musicality that lies beneath their works. So, listen, learn, and remember to make each track distinctly yours.
It doesn’t matter how seasoned or amateur you are as long as you keep perfecting your craft with determination and passion.
The overriding message? Stay true to your aesthetic preferences and dare to experiment – like the greats do. Your unique sampling style will emerge from there, I guarantee you!
Embrace this journey through beats, rhythms, and melodies garnered from the East Coast legends.

