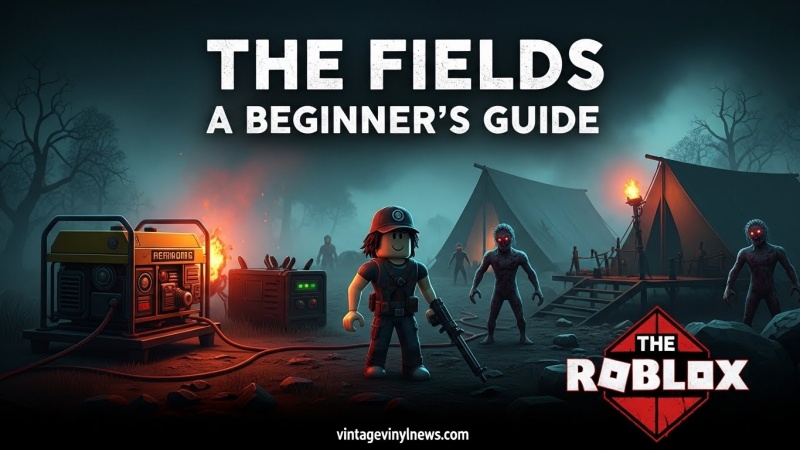
Welcome to the most comprehensive The Fields beginner’s guide you’ll find anywhere! As someone who’s spent countless hours surviving the infected quarantine zone, I’m here to walk you through everything you need to know to go from complete newbie to seasoned survivor. This guide will cover every essential aspect of the game, from your first moments spawning in the field to mastering advanced survival tactics that will keep you alive through the darkest nights.
Table of Contents
Quick Overview: The Fields at a Glance (July 2026)
| Aspect | Details |
|---|---|
| Game Type | Survival Horror |
| Developer | Not-a-Social Studio |
| Latest Update | v0.3 – Arms & Combatants (August 11, 2026) |
| Core Loop | Day: Explore & Loot → Night: Defend & Survive |
| Key Mechanics | Generator Management, Sanity System, Crafting |
| Difficulty | High (Challenging but rewarding) |
| Play Style | Solo/Co-op Survival Horror |
What is The Fields?
The Fields is a brutal, atmospheric Roblox survival horror game where you’re dropped into an infected quarantine zone and told one simple thing: survive. Developed by Not-a-Social Studio, this game takes inspiration from popular titles like TRAVERSAL, Darkwood, and Isle, creating a unique experience that’s both terrifying and addictive.
In The Fields, you play as a seeker entering an infected town quarantined by the mysterious organization HEMCOR. Upon reaching the last door to the zone, an unidentifiable creature emerges before you, and you remember nothing beyond that moment. Now you’re cut off from the outside world, infected by the blight that plagues the town, and you must escape while trying to cure yourself.
The game combines exploration, resource management, base defense, and psychological horror elements that will keep you on the edge of your seat. With the latest v0.3 – Arms & Combatants update released in August 2026, the game has received significant improvements to combat mechanics and new content that makes it more engaging than ever.
Basic Controls & UI
Before we dive into advanced strategies, let’s cover the fundamentals. The Fields uses standard Roblox PC controls with a clean, minimalist HUD that keeps you focused on survival.
Default PC Controls
| Action | Key / Input |
|---|---|
| Move | W / A / S / D |
| Interact (use / pick up) | E |
| Attack / swing / shoot | Mouse 1 (LMB) |
| Parry | F |
| Item hotbar slots | 1, 2, 3, 4… |
Core HUD Elements
Your HUD displays several crucial pieces of information that are vital for survival:
- Health: Your life bar. If it hits zero, your run is over
- Sanity: Drains in the dark or under certain conditions; low sanity causes debuffs and can unlock “Lost” or “Lapsing into Madness” states
- Time of day: Tracked precisely if you have a Watch equipped
- Compass/directions: Shown at the top of your HUD when you equip a Compass
Core Systems: Understanding the Game Mechanics
The Fields is built around several interconnected systems that you must master to survive. Let’s break down each one:
Day–Night Cycle
The entire game revolves around the clock, and understanding this cycle is crucial for survival:
- Daytime (7 AM – 8 PM): Your window to explore, loot, trade, and complete quests
- Nighttime (8 PM – 7 AM): When zombies and infected enemies roam aggressively, sanity loss kicks in, and the game turns from quiet tension to full horror
Pro Tip: Always keep track of time! The difference between calmly heading home and getting caught outside in madness territory often comes down to knowing exactly when 8 PM is approaching.
Generator & Power System
At your Base, you have a Generator that’s essential for survival:
- You start the game with two gasoline cans right away
- Insert gas into the generator early, but don’t turn it on until night – save fuel for when you actually need the light
- When the generator is on, your base is lit and safer
- Without light, your sanity drops at night, causing debuffs and eventually the “Lost” status
- Zombies can attack and turn off your generator – if it goes out, sprint to it and flip it back on before debuffs stack
Special Enemy Alert: Watch out for the Gas Drinker, a special enemy who appears to drink from your generator’s fuel. Killing him with ranged weapons unlocks the “Unhealthy Addiction/Cruel” badge.
Sanity System
Sanity is one of the most unique mechanics in The Fields and understanding it is crucial:
- Sanity drains when you’re in darkness or during nighttime without proper lighting
- Low sanity effects:
- Debilitating status effects
- Visual and audio distortions
- Eventually leads to “Lost” or “Lapsing into Madness” states
- Can unlock special badges but makes survival extremely difficult
Sanity Management Tips:
- Always keep your generator running at night
- Use the Tactical Flashlight when exploring dark areas
- Purple Inhalers can restore sanity when needed
- Stay in lit areas whenever possible
Your First Run: Step-by-Step Beginner Route
Now let’s walk through exactly what to do when you first start playing The Fields. Follow this route and you’ll survive your first few nights and build a strong foundation for future runs.
1. Spawn & Intro
When you start a new run:
- You’ll see a short intro explaining the world and the outbreak
- You wake up in a field near your Base
- Follow the on-screen prompt pointing you to the generator (highlighted in orange)
2. Secure the Base (Day 1)
On Day 1, don’t rush out into the wilderness. Instead, focus on securing your base:
Step 1: Fuel the Generator (But Leave It Off)
- Insert your two starting gas cans into the generator
- Don’t turn it on yet – you’ll need it when night falls
Step 2: Loot the Base Thoroughly Inside your Base, you’ll find:
- Workbench (crafting table) – upgrade this as early as you can
- Scattered materials like Rags, Nails, Planks, Wood Scrap, Metal Scrap, Electrical Tape
- Early equipment like the Compass (on stacked pallets)
Step 3: Organize Your Supplies
- Drag everything to the Workbench area
- Treat the workbench room as your main storage hub
- You’ll use these materials later for weapons, traps, and workbench upgrades
Step 4: Talk to the Merchant (Trader)
- During the day, a Trader/Merchant appears in a small shack near your base
- Sell junk (extra scrap, materials) for Reputation
- Use Reputation to buy essential tools:
- Survivor’s Backpack (extra carry slots) – priority purchase
- Ammo, crafting supplies, and eventually firearms like revolvers and shotguns
Early Goal: Unlock the “Prepared/Survivalist” setup: Compass, Watch, Tactical Flashlight, and Backpack. There’s even a badge called “Prepared” for equipping all four together!
3. First Exploration Targets (Still Day 1)
Once your Base is secured and you’ve visited the Merchant, it’s time to explore. Focus on the safest and most rewarding nearby locations:
Radio Station (West of Base)
The Radio Station is one of the most important early spots:
- Located west of your Base
- Almost always contains:
- Multiple Walkie-Talkies (for team communication in co-op)
- A Watch (critical for tracking time)
- Sometimes weapons
Why This Matters: Walkies let you coordinate with friends, but even solo, the Watch is huge. Knowing exactly when 8 PM is coming can be the difference between calmly heading home and getting caught outside in madness territory.
Construction Site
Another essential early location:
- Contains Tactical Flashlight (first floor) – massive help at night
- Wiring (first floor) – needed for the Hunter’s Trial quest
- Other crafting materials (nails, planks, scrap)
Other Key Early-Game Locations
From the items & badges pages, we also know about:
- Hunter’s Cabin – where you’ll meet the Hunter for an important questline; also near bear traps
- Hangar/Storage Hangar – where you can find the Survivor’s Backpack and later use the HEMCOR key for the Ritual Blade
- Barn – spawns enemies like Brutes and sometimes a Heavy Duty Toolbox
- Giant Tree – tied to sanity/madness events and the Treebound badge
Day 1 Strategy: Don’t overextend! Hit Radio Station and Construction Site if time allows, then head back before dark.
4. Night 1: How to Not Die Immediately
When the clock ticks toward 8 PM, follow these steps precisely:
Step 1: Return to Base Early
- Don’t cut it close – try to be home by around 6-7 PM game time
- Being caught outside at night is extremely dangerous for beginners
Step 2: Turn on the Generator at Dusk
- Flip the generator on as the sun sets
- Make sure your base lights up; if the generator shuts off, you’ll need to sprint back and restart it
Step 3: Prepare for Zombie Attack
- Nights bring waves of infected enemies around your base
- Early on, you’ll mostly be using melee weapons like crafted planks and basic guns if you’re lucky
Step 4: Stay Inside the Lit Area
- Being outside in the dark causes sanity loss
- Let zombies come to you; don’t go wandering off into pitch black unless you know what you’re doing
Step 5: Watch for Special Events
- The Gas Drinker can appear to drink your generator’s gas
- Shooting him down grants a badge and keeps your fuel safe
- Later nights can spawn Spores, Spitters, and Raiders, each tied to specific badges and strategies
Once you make it through your first night, you’ll unlock the Survivor badge and officially get over the first big hump!
Items, Crafting & Workbench Progression
Items in The Fields fall into three broad categories: Equipment, Crafting Items, and Ammo/Weapons. Let’s break down each category:
Equipment Items (Must-Have Tools)
These are the most important equipment pieces that will dramatically improve your survival chances:
Compass
- Found: On pallets in your Base
- Function: Shows directions at the top of your HUD
- Why It’s Essential: Navigation is crucial in The Fields’ large map
Walkie-Talkie
- Found: At the Radio Station
- Function: Lets you talk to teammates who also have one
- Why It’s Essential: Coordination can be life-saving in co-op play
Watch
- Found: Near a corpse outside the Radio Station
- Function: Lets you track time precisely
- Why It’s Essential: Knowing when night falls is critical for survival
Tactical Flashlight
- Found: At the Construction Site (first floor)
- Function: Chest-mountable light source
- Why It’s Essential: Massive help for night survival and exploring dark areas
Survivor’s Backpack
- Found: In the Hangar or bought from Merchant (600 Reputation)
- Function: Gives +3 carry capacity
- Why It’s Essential: More inventory space means more resources and better preparation
Bear Traps
- Found: Near the Hunter’s Cabin or as quest rewards
- Function: Place them to immobilize enemies
- Why It’s Essential: Great for defense and can unlock the “Bearly Survived” badge if you step on one yourself
Crafting Items & Materials
Crafting is essential for progression in The Fields. Here are the key materials and their uses:
Essential Crafting Materials
| Material | Common Locations | Primary Uses |
|---|---|---|
| Rags | Anywhere | Craft Bandages, Molotovs, Torch |
| Nails | Common drops | Craft weapons, upgrade workbench |
| Planks | Construction areas | Craft weapons, upgrade workbench |
| Metal Scrap | Industrial areas | Craft advanced weapons, sell for rep |
| Wood Scrap | Forest areas | Upgrade workbench |
| Electrical Tape | Tech areas | Craft weapons, repairs |
| Wiring | Construction Site | Hunter’s Trial quest, advanced crafting |
Special Quest Items
- Blighted Poppy: Used for crafting Blighted Solution
- Blightcap: Mushroom used for Blighted Salve (Hunter’s Quest)
- Key Parts: Combine to create HEMCOR Key for special areas
- Blowtorch: Reward for Hunter’s Trial, used for Workbench Level 3
Workbench Progression
Your Workbench is the heart of your base and can be upgraded to unlock new crafting options:
Level 1: Basic crafting (starting level) Level 2: Unlocks repair functionality (requires specific materials) Level 3: Advanced crafting (requires Blowtorch from Hunter’s Trial) Level 4: Master crafting (requires Heavy Duty Toolbox)
Pro Tip: Always prioritize Workbench upgrades when possible. Each level opens up new weapon and item options that can dramatically improve your survival chances.
Weapons & Combat System
Combat in The Fields is brutal and unforgiving, but mastering it is essential for survival. Let’s break down the weapon system and combat mechanics:
Weapon Types
There are three main categories of weapons in The Fields:
1. Melee Weapons
- Pros: No ammo required, reliable
- Cons: Durability depletes, requires close range
- Examples: Crafted planks, axes, blades
- Best For: Early game, conserving ammo
2. Ranged Weapons
- Pros: Safe distance, high damage
- Cons: Require ammo, rare early game
- Examples: Revolver, Shotgun
- Best For: Special enemies, base defense
3. Throwable/Placeable
- Pros: Tactical advantages, area control
- Cons: Limited supply, one-time use
- Examples: Molotovs, Bear Traps
- Best For: Crowd control, base defense
Combat Mechanics
Parrying System
The Parry system allows you to negate incoming damage when attacked by infected:
- How to Parry: Press [F] right before an enemy attack lands
- Requirements: Must have a melee weapon equipped
- Benefit: Perfect parries can stagger enemies and create openings
Durability System
- Each melee weapon has durability that decreases with use
- When durability reaches 0, the weapon breaks and becomes unusable
- Repairing: Requires specific materials and Level 2+ Workbench
- Pro Tip: Always carry backup weapons or repair materials
Ammo Management
- Two types: Revolver Ammo and Shotgun Shells
- Can be found in various locations or purchased from Trader/Hunter
- Ammo Boxes: More economical than buying individual bullets
- Strategy: Save ammo for special enemies or desperate situations
Weapon Crafting Recipes
Here are some essential early-game weapon crafting recipes:
Spiked Plank
- Materials: 1 Plank + 3 Nails
- Damage: Moderate
- Durability: Medium
- Best For: Early game combat
Sharpened Spiked Plank
- Materials: 1 Spiked Plank + 2 Metal Scrap
- Damage: High
- Durability: Medium
- Best For: Mid-game combat
Molotov
- Materials: 1 Glass Bottle + 1 Rag + 1 Electrical Tape
- Damage: Area effect, fire damage over time
- Uses: 1
- Best For: Crowd control, base defense
Enemies & Threats
The Fields is filled with various enemies, each with unique behaviors and threats. Understanding them is crucial for survival:
Blighted Enemies (Zombie-like)
These are the most common enemies you’ll encounter, especially at night:
Blighted (Basic)
- Health: Low
- Damage: Low
- Speed: Slow
- Strategy: Easy to defeat, good for practicing combat
- Weakness: Head shots deal extra damage
Shrieker
- Health: Medium
- Damage: Low (but special attack)
- Speed: Medium
- Special: Can scream to alert other enemies
- Strategy: Priority target, eliminate quickly to avoid attracting more enemies
Brute
- Health: High
- Damage: High
- Speed: Slow
- Special: Powerful attacks, can stagger players
- Strategy: Keep distance, use ranged weapons, parry when possible
Sporren
- Health: Medium
- Damage: Medium (poison)
- Speed: Medium
- Special: Can poison players
- Strategy: Use ranged attacks, carry antidotes if available
Addict
- Health: Medium
- Damage: Medium
- Speed: Fast
- Special: Aggressive behavior, quick attacks
- Strategy: Parry frequently, don’t let them surround you
Spitter
- Health: Low
- Damage: Medium (ranged)
- Speed: Slow
- Special: Can spit at players from distance
- Strategy: Close distance quickly or use ranged weapons
Human Enemies
Scavenger
- Health: Medium
- Damage: Medium
- Speed: Medium
- Behavior: More intelligent than Blighted, uses tactics
- Strategy: Treat as serious threat, use cover and strategy
Special Events
Gas Drinker
- Health: Medium
- Damage: Low
- Speed: Medium
- Special: Drinks from generator fuel
- Strategy: Kill with ranged weapons for “Unhealthy Addiction” badge
- Priority: High – protects your generator fuel
Combat Tips Against Enemies
- Head Shots: Always aim for the head – it deals significantly more damage
- Parry Timing: Learn enemy attack patterns and parry accordingly
- Environment: Use the environment to your advantage – narrow corridors, doorways
- Resource Management: Don’t waste ammo on basic enemies if possible
- Group Management: Try to fight enemies one at a time, avoid getting surrounded
Locations & Exploration
The Fields features a large, open world with multiple locations to explore. Each area has unique resources, enemies, and challenges. Let’s break down the key locations:
Starting Area
Your Base
- Description: Your safe haven with generator and workbench
- Resources: Basic crafting materials, starting equipment
- Enemies: Generally safe during day
- Importance: Your home base, essential for survival
Trader Shack
- Description: Small building near your base
- Resources: Trading opportunities
- NPCs: Merchant/Trader
- Importance: Primary source for buying/selling items
Early Game Locations
Radio Station (West of Base)
- Description: Broadcast building with multiple floors
- Resources: Walkie-Talkies, Watch, sometimes weapons
- Enemies: Light presence, increases at night
- Importance: Essential for communication and time management
Construction Site
- Description: Building site with scaffolding and materials
- Resources: Tactical Flashlight, Wiring, crafting materials
- Enemies: Moderate presence
- Importance: Key for lighting and Hunter’s Trial quest
Hunter’s Cabin
- Description: Small cabin in the woods
- Resources: Bear Traps, quest items
- NPCs: Hunter (quest giver)
- Enemies: Bear traps in area
- Importance: Major quest hub for progression
Mid Game Locations
Hangar/Storage Hangar
- Description: Large storage facility
- Resources: Survivor’s Backpack, advanced materials
- Enemies: Heavy presence, stronger enemies
- Importance: Key for inventory expansion and advanced items
Barn
- Description: Large agricultural building
- Resources: Heavy Duty Toolbox (sometimes), materials
- Enemies: Brutes, stronger enemies
- Importance: Good for late-game crafting materials
Security Checkpoint Alpha
- Description: Military checkpoint
- Resources: Medical Crate (requires key), advanced items
- Enemies: Strong military-themed enemies
- Importance: Medical supplies and advanced gear
Late Game/Special Locations
Giant Tree
- Description: Massive, mysterious tree
- Resources: Special items, sanity-related
- Enemies: Special sanity-based enemies
- Importance: Tied to sanity mechanics and special badges
HEMCOR Facilities
- Description: Corporate/military buildings
- Resources: Advanced weapons, special items
- Enemies: Elite enemies, special events
- Importance: End-game content, major story elements
Exploration Tips
- Day Planning: Always plan your exploration routes during daylight hours
- Time Management: Keep track of time using your Watch
- Resource Prioritization: Focus on essential items first (Watch, Flashlight, Backpack)
- Safe Routes: Learn safe paths between locations
- Escape Routes: Always know how to get back to base quickly
- Weather Awareness: Some weather conditions affect visibility and enemy behavior
NPCs & Quests
The Fields features several NPCs that provide quests, trading opportunities, and story elements. Building relationships with these characters is essential for progression:
The Merchant/Trader
Location: Small shack near your base (appears during day) Function: Buy and sell items using Reputation currency Key Items Available:
- Survivor’s Backpack (600 Reputation)
- Ammo and weapons
- Crafting materials
- Special items (rotating stock)
Trading Strategy:
- Sell excess materials and junk items
- Prioritize essential equipment first
- Save Reputation for expensive but crucial items
- Check stock regularly as it changes
The Hunter
Location: Hunter’s Cabin Function: Major quest giver, advanced trading Quest Line: Hunter’s Trial (multi-stage quest)
Hunter’s Trial Quest Walkthrough
Part 1: The Wiring
- Objective: Find Wiring and bring it to the Hunter
- Location: Construction Site (first floor)
- Reward: Blowtorch (essential for Workbench Level 3)
Part 2: The Blighted Salve
- Objective: Craft Blighted Salve
- Materials Needed: Blightcap + Empty Vial
- Locations: Blightcap (growing in grass), Empty Vial (various locations)
- Reward: Medical Crate Key + Heavy Duty Toolbox
Part 3: The Medical Crate
- Objective: Open Medical Crate at Security Checkpoint Alpha
- Reward: Advanced medical supplies, reputation
Advanced Hunter Rewards:
- Special weapons and items
- Advanced crafting recipes
- Reputation bonuses
- Special badges
Other NPCs
As you progress, you may encounter other NPCs with their own quest lines and trading options. These are often tied to specific locations or story events.
Quest Strategy Tips
- Quest Priority: Focus on Hunter’s Trial early as it unlocks crucial progression items
- Material Collection: Gather quest materials as you explore normally
- Quest Timing: Complete quests during daylight hours when possible
- Reward Planning: Plan ahead for quest rewards and how they’ll help your progression
- Multiple Quests: Keep track of multiple quest objectives simultaneously
2026 Advanced Strategies & Pro Tips
Now that we’ve covered the basics, let’s dive into advanced strategies that will separate you from casual players:
Base Management & Defense
Generator Optimization:
- Fuel Management: Only run generator when absolutely necessary
- Backup Fuel: Always keep extra gasoline cans stored
- Generator Placement: Understand generator coverage area for maximum safety
- Quick Restart: Practice quickly restarting generator if it goes out
Base Defense Setup:
- Bear Trap Placement: Strategic placement around base perimeter
- Light Management: Multiple light sources for redundancy
- Escape Routes: Plan multiple ways to escape if overwhelmed
- Resource Storage: Organize items for quick access during emergencies
Advanced Combat Techniques
Weapon Mastery:
- Parry Perfection: Learn exact timing for different enemy types
- Weapon Switching: Quick switching between melee and ranged
- Durability Management: Repair weapons before they break
- Ammo Conservation: Use melee for basic enemies, save ammo for threats
Enemy Control:
- Funneling: Use doorways and narrow spaces to limit enemy numbers
- Kiting: Lead enemies into traps or favorable positions
- Priority Targeting: Eliminate the most dangerous enemies first
- Environmental Usage: Use explosive barrels, traps, and other environmental hazards
Resource Management Mastery
Inventory Optimization:
- Essential Items Only: Carry only what you absolutely need
- Stack Management: Keep similar items stacked for efficiency
- Quick Access: Arrange hotbar for most-used items
- Drop Strategy: Know what to drop when inventory is full
Crafting Efficiency:
- Bulk Crafting: Craft multiple items when possible
- Material Prioritization: Focus on materials for essential items
- Upgrade Planning: Plan workbench upgrades in advance
- Recipe Knowledge: Memorize essential crafting recipes
Sanity Management Advanced
Sanity Preservation:
- Light Discipline: Always maintain light sources
- Mental Items: Keep Purple Inhalers for emergencies
- Safe Spaces: Know locations of permanently lit areas
- Recovery Planning: Plan sanity recovery during safe periods
Madness Exploitation:
- Controlled Madness: Sometimes low sanity can be beneficial for specific badges
- Recovery Timing: Know when to recover vs. when to embrace madness
- Event Preparation: Prepare for sanity-based special events
Speed Running & Efficiency
Route Optimization:
- Optimal Paths: Learn the most efficient routes between locations
- Time Management: Maximize daylight exploration efficiency
- Resource Density: Focus on areas with high resource density
- Loop Strategies: Create efficient exploration loops
Progression Acceleration:
- Quest Stacking: Complete multiple objectives in single runs
- Early Power: Rush for powerful items and upgrades
- Reputation Farming: Efficient methods for gaining reputation
- Risk Assessment: Know when to take risks vs. play safe
Common Beginner Mistakes to Avoid
Based on extensive gameplay experience, here are the most common mistakes that get beginners killed:
1. Poor Time Management
- Mistake: Losing track of time and getting caught outside at night
- Solution: Always wear a Watch and start heading back by 6 PM
2. Generator Mismanagement
- Mistake: Turning on generator too early or running out of fuel
- Solution: Save fuel for night, always keep backup cans
3. Overextending Early Game
- Mistake: Exploring too far from base on Day 1
- Solution: Stick to nearby locations until properly equipped
4. Ignoring Sanity
- Mistake: Letting sanity drop too low without recovery items
- Solution: Always carry Purple Inhalers and maintain light sources
5. Poor Combat Preparation
- Mistake: Entering combat without proper weapons or health items
- Solution: Always be combat-ready with weapons and healing items
6. Inventory Mismanagement
- Mistake: Carrying too much junk or not having essential items
- Solution: Prioritize essential items, sell excess regularly
7. Neglecting Quests
- Mistake: Ignoring NPC quests and progression opportunities
- Solution: Prioritize Hunter’s Trial and other progression quests
8. Bad Base Defense
- Mistake: Not preparing base properly for night attacks
- Solution: Set up traps, manage generator, plan defense strategy
FAQ: Frequently Asked Questions
How do I survive my first night in The Fields?
Focus on securing your base first: fuel the generator (but don’t turn it on yet), loot all base materials, visit the trader, and explore nearby locations like the Radio Station and Construction Site. Return to base by 6 PM, turn on the generator at dusk, and stay in the lit area while defending against zombies.
What’s the best way to manage sanity?
Always keep your generator running at night, use the Tactical Flashlight when exploring dark areas, carry Purple Inhalers for emergencies, and stay in lit areas whenever possible. Sanity drains quickly in darkness, so light management is crucial.
How do I complete the Hunter’s Trial quest?
Start by finding Wiring at the Construction Site and bringing it to the Hunter. Then gather Blightcap and Empty Vial to craft Blighted Salve. Return to the Hunter for the Medical Crate Key, and use it at Security Checkpoint Alpha. This questline provides essential progression items.
What are the most important items to get early?
Prioritize the Watch (for time management), Tactical Flashlight (for light), Compass (for navigation), and Survivor’s Backpack (for inventory space). These four items together even unlock the “Prepared” badge.
How do I deal with the Gas Drinker enemy?
The Gas Drinker appears at your generator and drinks fuel. Kill it with ranged weapons to protect your fuel and unlock the “Unhealthy Addiction” badge. Keep some ranged ammo ready for this special event.
What’s the best strategy for base defense?
Set up Bear Traps around your base perimeter, keep your generator running with backup fuel, maintain multiple light sources, and stay in the central lit area. Let enemies come to you rather than wandering into darkness.
How do I repair weapons?
You need a Level 2+ Workbench and specific repair materials like Wood Glue. Interact with the Workbench, select the “Repair” tab, and choose the weapon you want to fix. Always repair weapons before they completely break.
What’s the most efficient way to gain reputation?
Sell excess materials and junk items to the Trader, complete quests (especially Hunter’s Trial), and find valuable items to sell. Focus on selling items you don’t need rather than hoarding everything.
Conclusion: Your Journey to Mastery
Congratulations! You’ve now got the knowledge and strategies needed to not just survive, but thrive in The Fields. Remember that this game is all about learning from experience – each death teaches you something new about survival.
Key Takeaways:
- Time Management: Always know when night is coming
- Resource Management: Prioritize essential items and manage inventory wisely
- Base Defense: Your generator is your lifeline – protect it at all costs
- Sanity Management: Light is your friend – embrace it
- Progression: Focus on quests and upgrades to unlock new possibilities
Final Pro Tips:
- Don’t get discouraged by deaths – they’re learning opportunities
- Experiment with different strategies to find what works for you
- Join the community (Reddit, Discord) for additional tips and updates
- Keep an eye on game updates – the v0.3 “Arms & Combatants” update shows the developers are actively improving the game
Remember, the goal isn’t just to survive – it’s to master the mechanics, complete the quests, uncover the mysteries of HEMCOR, and ultimately find your way out of the infected quarantine zone. With this guide as your foundation, you’re well on your way to becoming a true survivor in The Fields.
Stay safe, keep your generator running, and may your sanity remain intact!